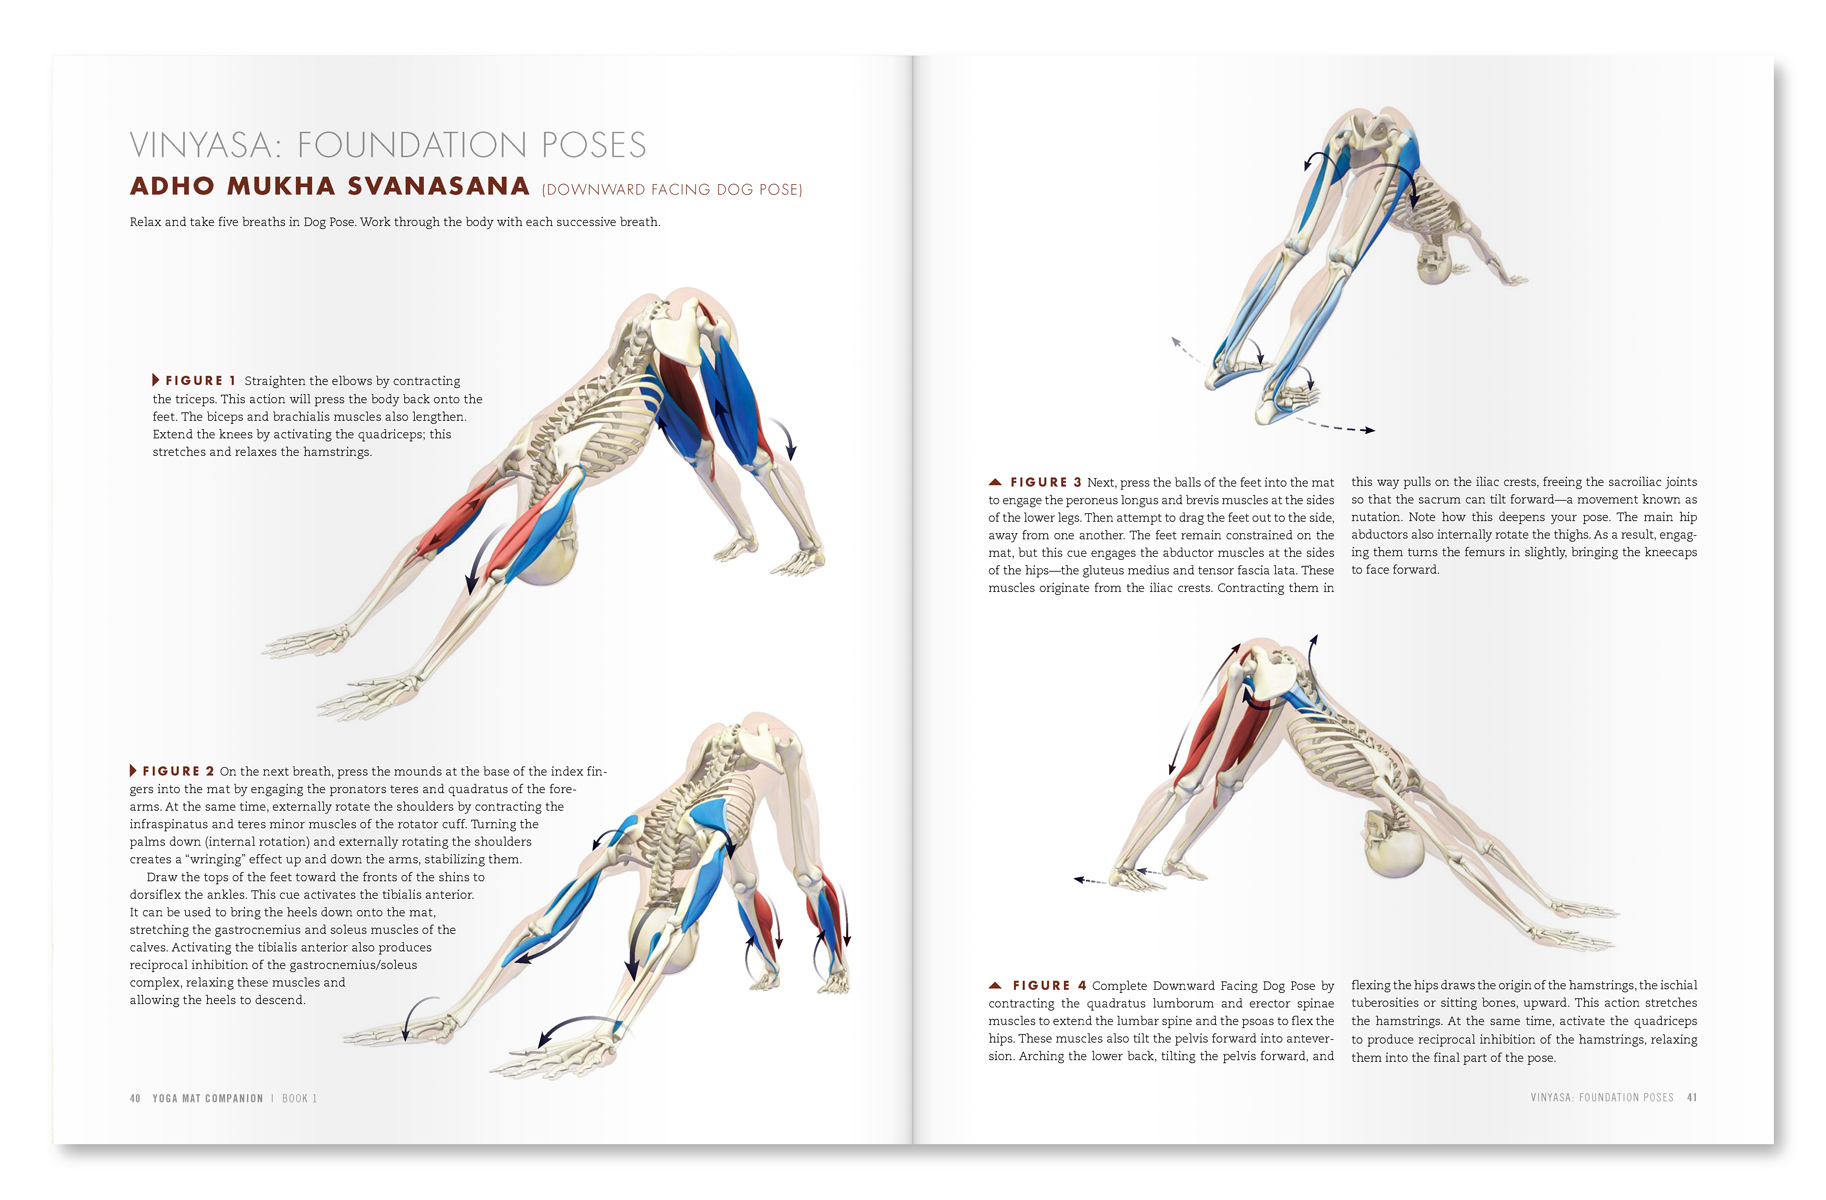
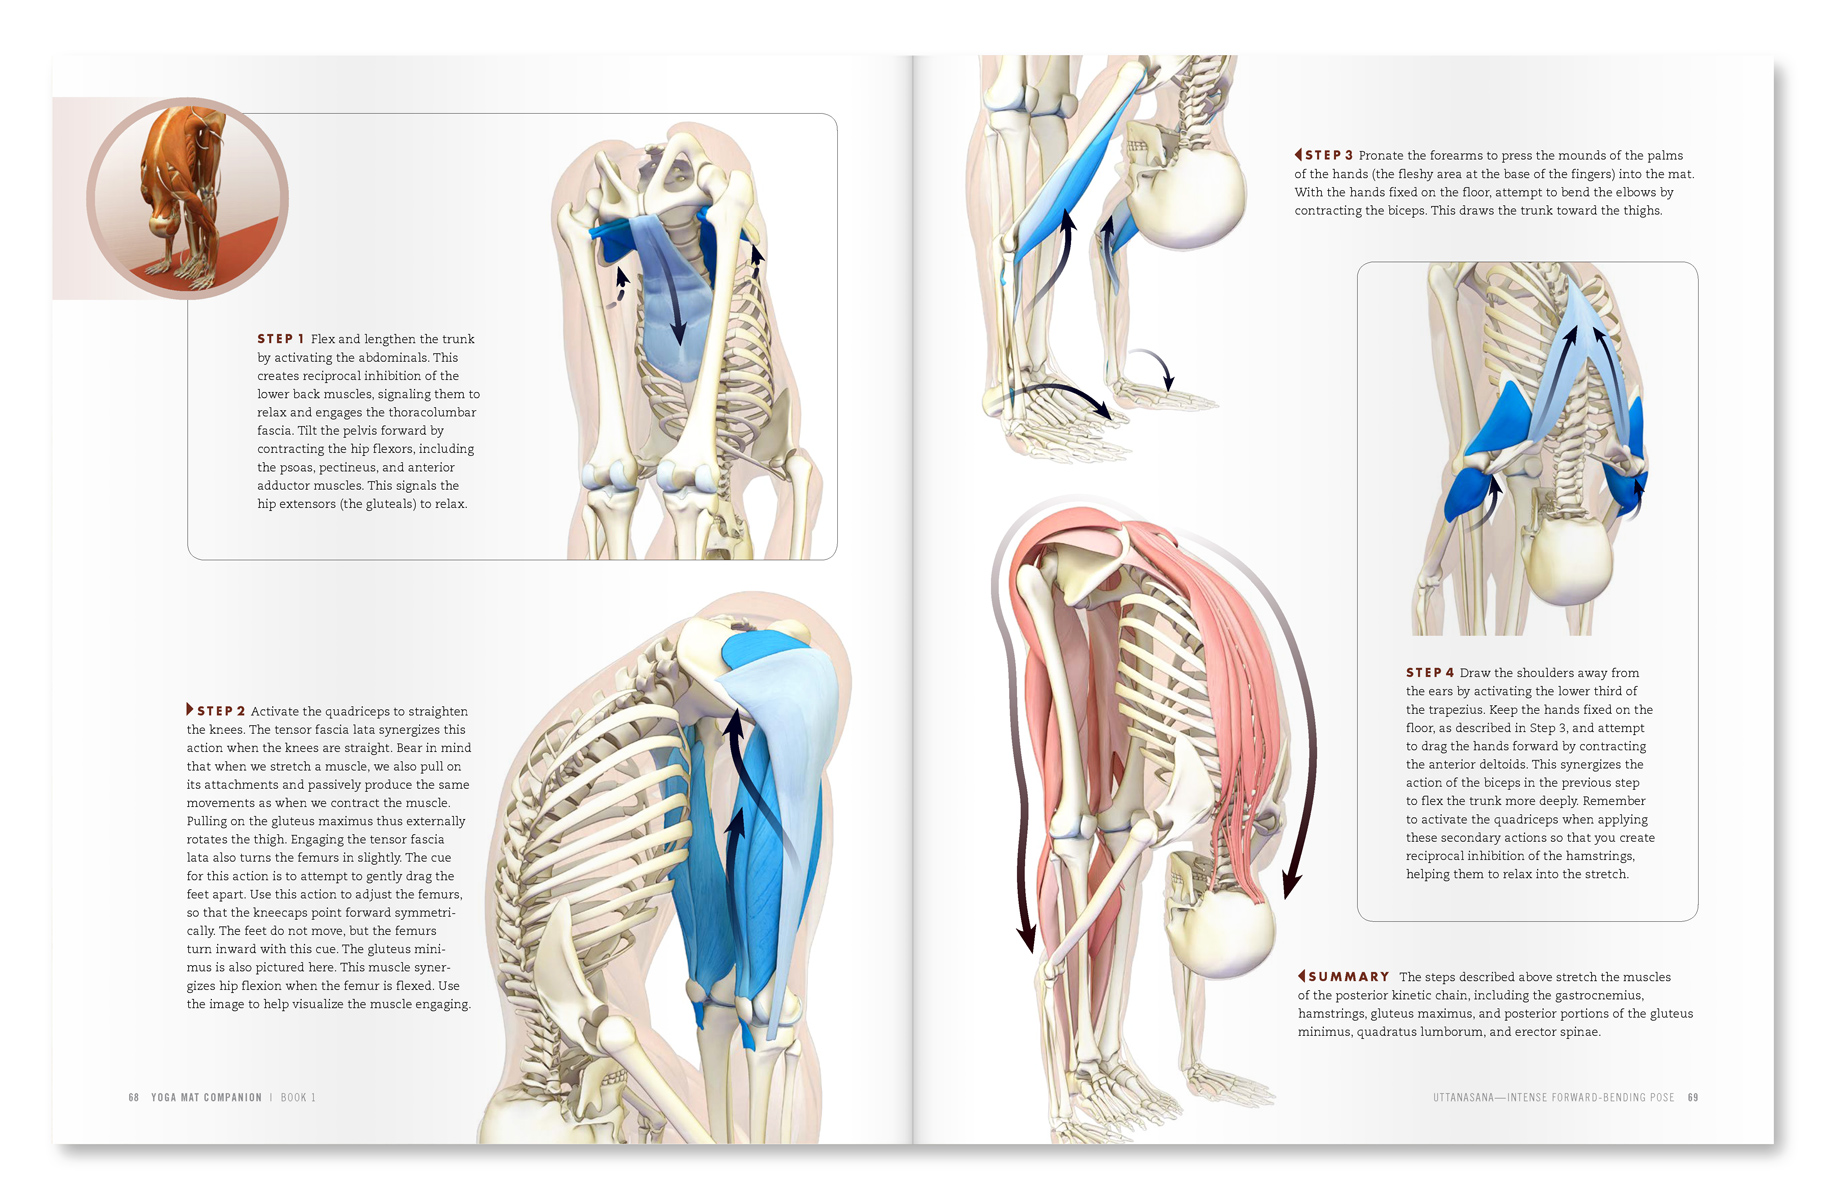
Hello Friends,
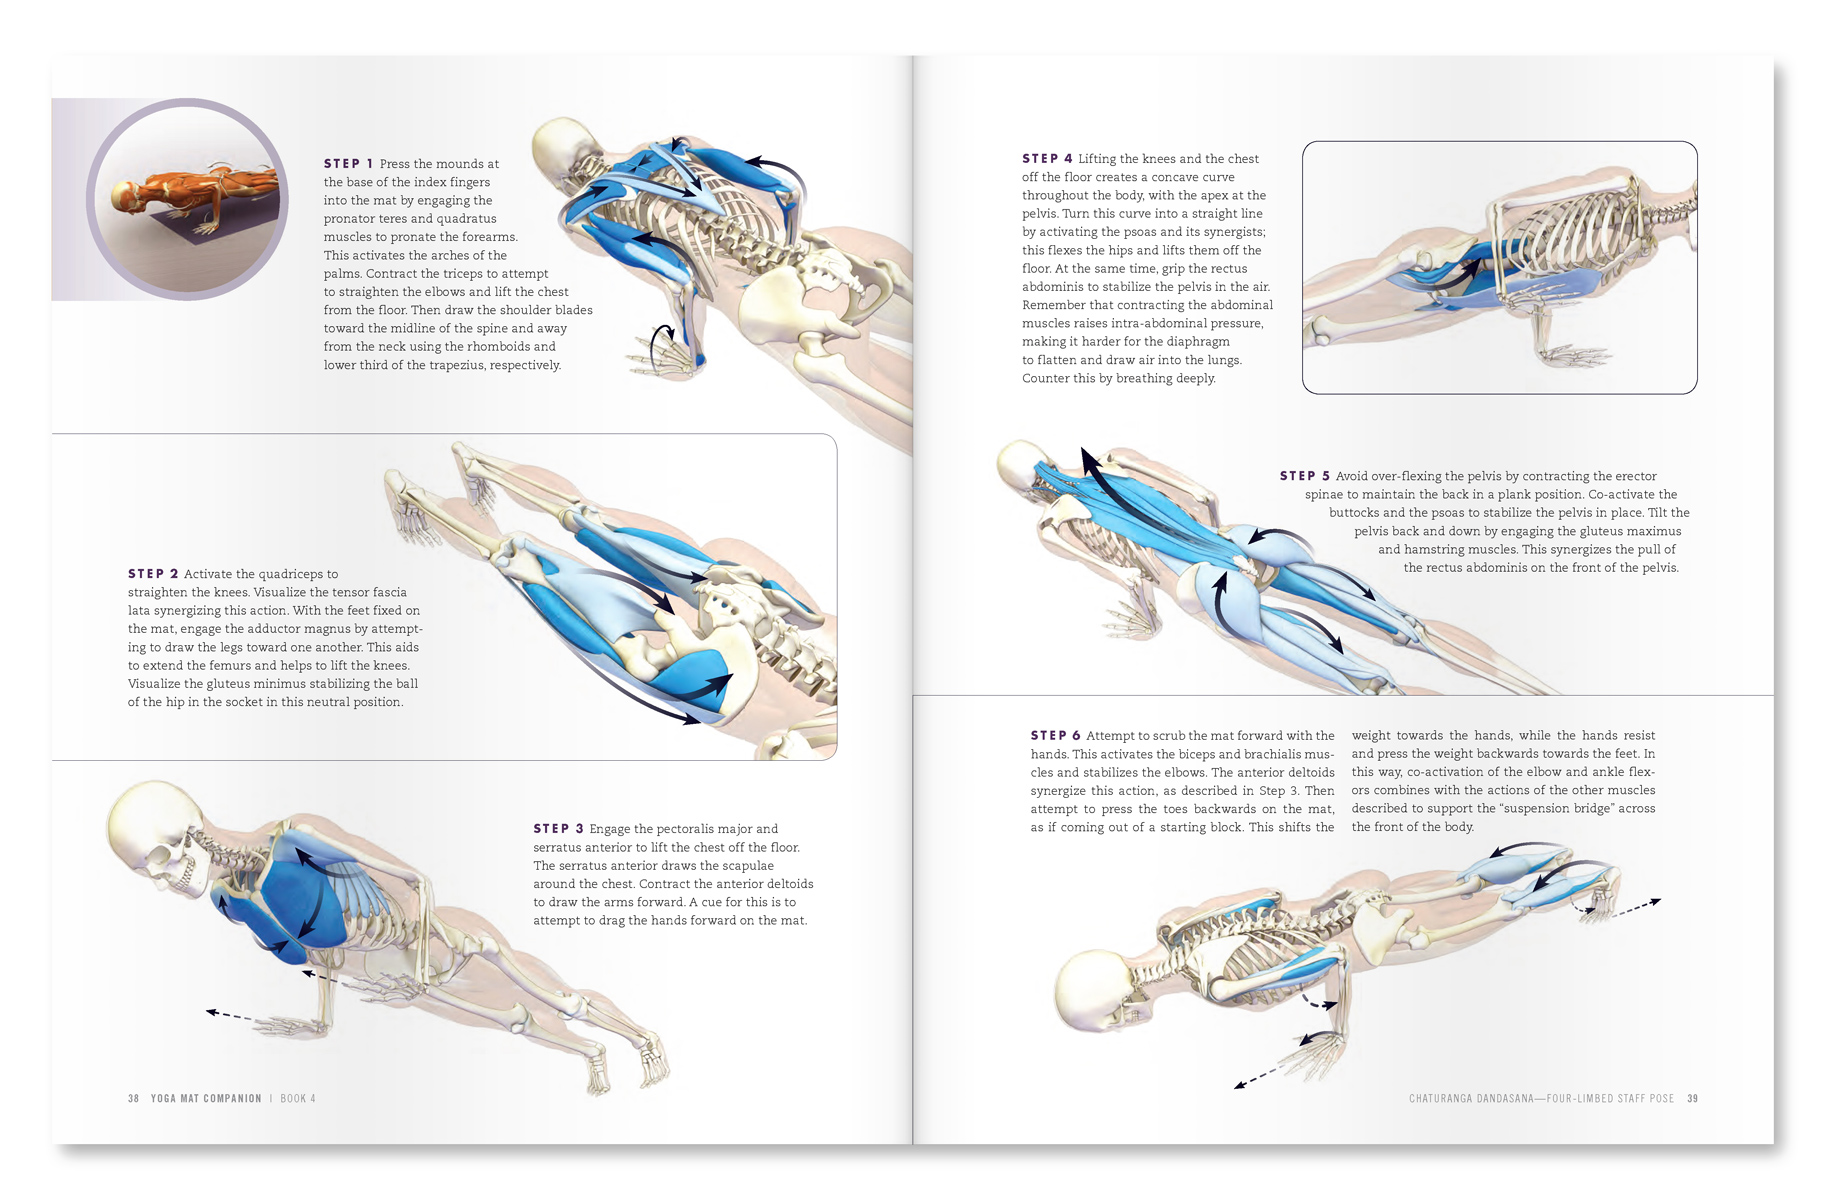
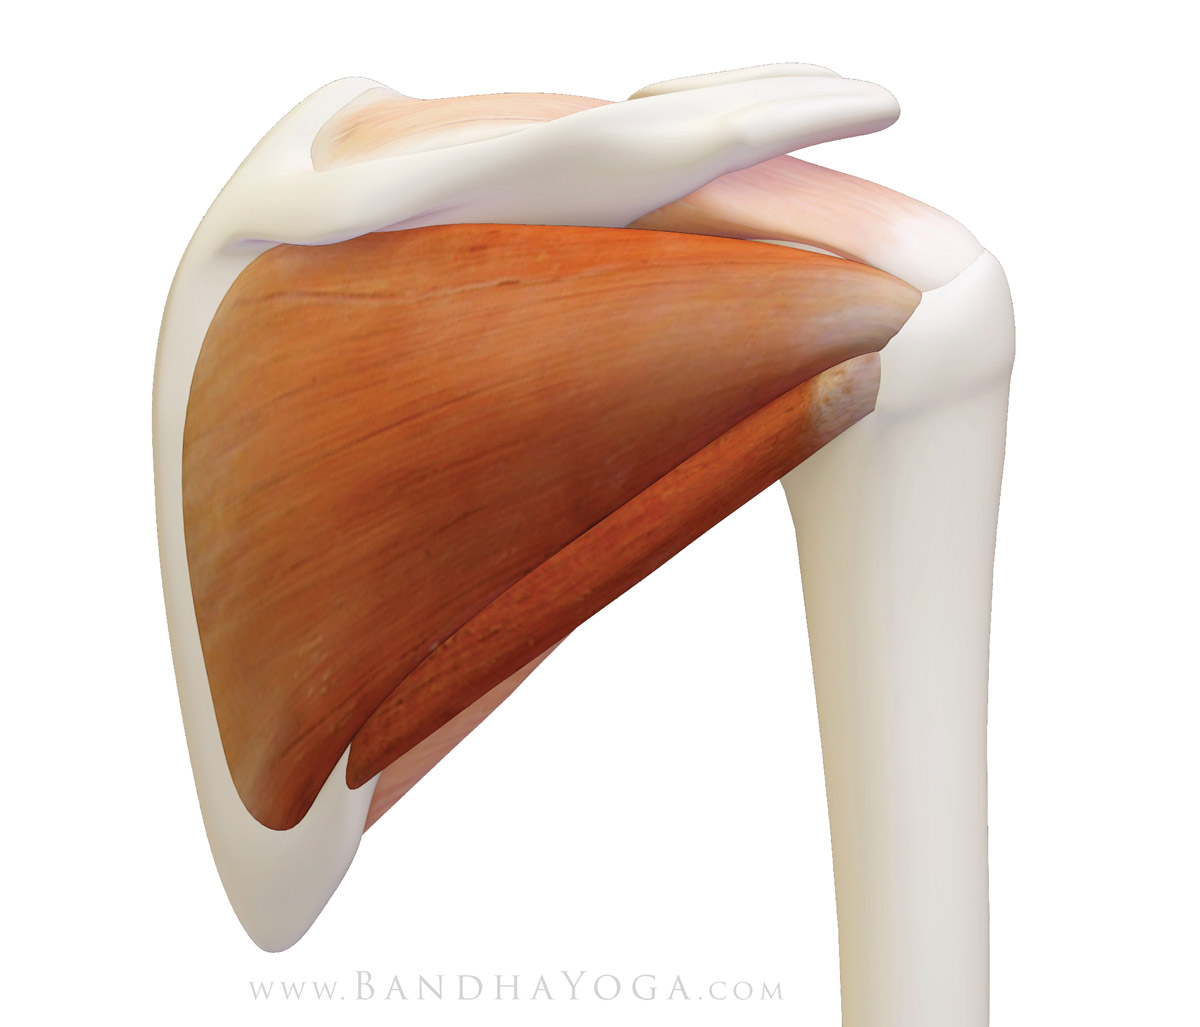
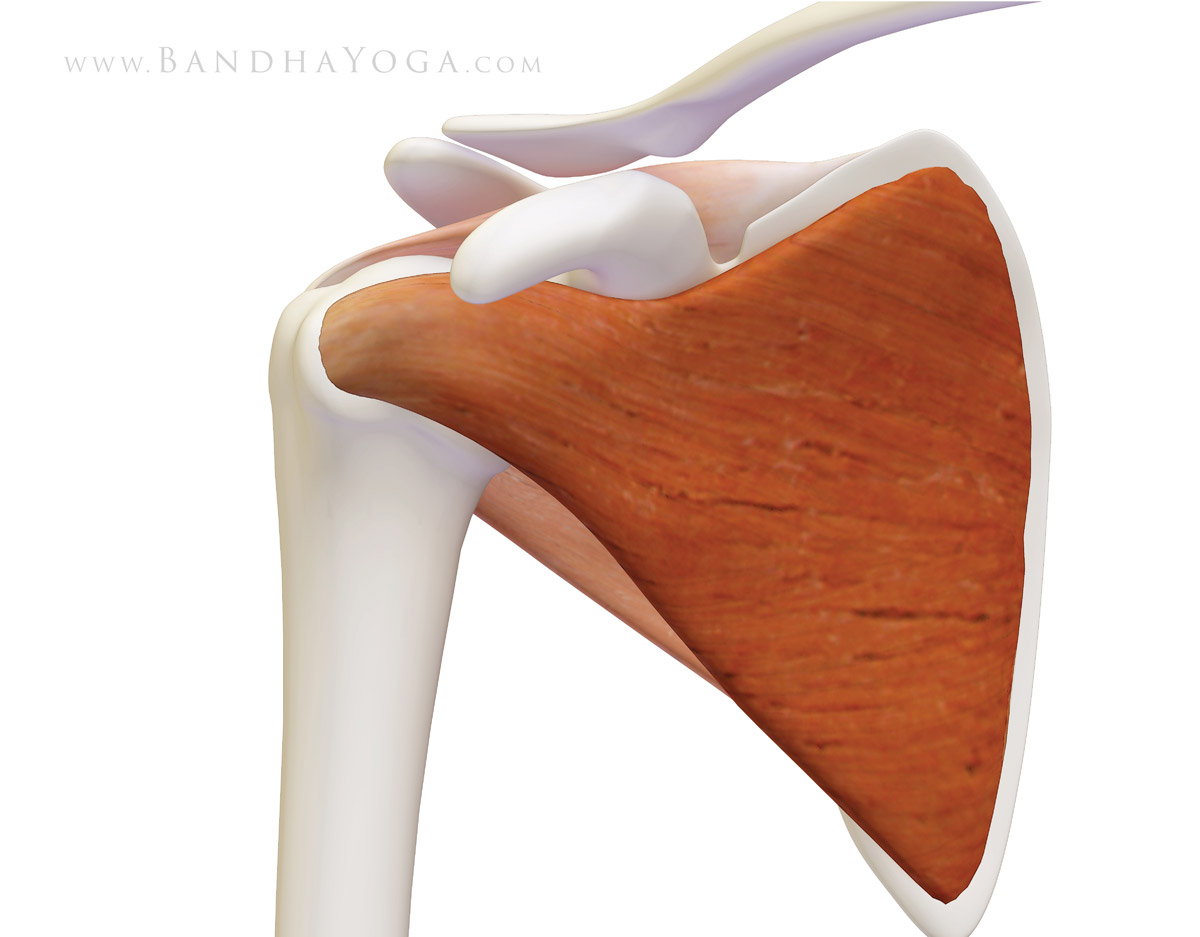
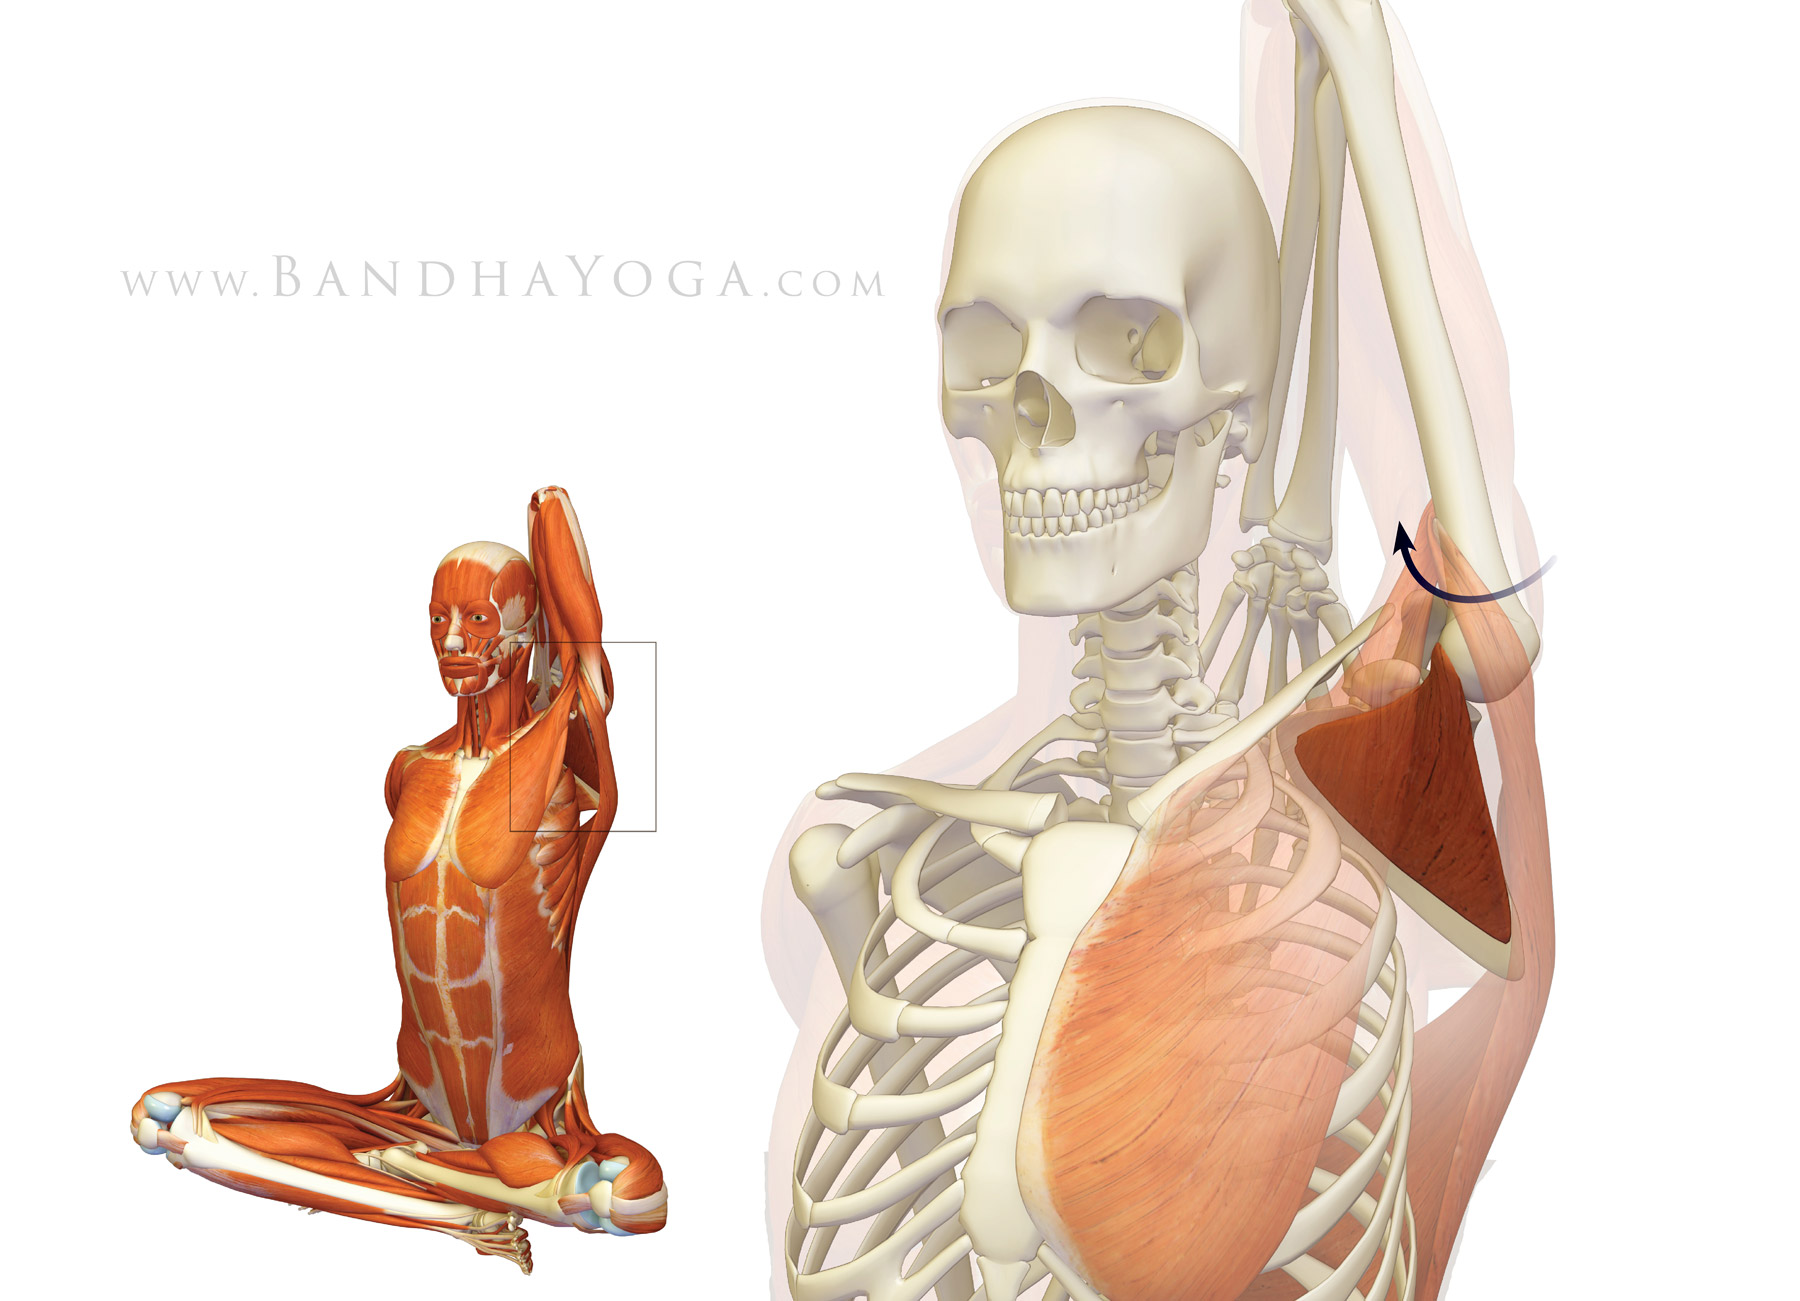
Let’s cap off the muscles of your rotator cuff with the supraspinatus.
This muscle originates in a trough-like area above the scapular spine, hence
its name supra, which means “above”. The supraspinatus then inserts onto the
greater tuberosity just behind where the long head of the biceps enters the
shoulder (figure 1).
 |
| Figure 1: The supraspinatus muscle of the rotator cuff (with the infraspinatus and teres minor faded). |
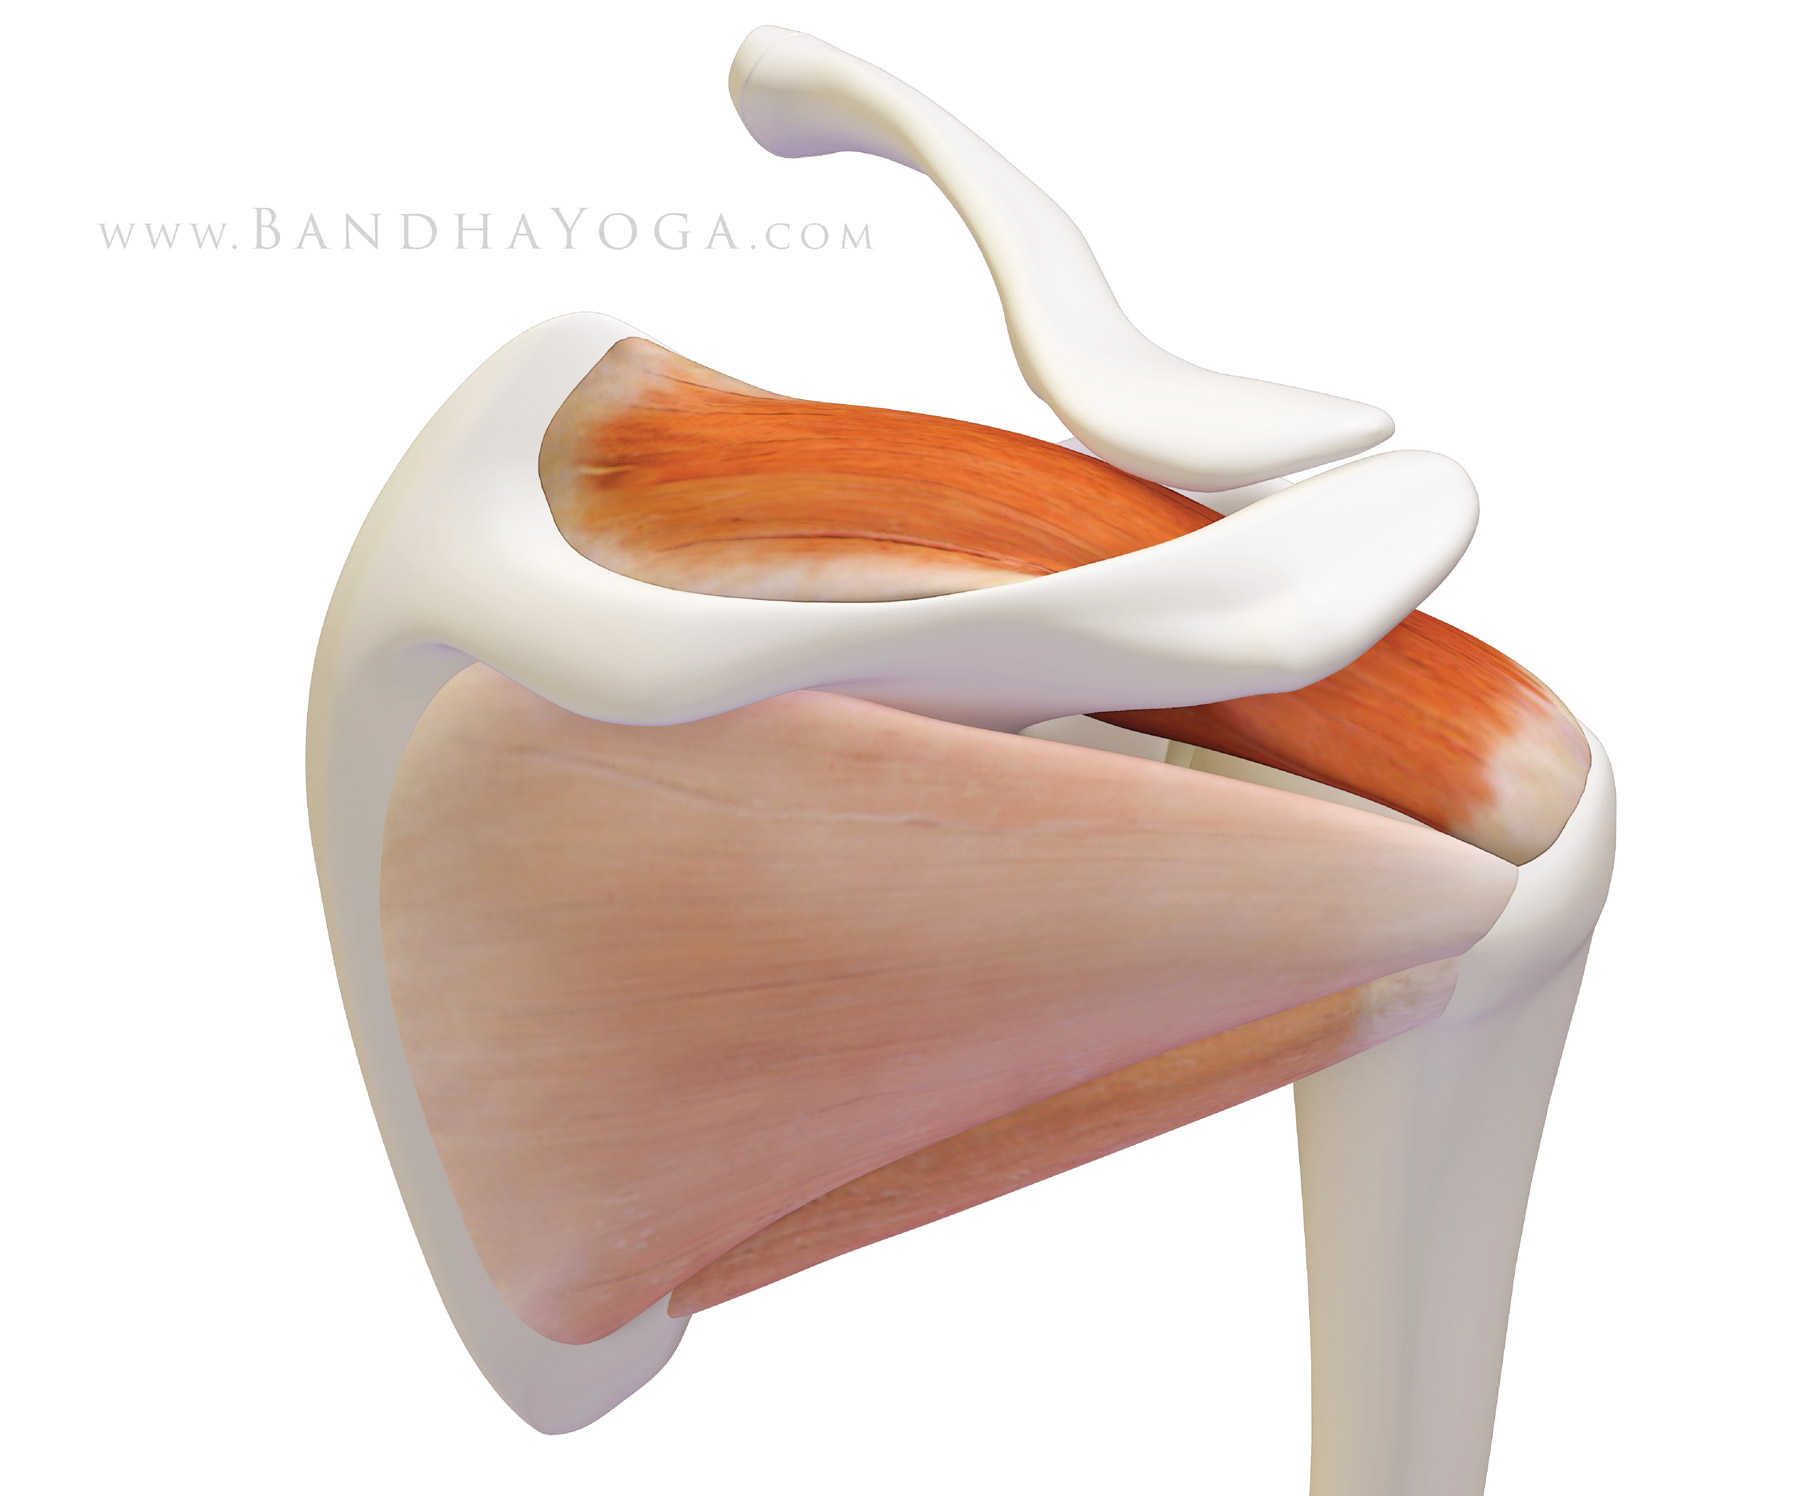
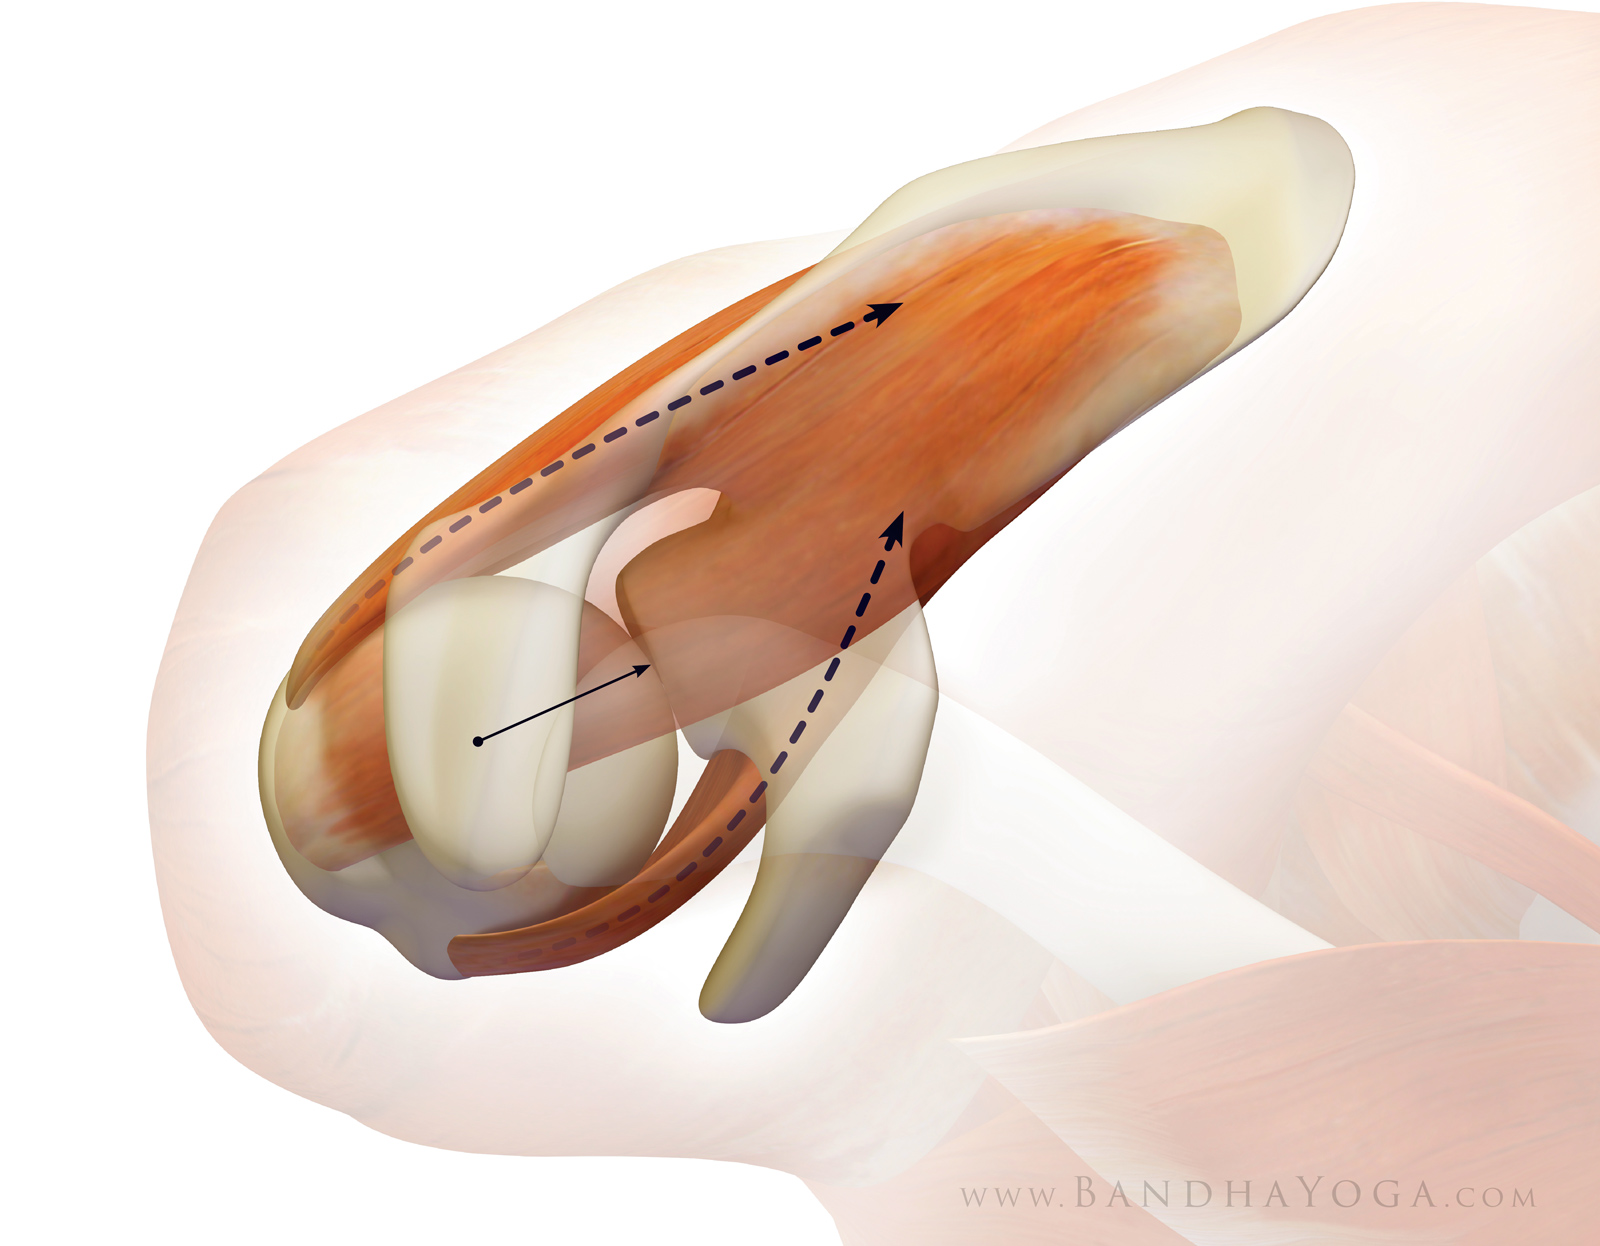
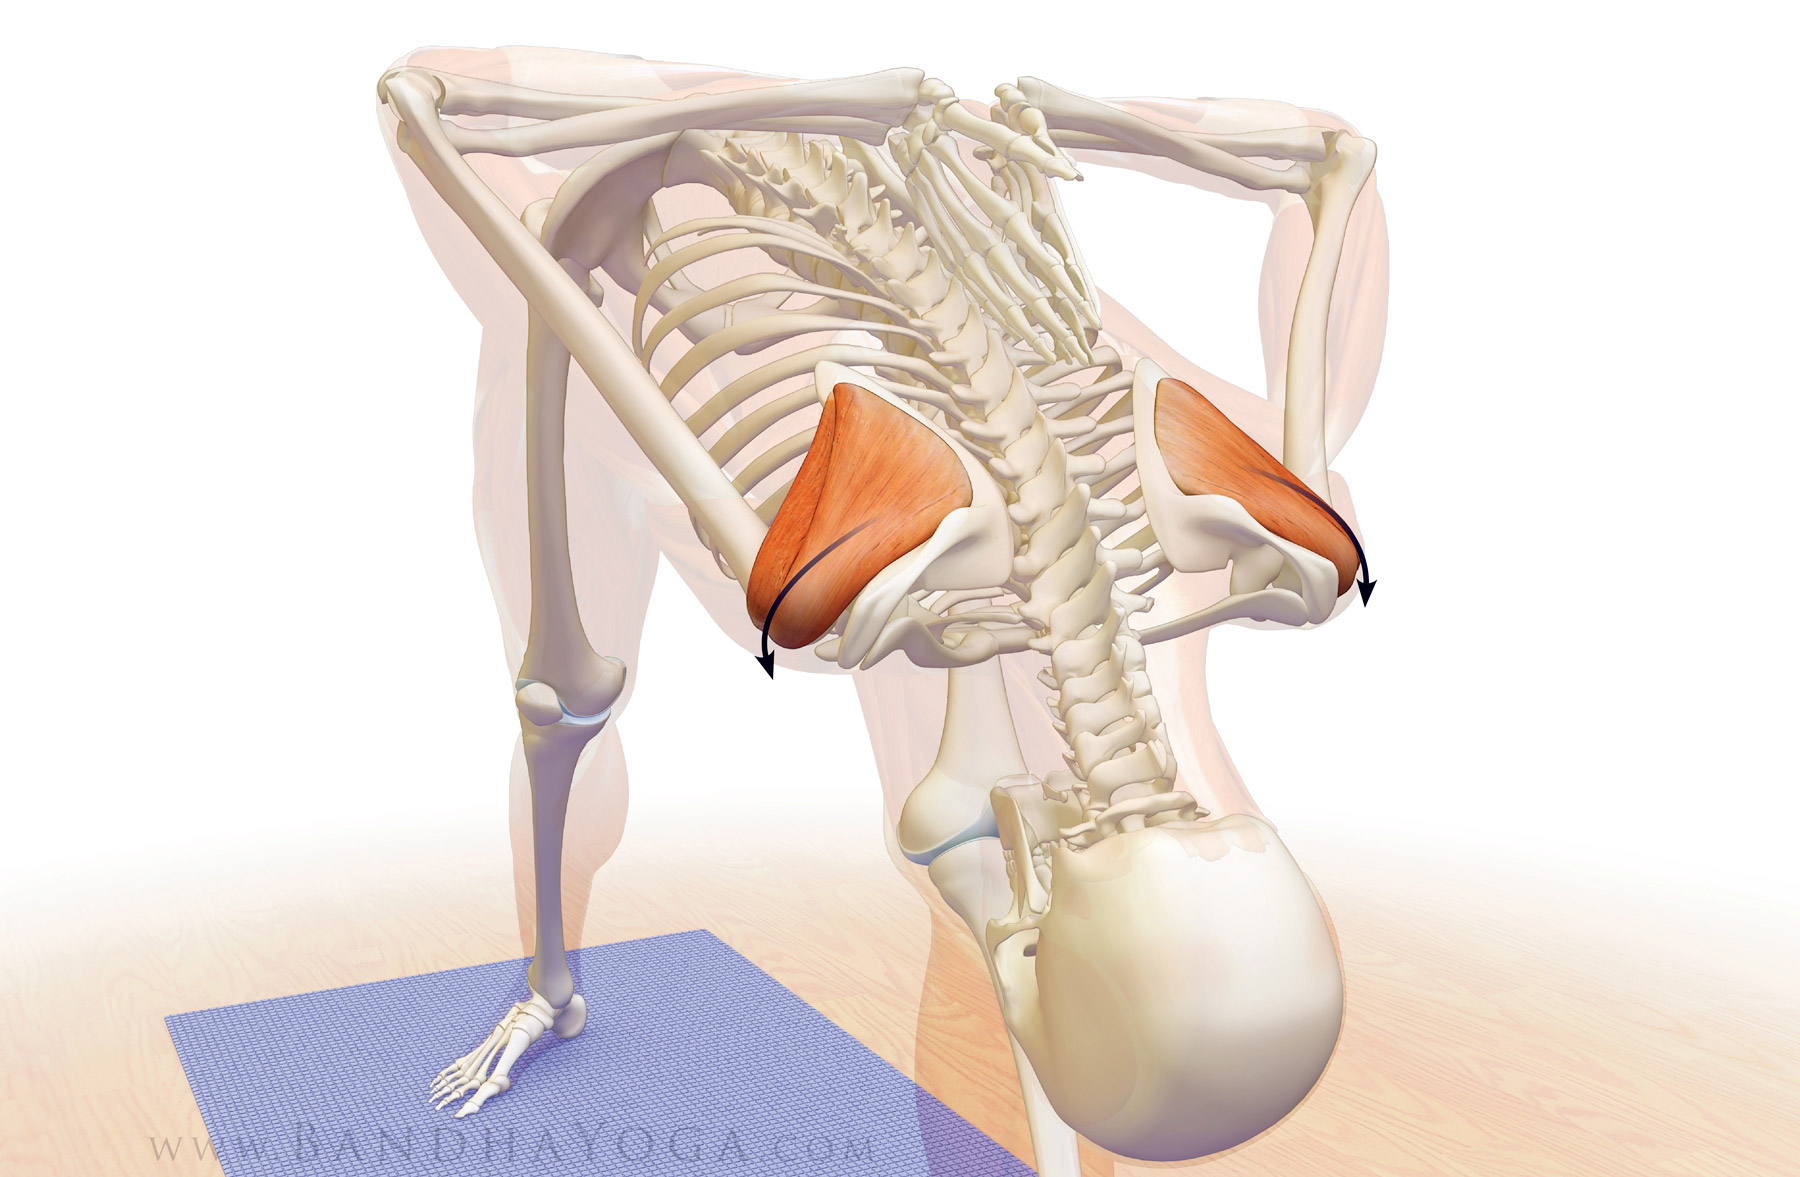
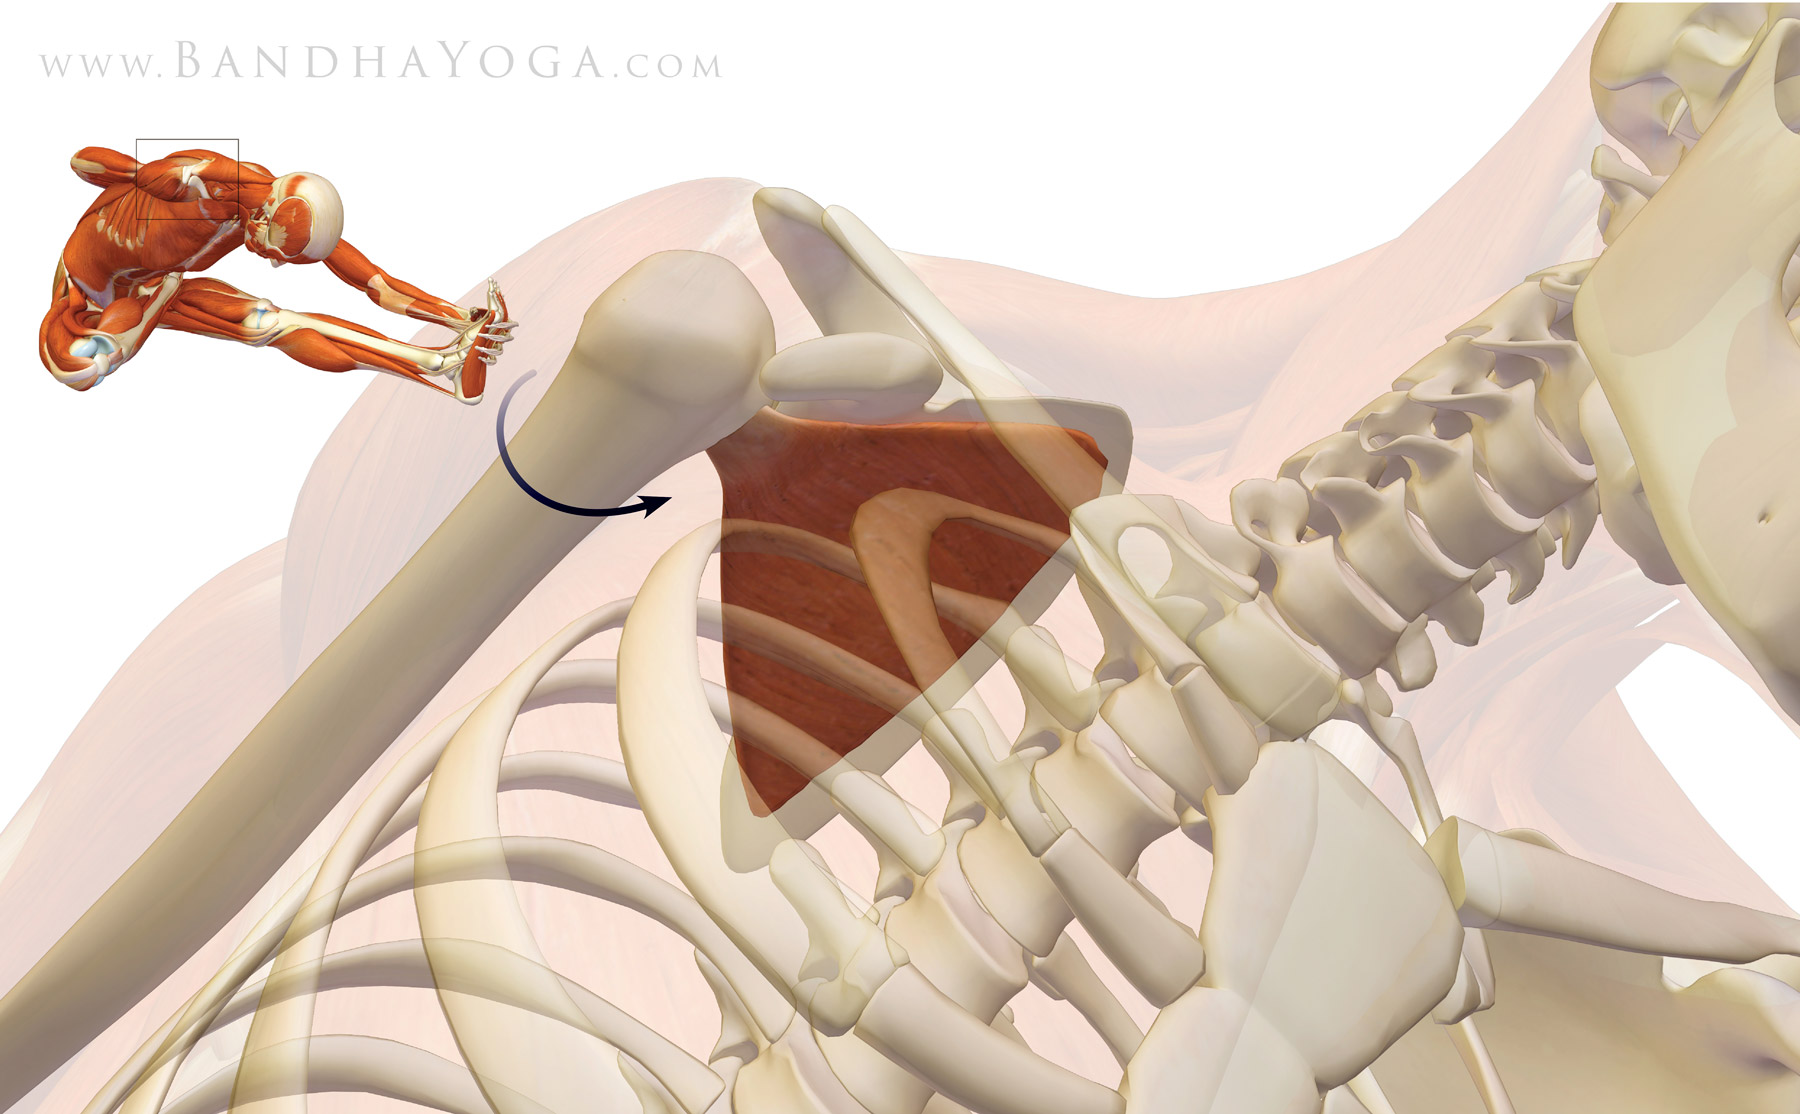
Contracting the supraspinatus abducts the humerus at the
glenoid socket (takes the arm out to the side) for the first 15 degrees. After
that, it becomes a synergist of the deltoid for abduction. As with the other
muscles of the cuff, the supraspinatus also stabilizes the humeral head in the
socket. Figure 2 illustrates this in Warrior II.
 |
| Figure 2: The supraspinatus contracting to synergize the deltoid in abducting the shoulders in Warrior II. |
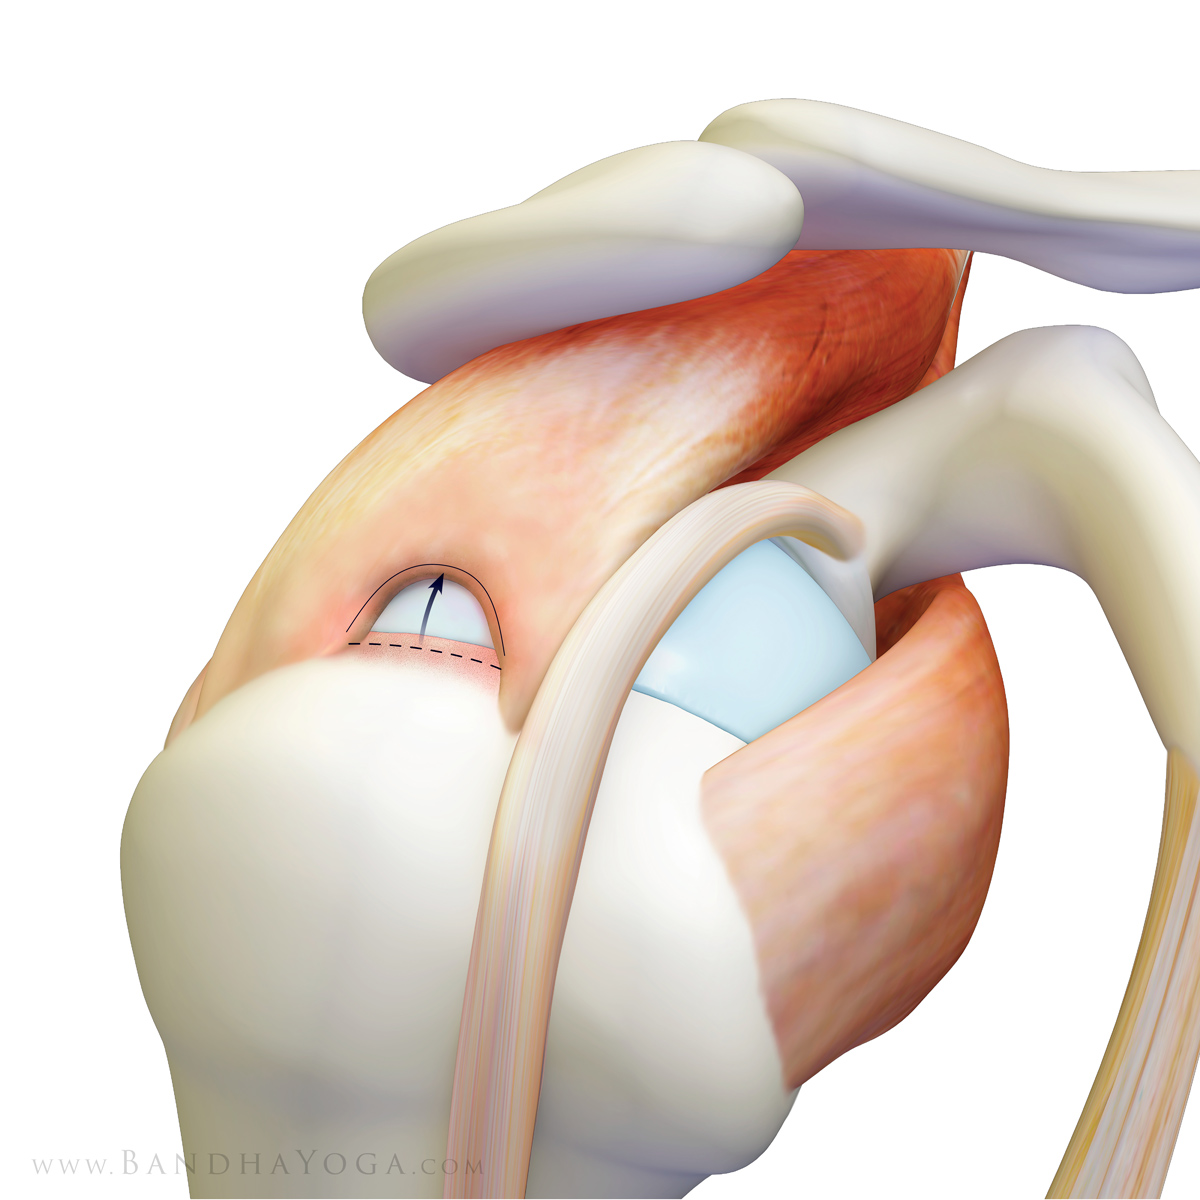
The supraspinatus is the rotator cuff muscle that is most frequently torn. Tears start to become common beyond the age of forty, with an increased incidence in each decade of life. Figure 3 illustrates a supraspinatus rotator cuff tear.
 |
| Figure 3: Full thickness tear of the supraspinatus muscle (with the long head of the biceps shown in front of the supraspinatus). |
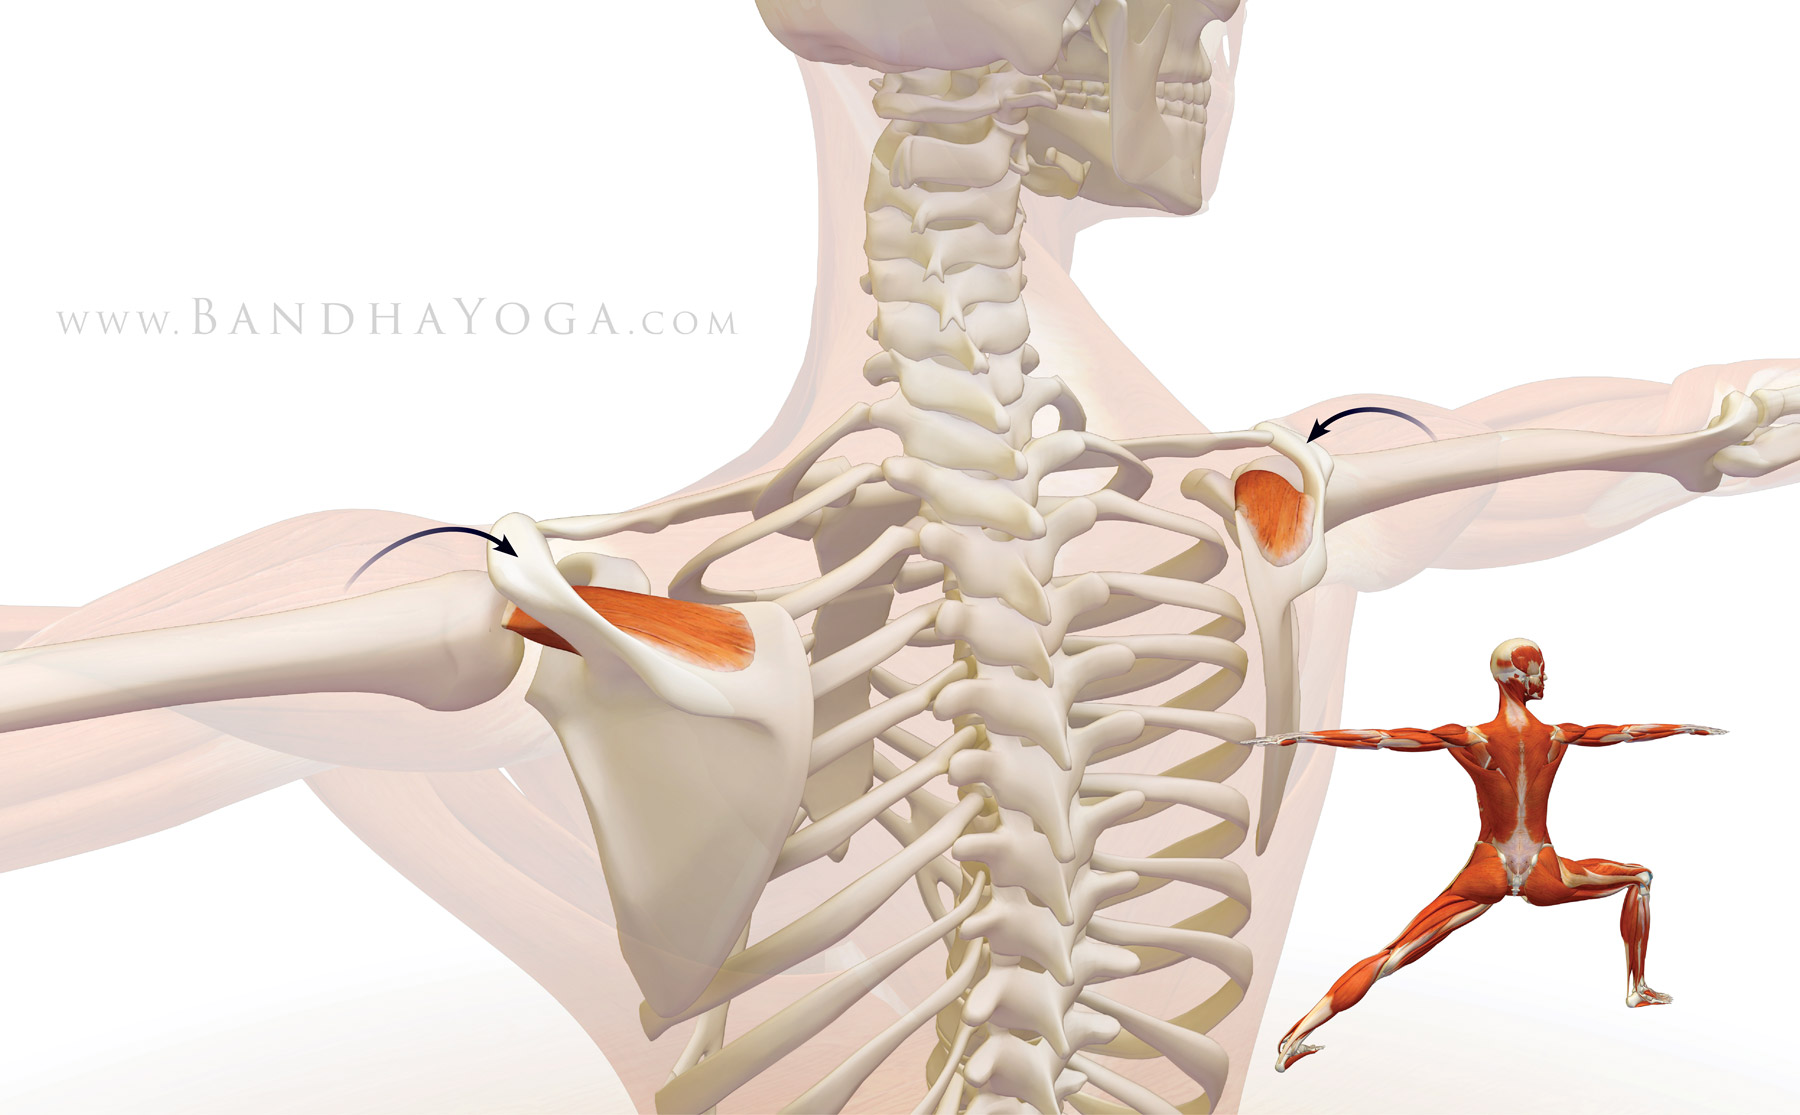
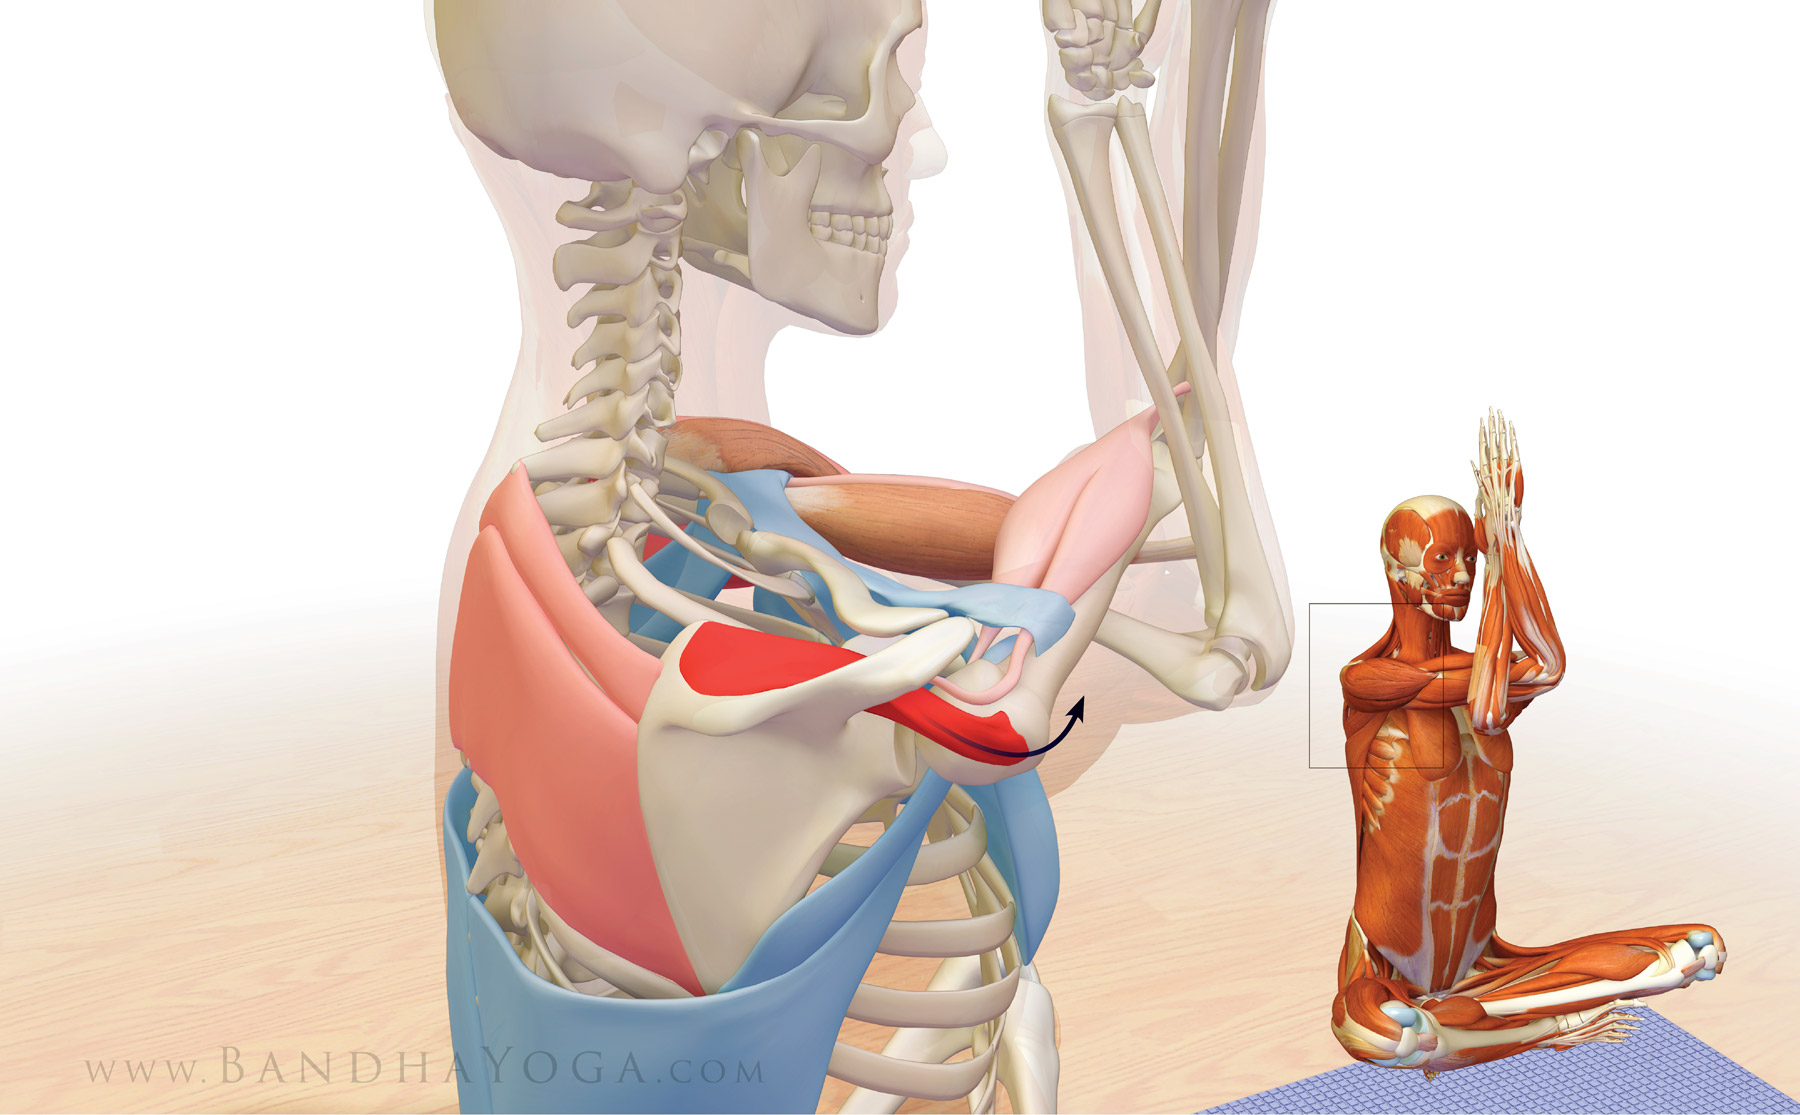
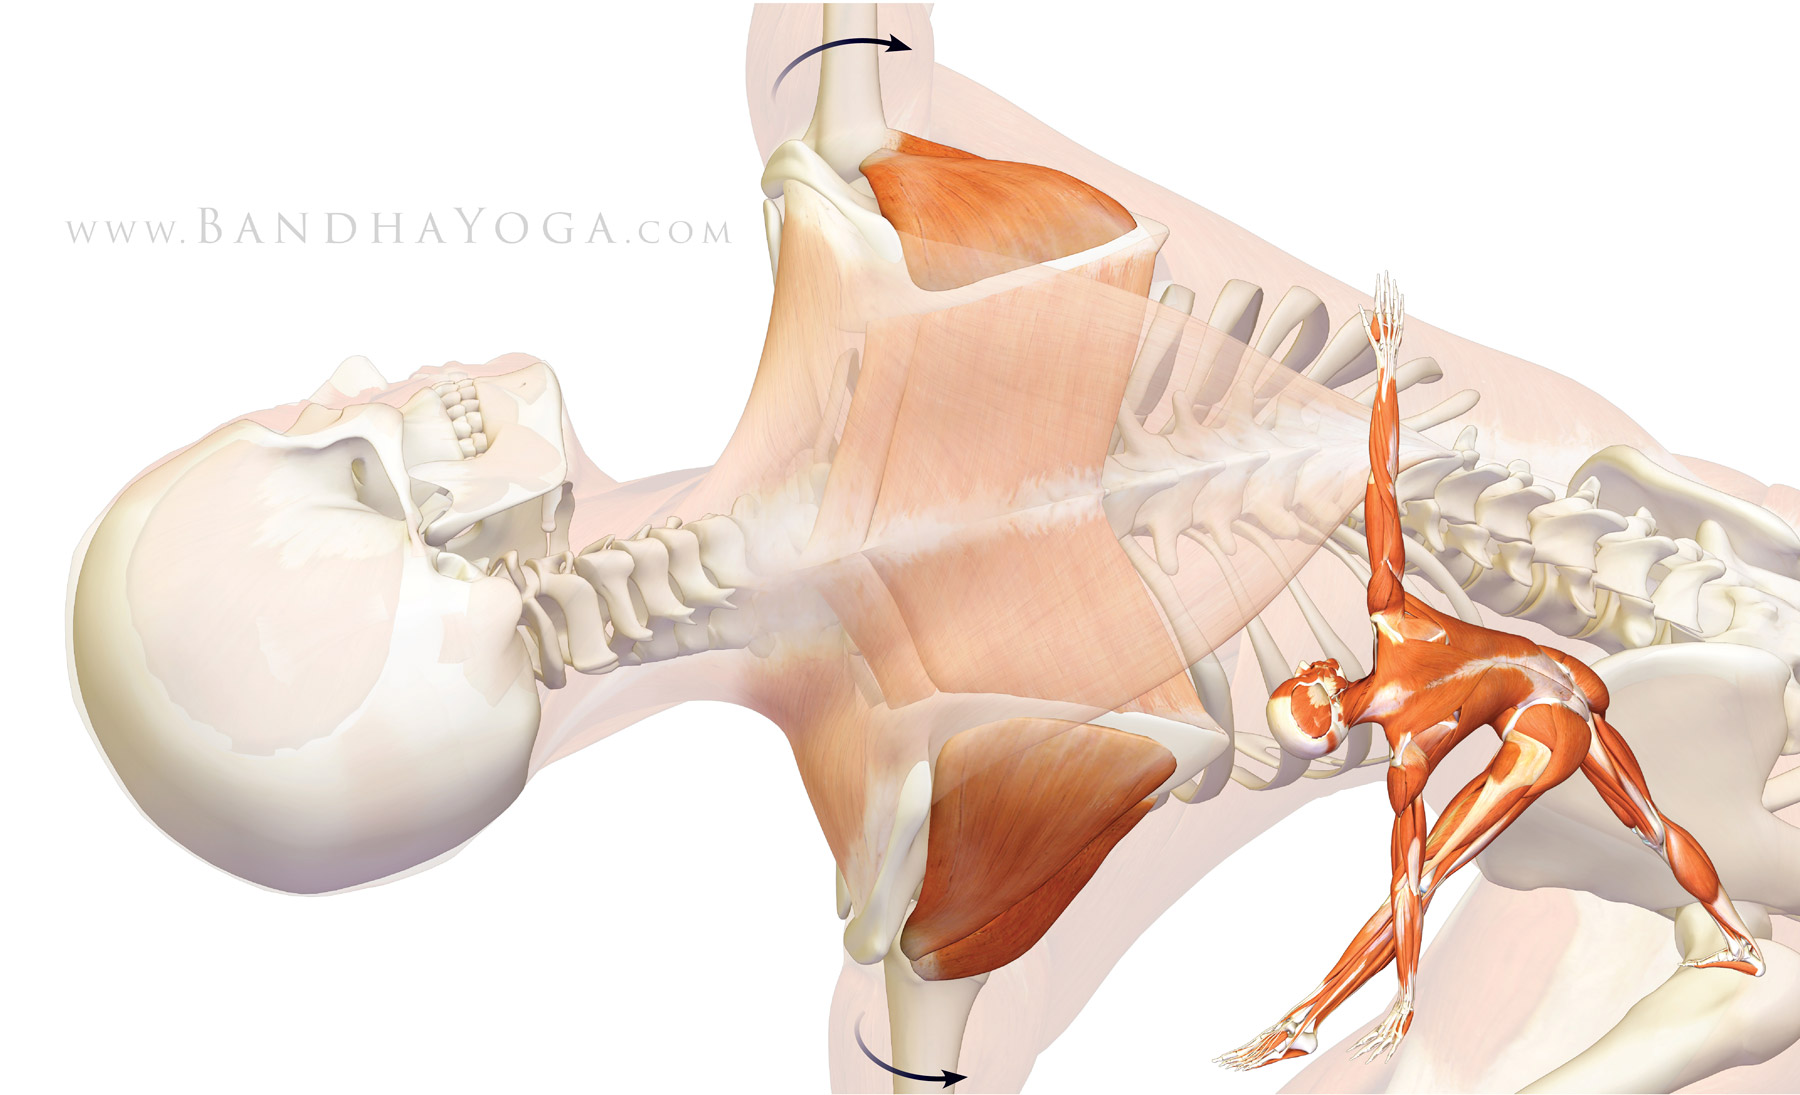
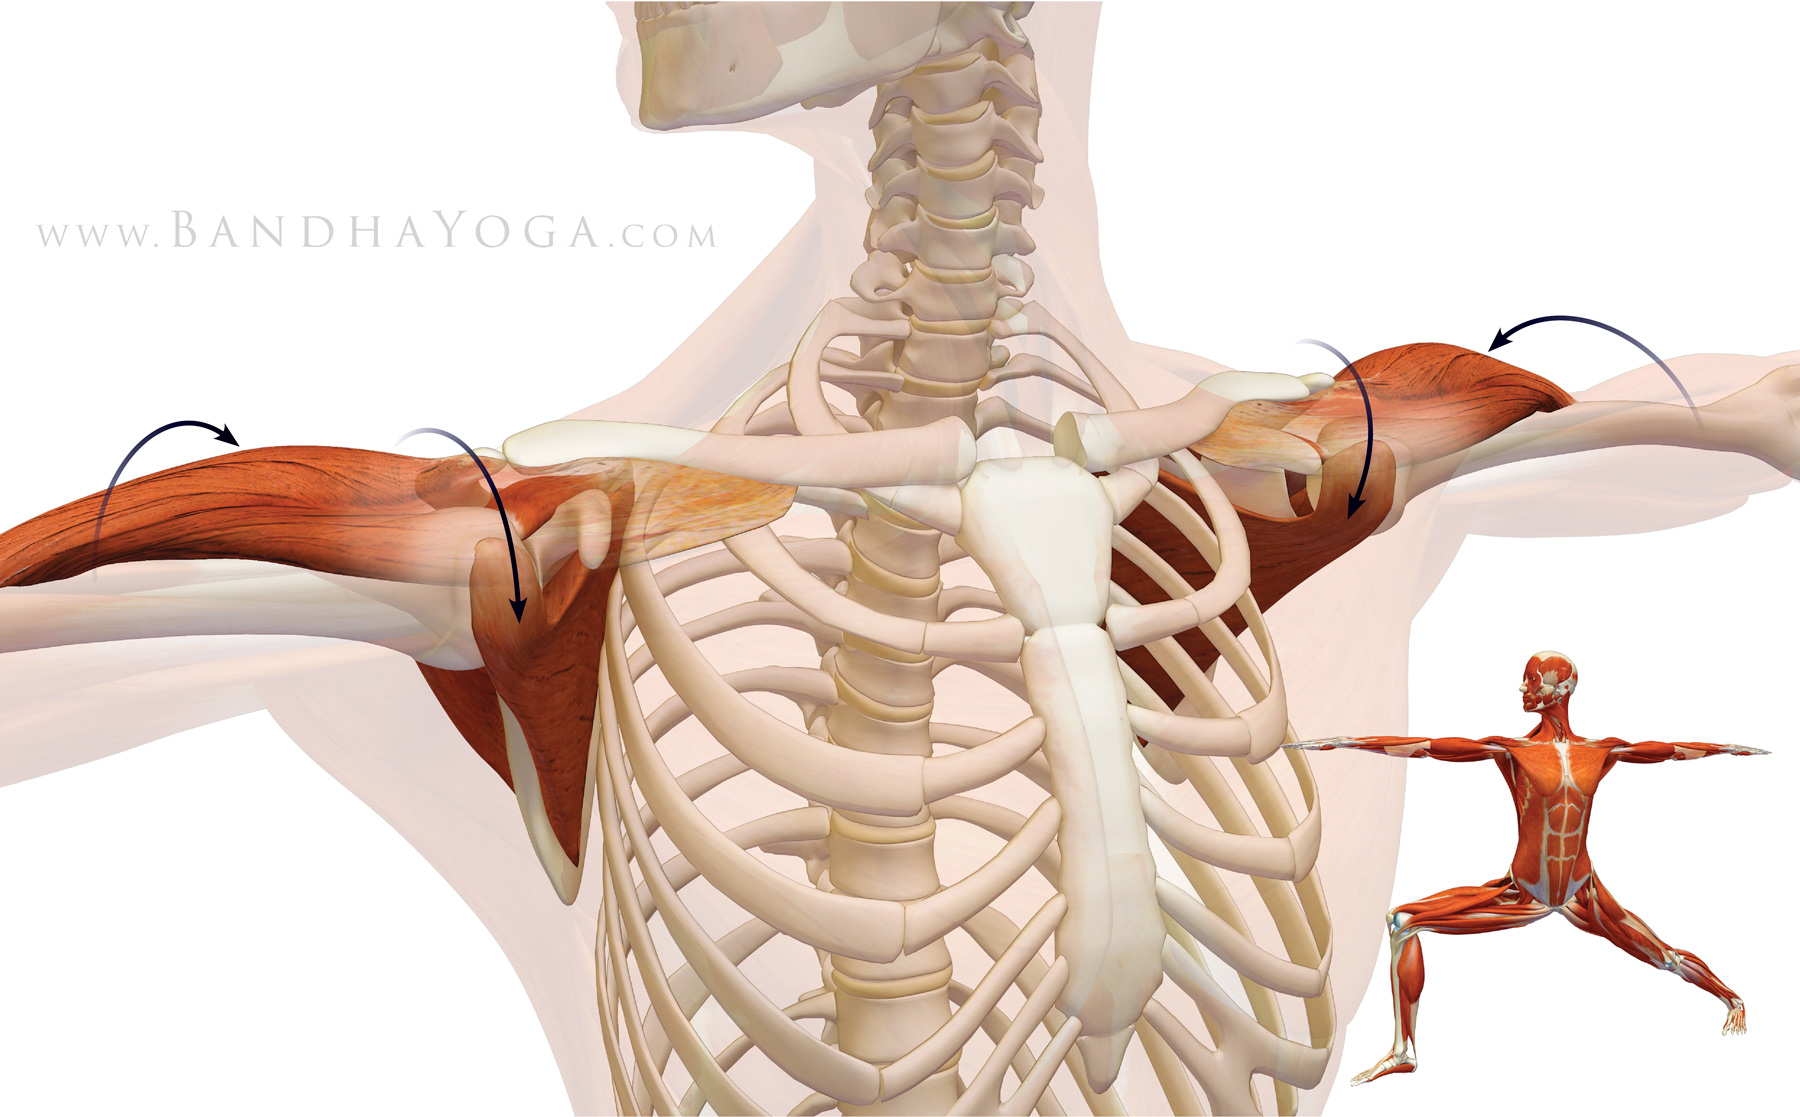
Drawing your arm across the chest (adducting it) stretches
the supraspinatus, as well as the capsule of the shoulder and the deltoid
muscle. Figure 4 illustrates this action in Garudasana. Note the muscles (colored blue) that
contract to stretch the supraspinatus and the muscles that also stretch in this pose (colored red).
 |
| Figure 4: The supraspinatus muscle stretching in Garudasana. The muscles in red are stretching and those in blue are contracting. |
Thanks for stopping by. Stay tuned for the next post when I'll go over the interaction between the deltoid muscle and the rotator cuff. By the end of this four-post series, you'll have a good understanding of the functional anatomy and biomechanics of the shoulder joint as applied to yoga. Click here to browse through the Bandha Yoga book series on anatomy, biomechanics and physiology for yoga.
All the Best,
Ray Long, MD


 Your Rotator Cuff
 Your Piriformis Muscle
 Downward Dog Pose
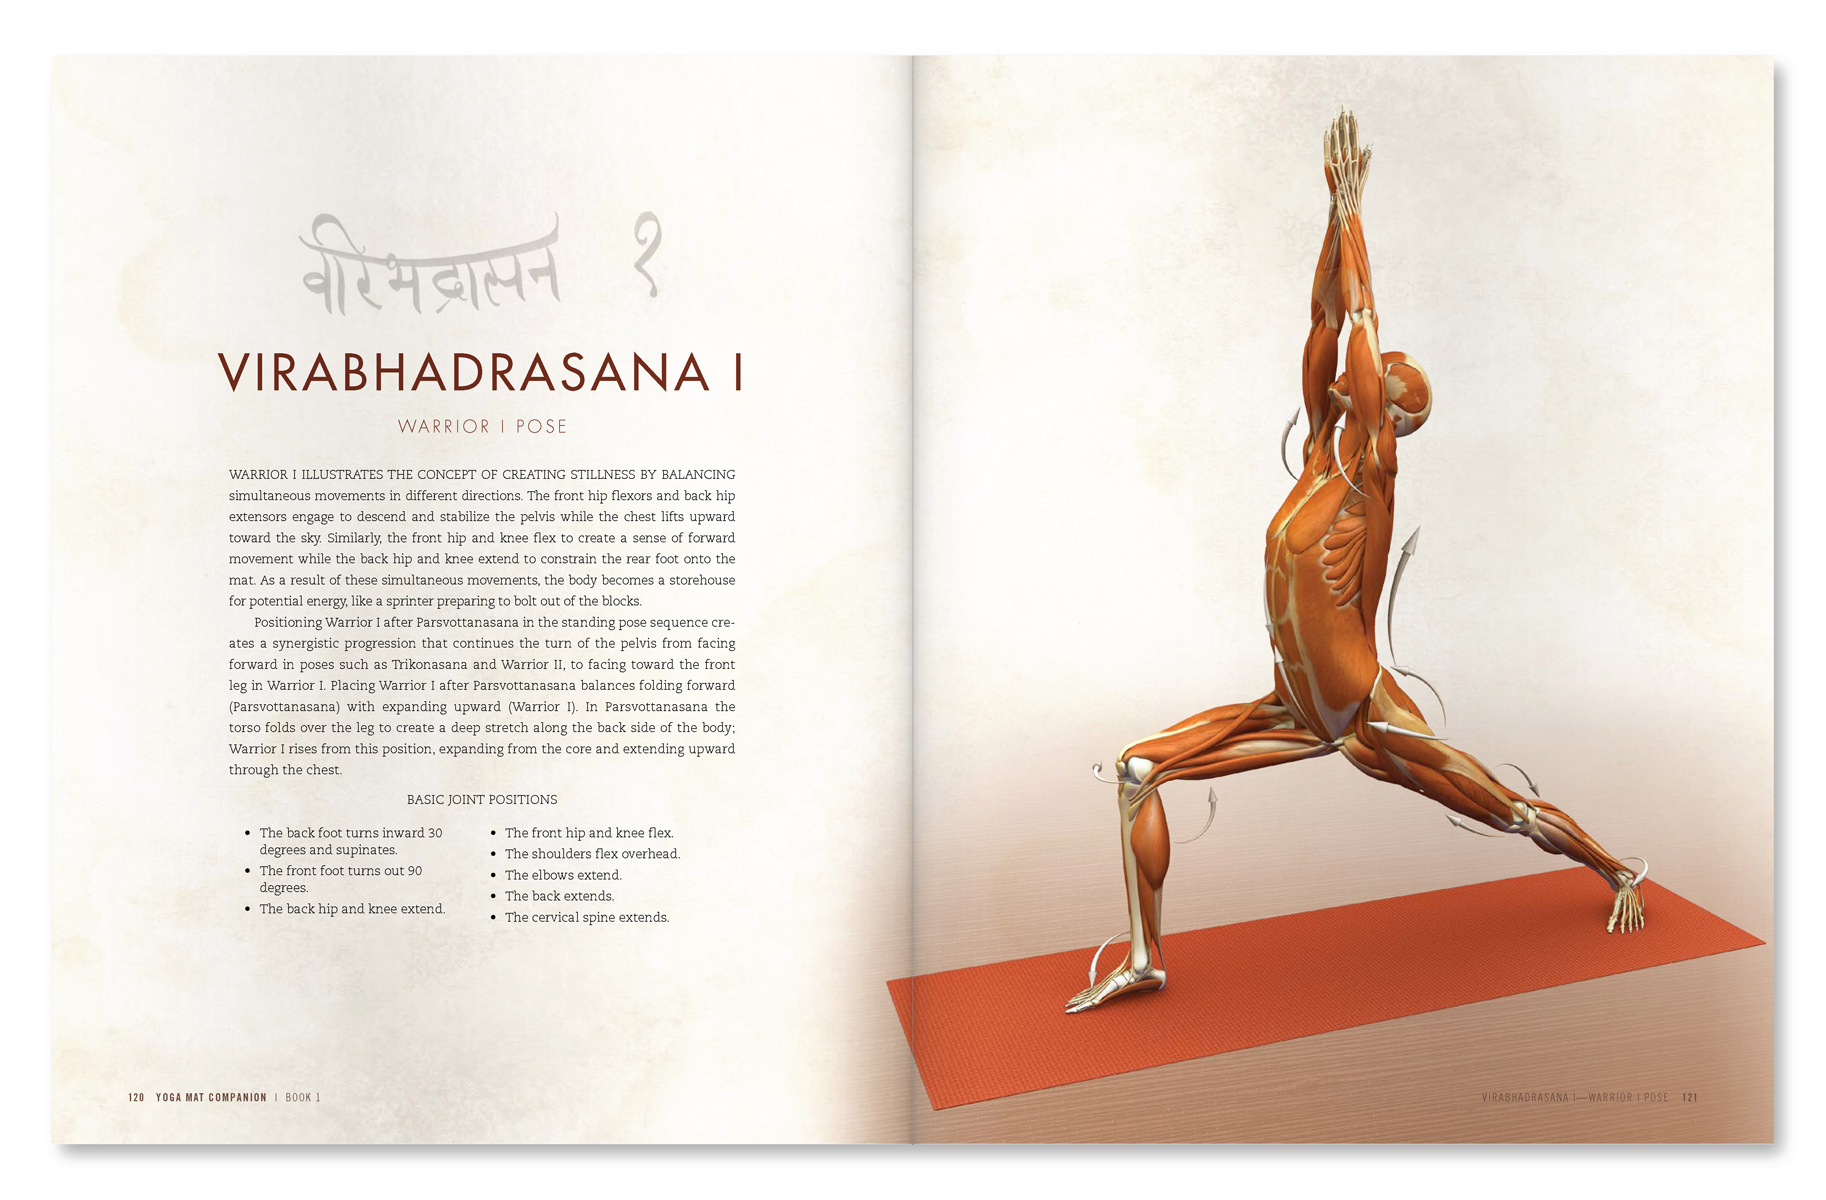
 Warrior I
 Your Hamstrings
 Your Psoas
 Your Gluteus Medius