Techniques of visualizing are employed in many disciplines. Elite athletes, from NFL quarterbacks to champion racing car drivers often integrate visualization into their training regimens. A racer will use this technique by entering a meditative state and picturing the details of the track they are going to drive, seeing every curve and bump and visualizing themselves driving a safe and flawless race. Then they go out and drive a safe and flawless race.
Visualization is also a powerful tool utilized by the medical field, particularly as an adjunct to cancer treatment. Patients relax and then picture detailed images of their immune system attacking and defeating the cancer. Indeed, visualization techniques were even utsed by my surgical training program; we were trained to conduct a mental “walk through” of the surgery we were preparing to perform, picturing each step going perfectly--with excellent results. And, as we demonstrated in our previous blog post on the piriformis muscle, an animation can be a powerful tool for integrating knowledge of the body into actual practice.
In this blog post we use visualization, combined with knowledge of function, to access one of my favorite “hidden” muscles—the popliteus. We will see how picturing the function of this muscle leads to engaging it. This engagement in turn provides additional stability for the knee in poses like Lotus, Baddha konasana and Janu sirsasana. First, let's look at the muscle itself.
Here’s the anatomy…
The popliteus muscle originates from the lateral (outside) surface of the lateral condyle of the femur (with a small slip to the lateral meniscus and fibular head) and inserts onto the inside of the back of the tibia, as shown in Figure 1. It acts to flex and internally (medially) rotate the tibia when the leg is not weight bearing and is a synergist of the medial (inside) hamstrings—the semimembranosus and semitenonosus—for these actions. It is here we will focus our attention for this blog post. The popliteus also “unlocks” the knee joint as we begin to flex it from the extended position, so strengthening this muscle can be beneficial for avoiding hyper-extending the knees. Overall, the popliteus is an important rotational stabilizer of the knee joint; engaging it enhances joint congruency. That is why I teach this cue in my workshops on Lotus pose.
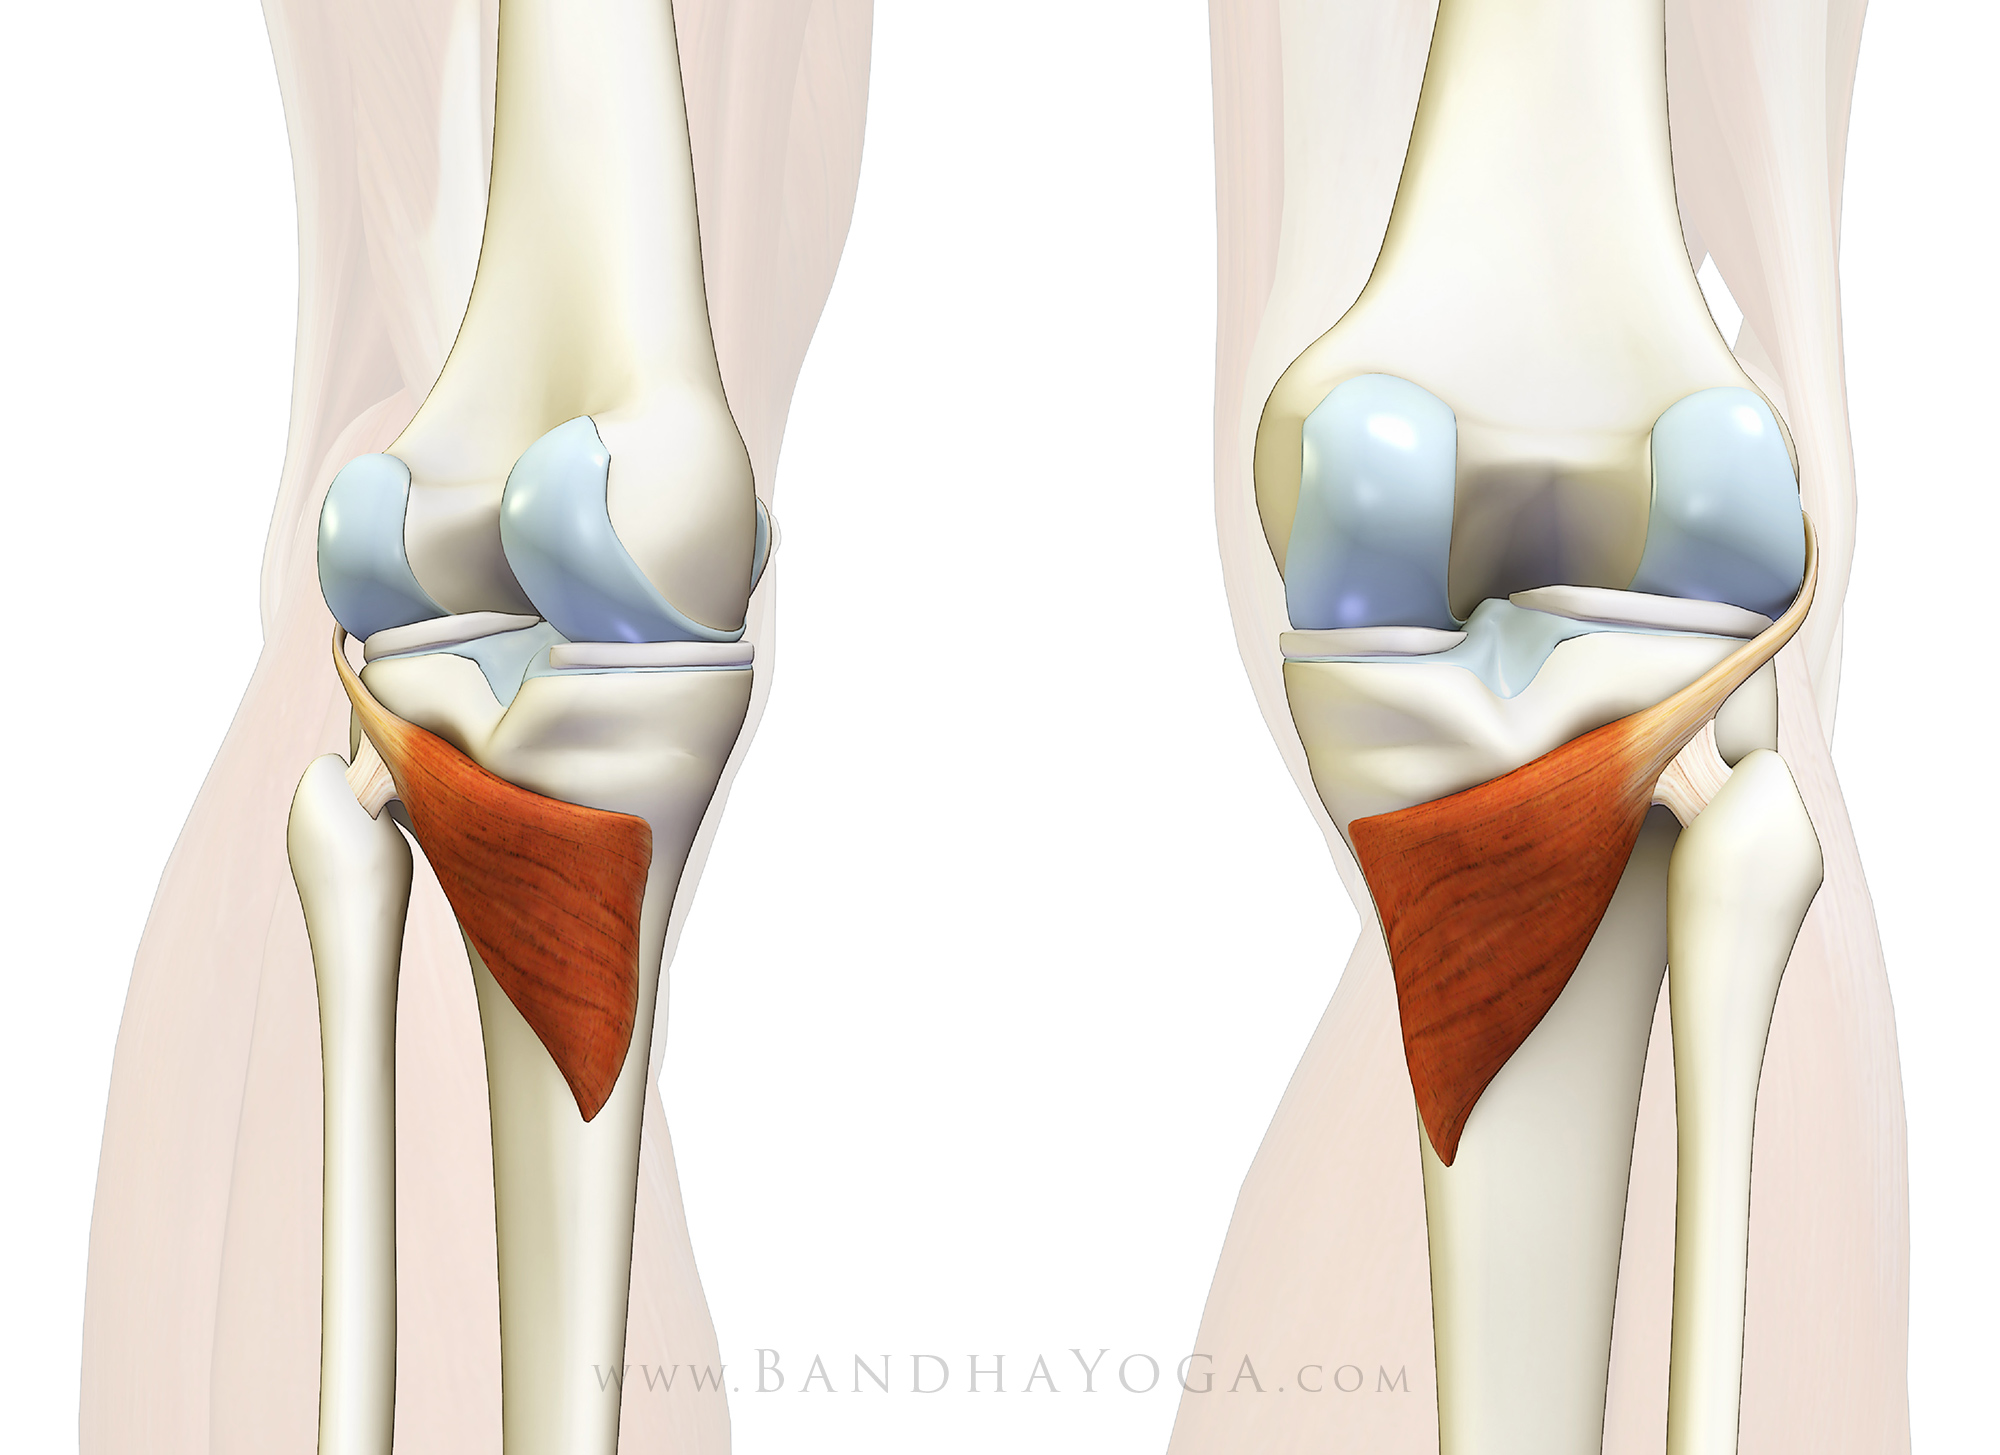 |
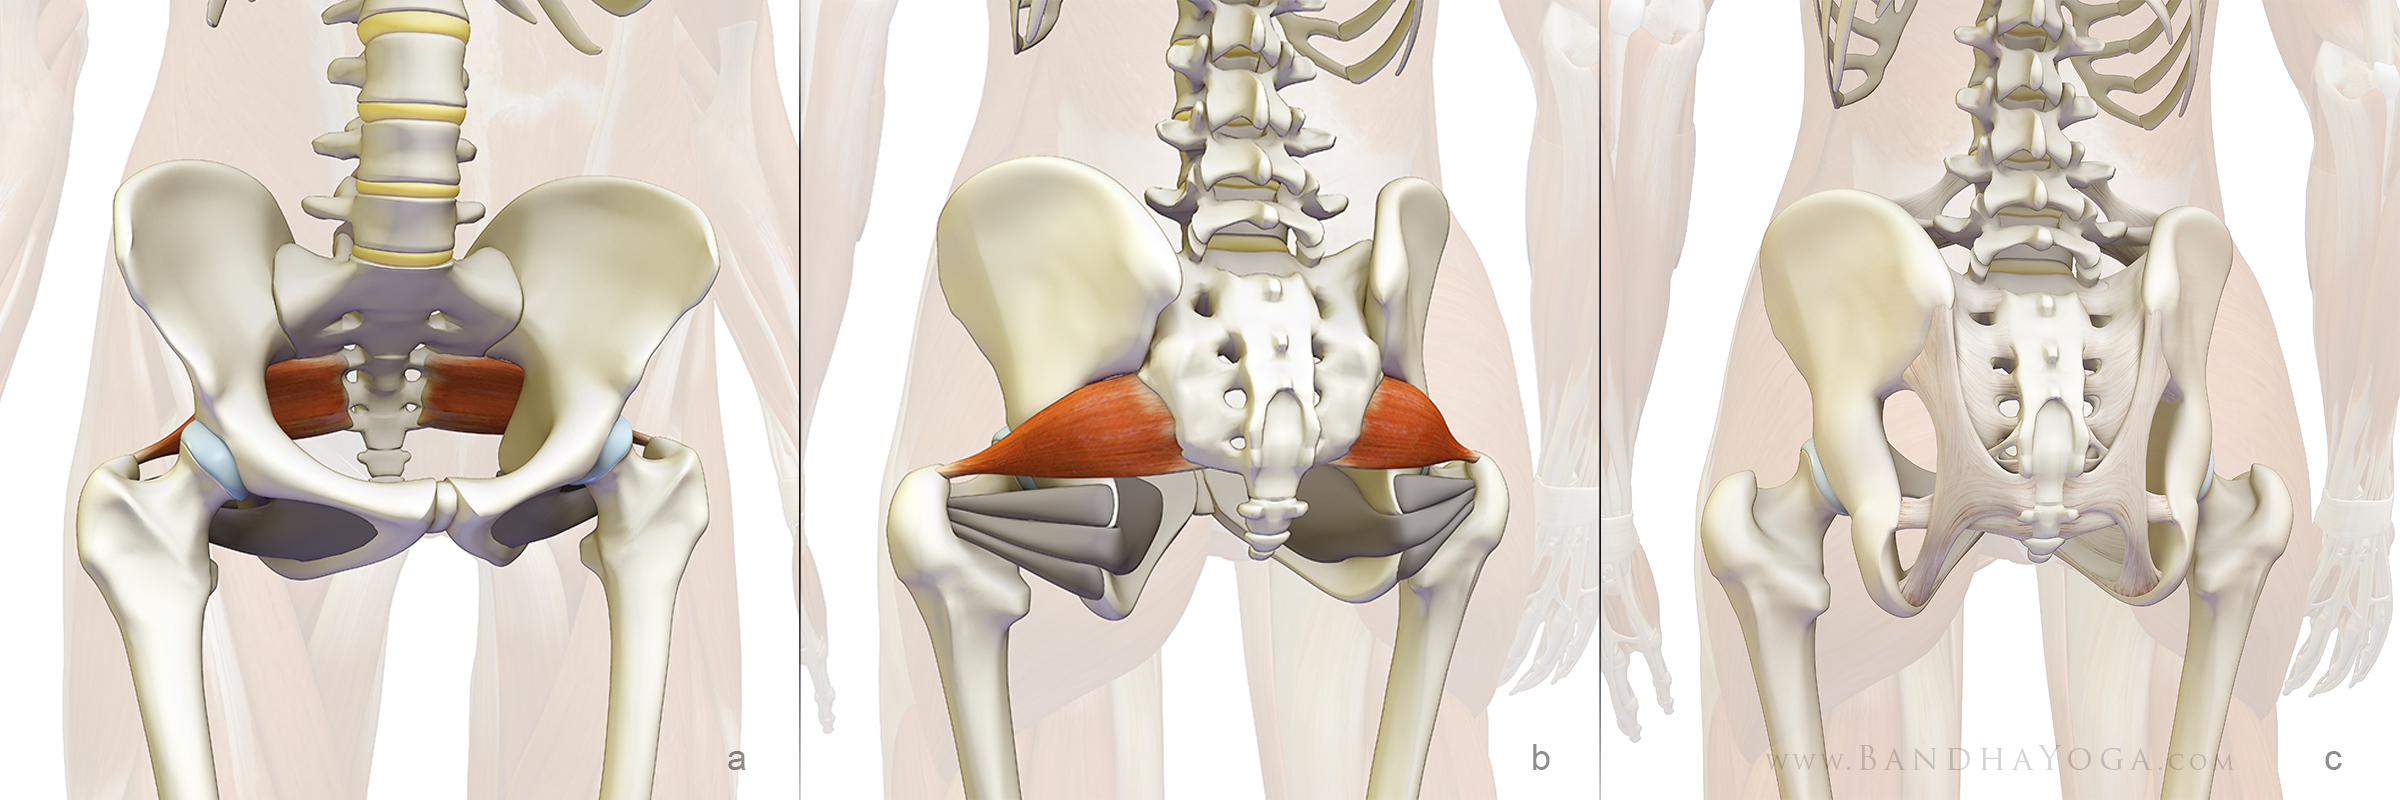
| Figure 1: The popliteus muscle viewed from behind the knee. |
Here’s the cue…
The key to poses like Lotus, Baddhakonasana and Janu sirsasana is to obtain range of motion of the hip joint, while maintaining congruency of the knee (click here for an explanation of joint congruency). So before I practice these poses, I typically warm up with some asanas that release the muscles about the hip joint. Click here for Reverse Pigeon Pose, and here for a tip on protecting the knee in this pose. Click here for a technique on releasing the internal rotators of the hip and here for a technique to release the hip adductors.
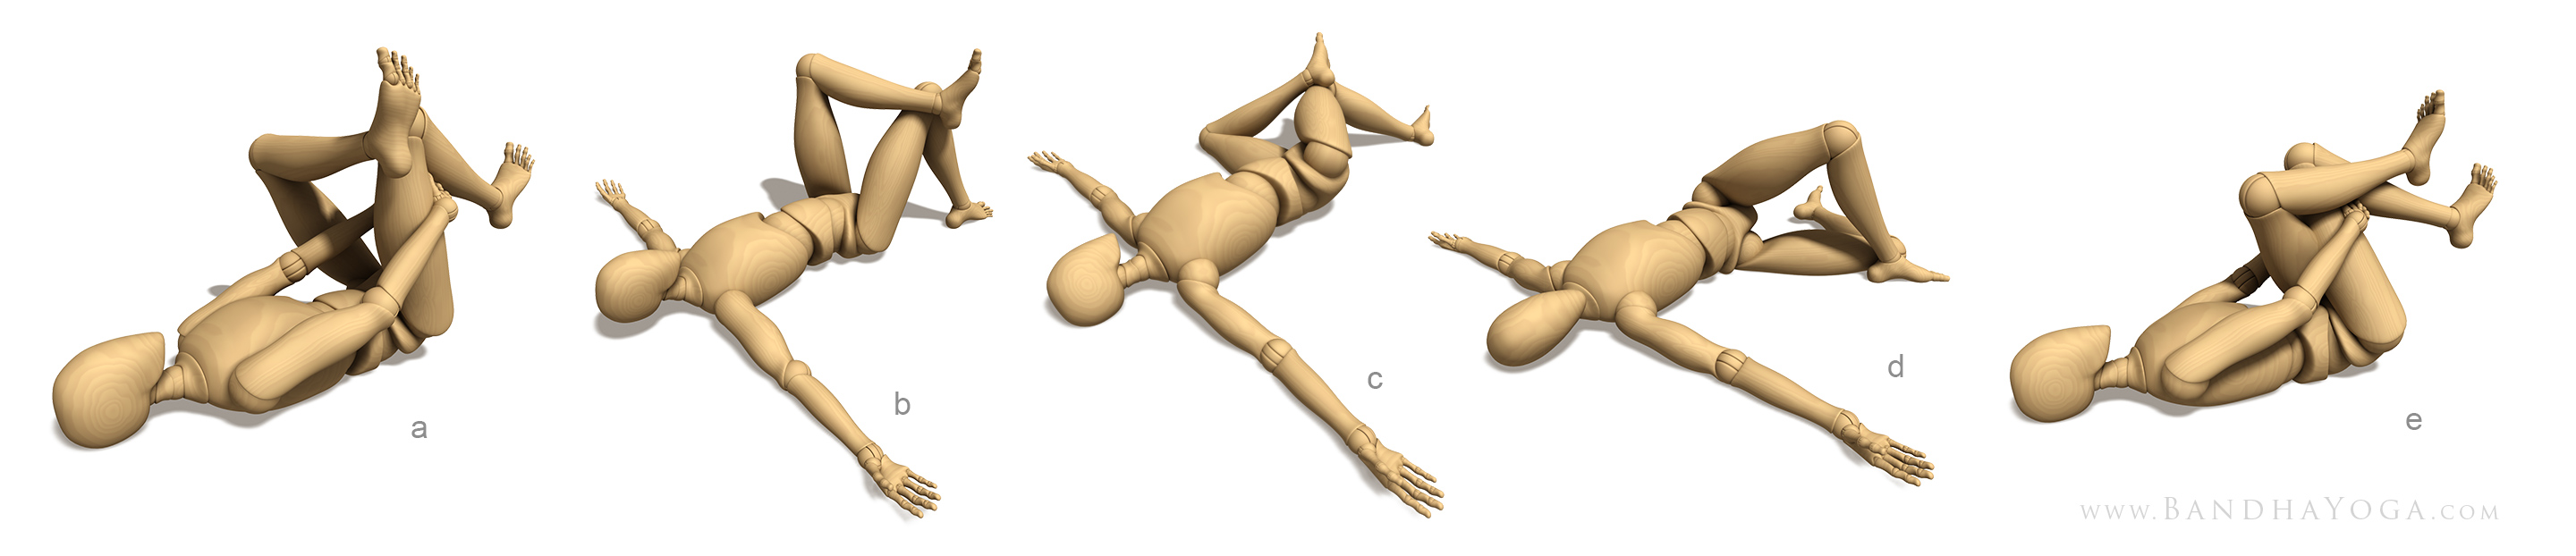
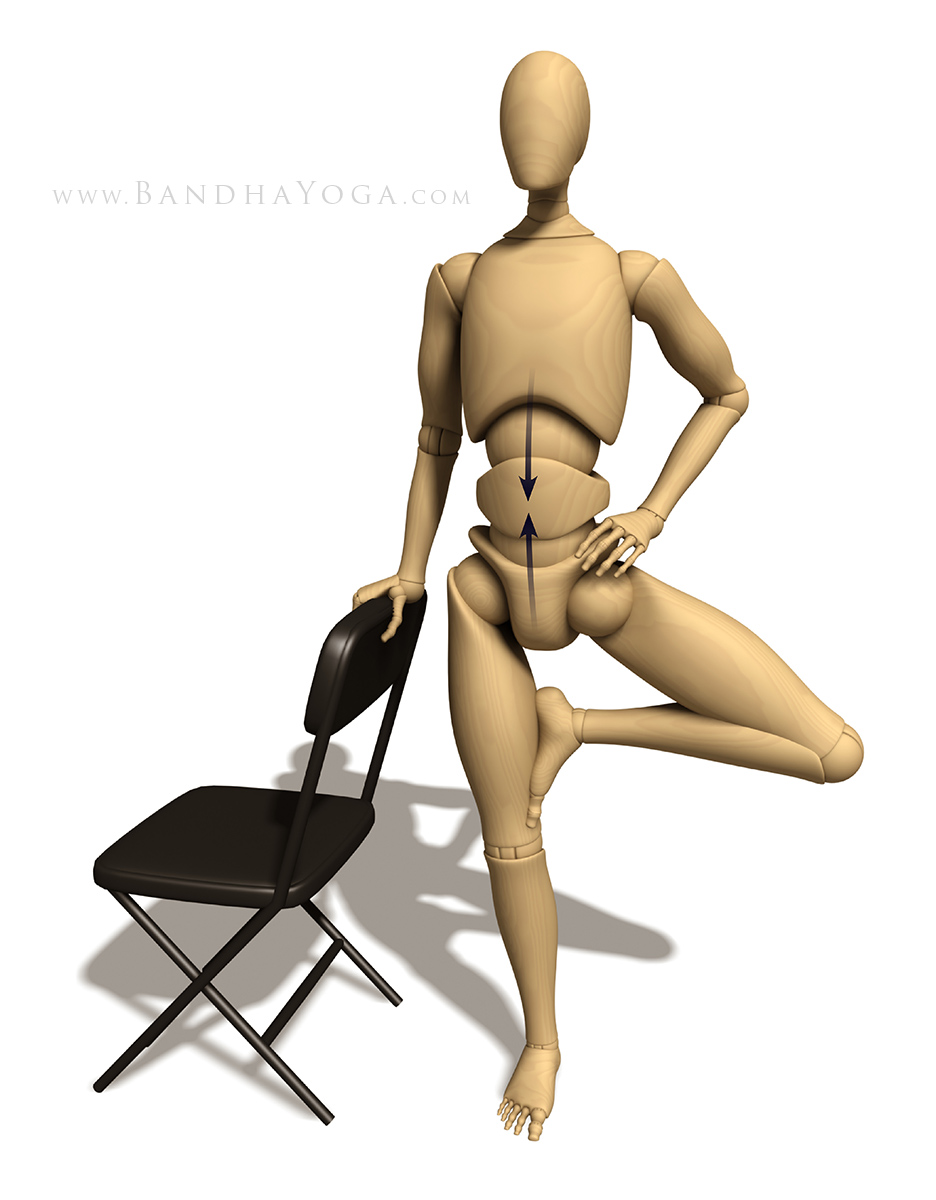
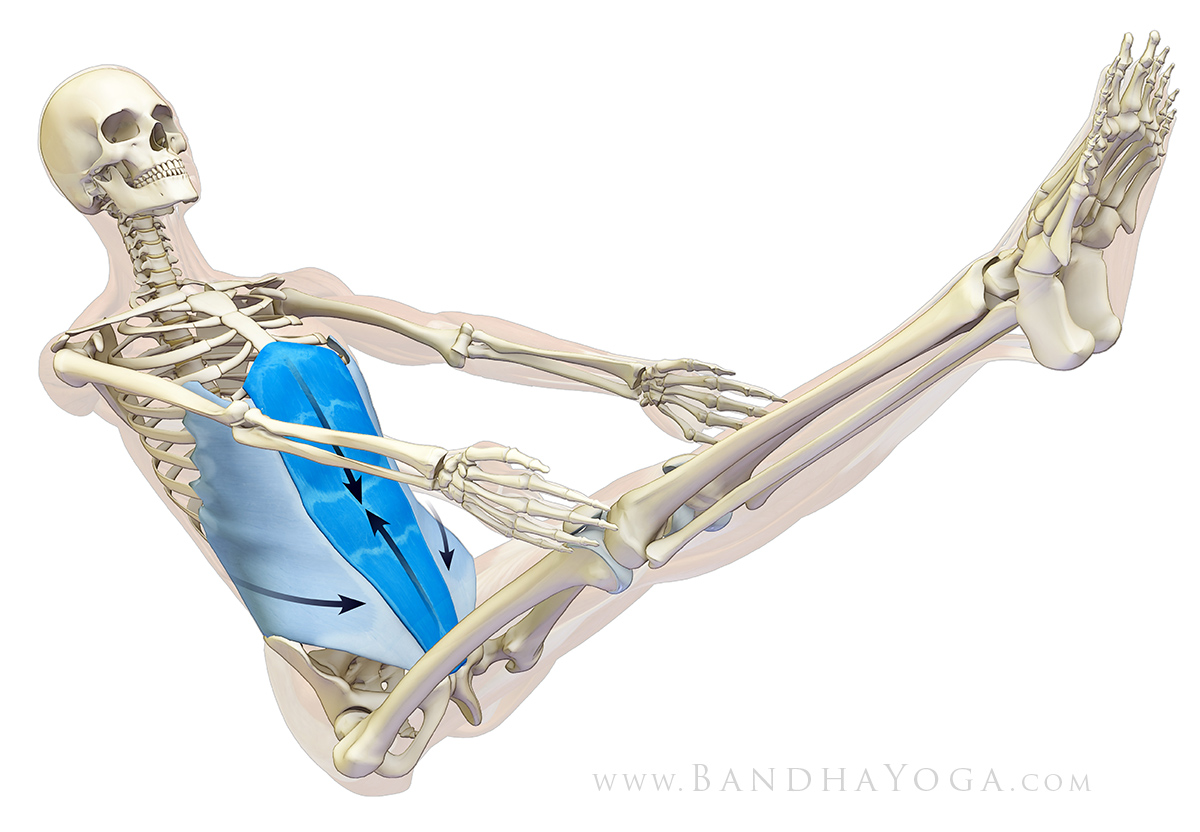
As a general consideration, when working on isolating smaller difficult to access muscles like the popliteus, begin with a couple of short duration visualizations. Don’t try too hard, but simply imagine the action of the popliteus in Baddha konasana as shown in Figure 2 and gently contract the muscle. Then release and take the counter pose, Dandasana. Repeat the process, picturing the popliteus muscle near the knee joint engaging to synergize flexing the knee and internally rotating the tibia. Several short duration repetitions allows the brain to create circuitry to more efficiently access this important knee stabilizer. Do this process over several days, after which you will be able to engage the muscle at will and with increasing refinement. Use gentle muscular engagement and “ease into and out of” your poses, paying attention to detail. If you experience pain in your stretch, then carefully release and come out of the pose.
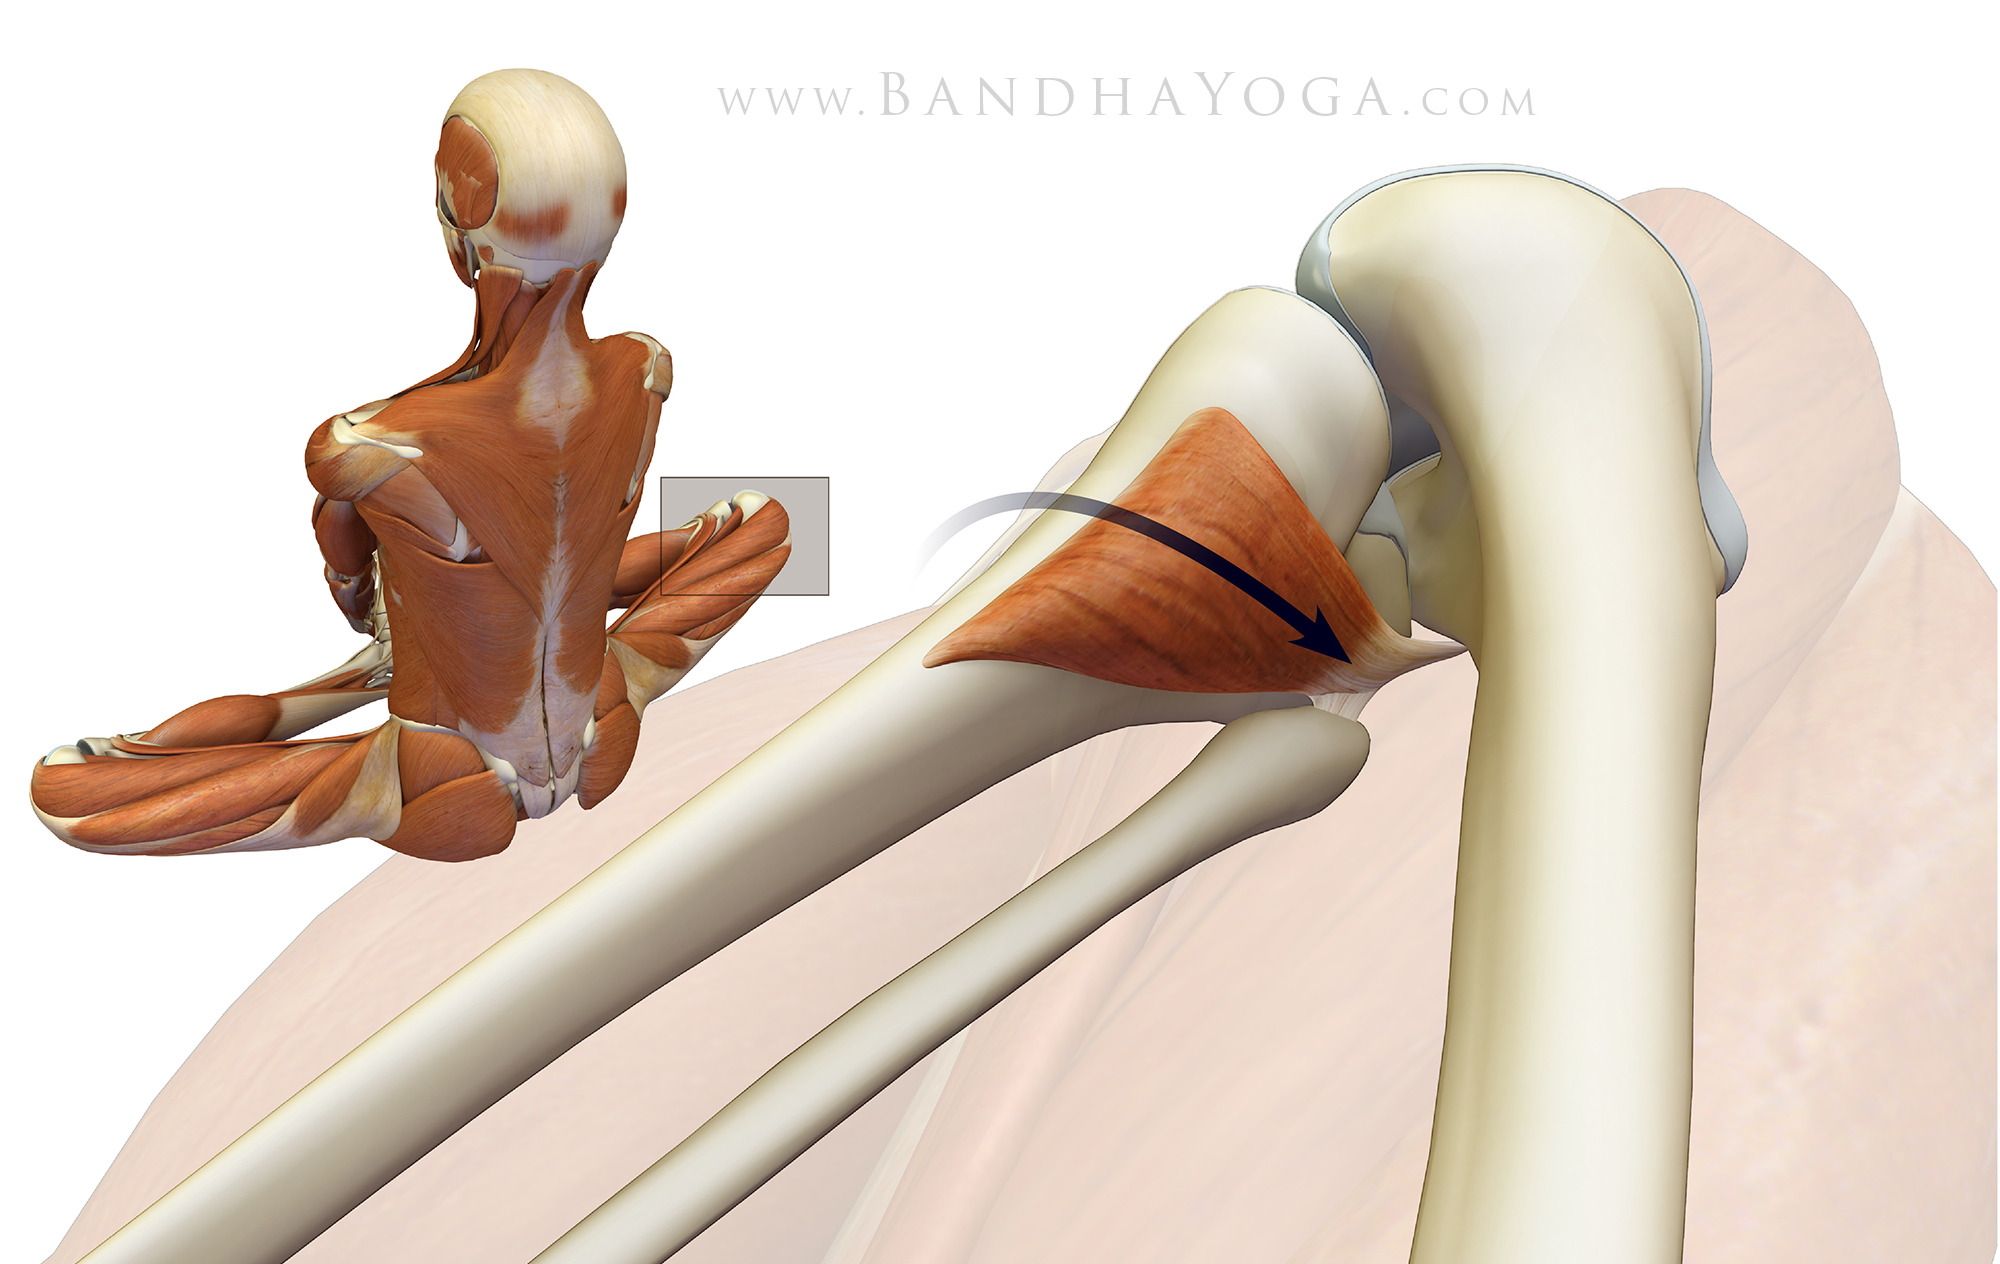 |
| Figure 2: Visualizing the popliteus muscle flexing and and internally rotating the tibia in Baddha konasana. |
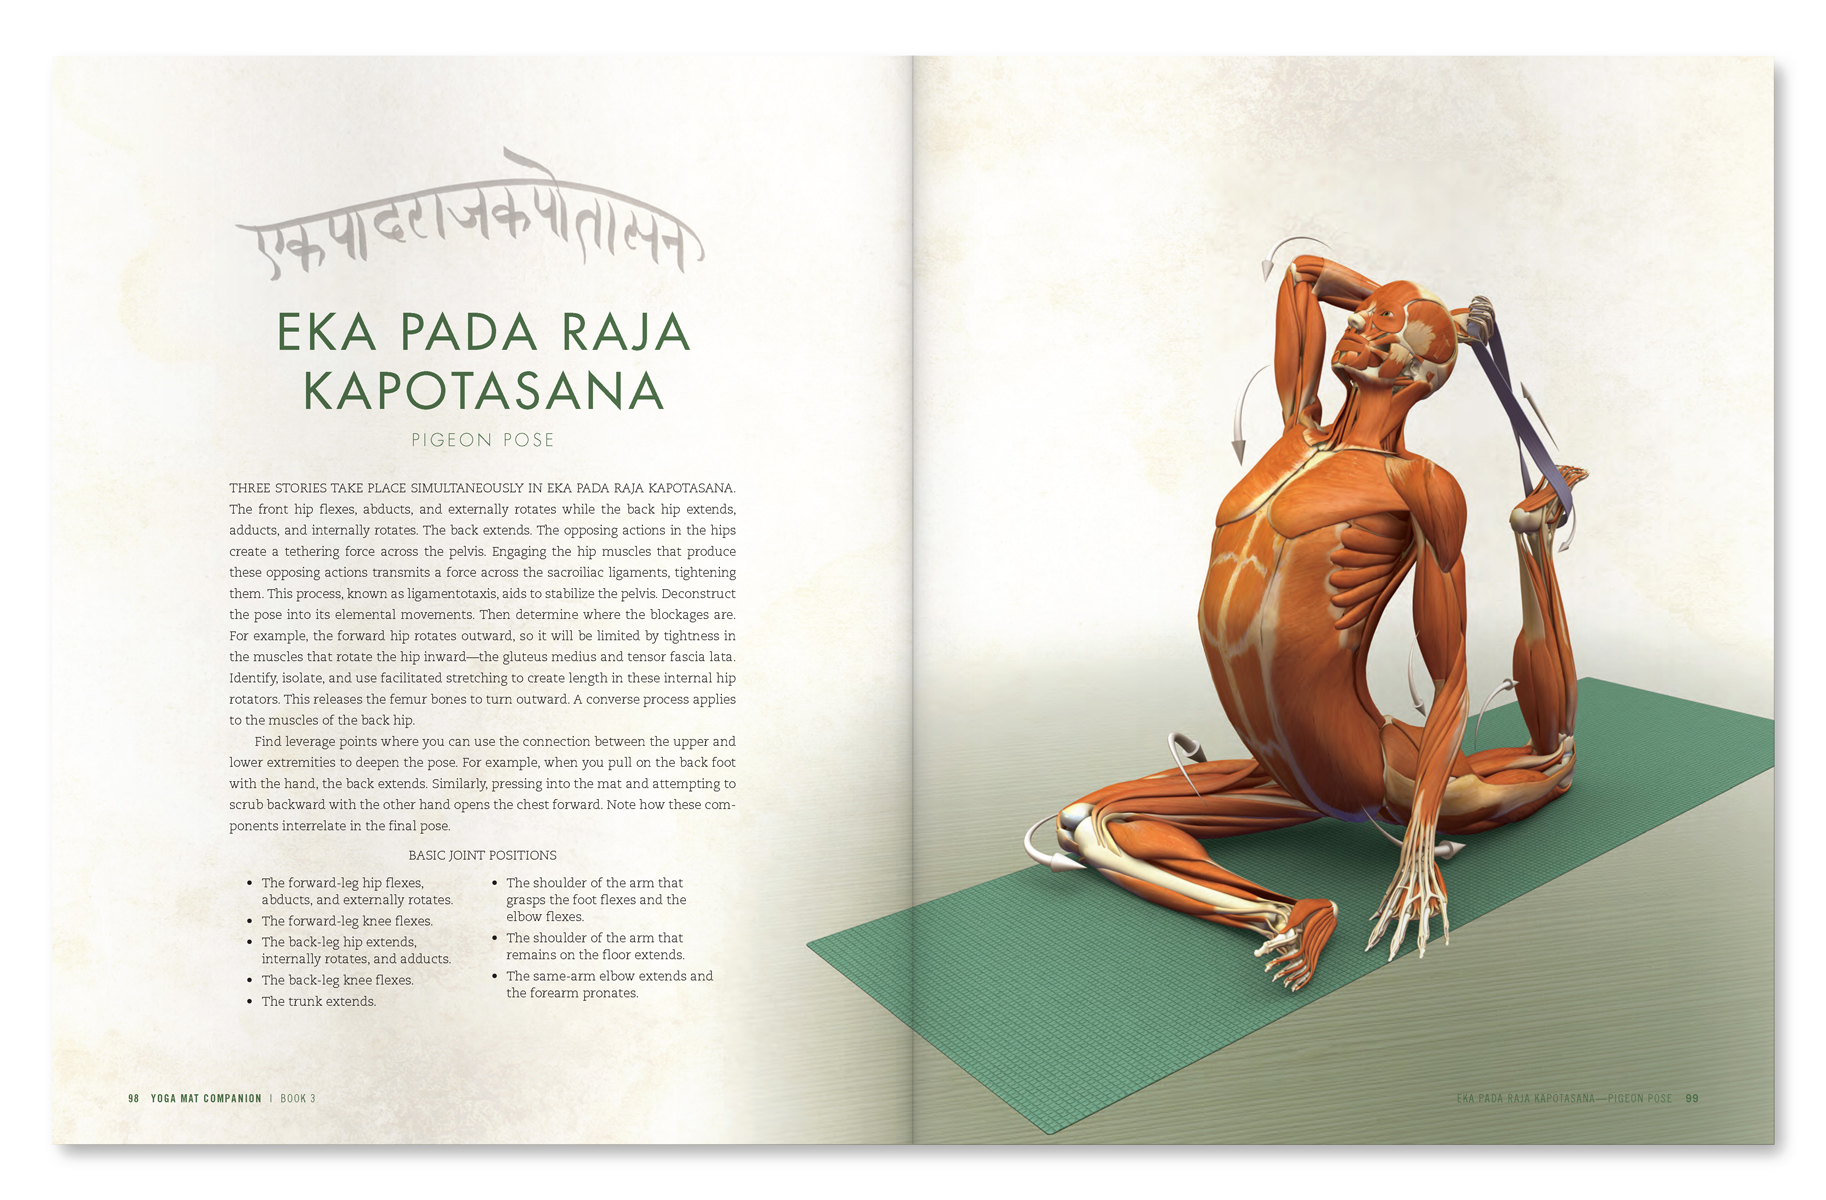
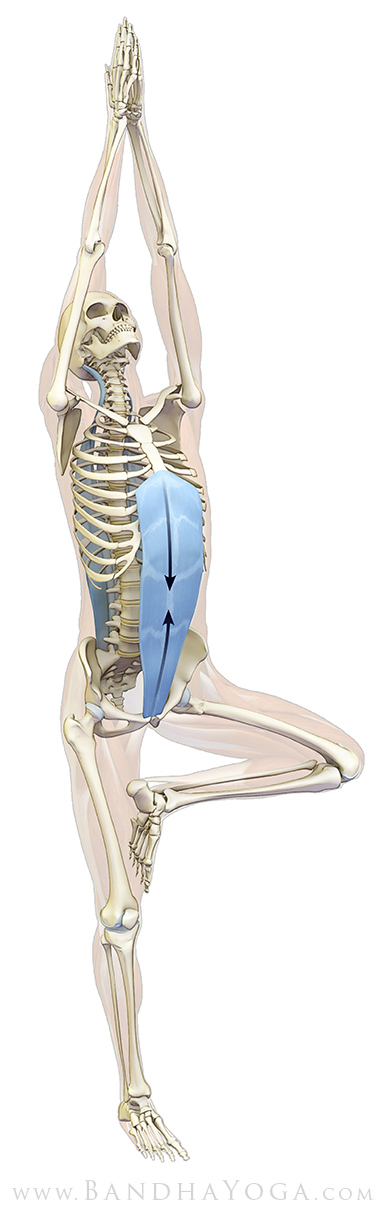
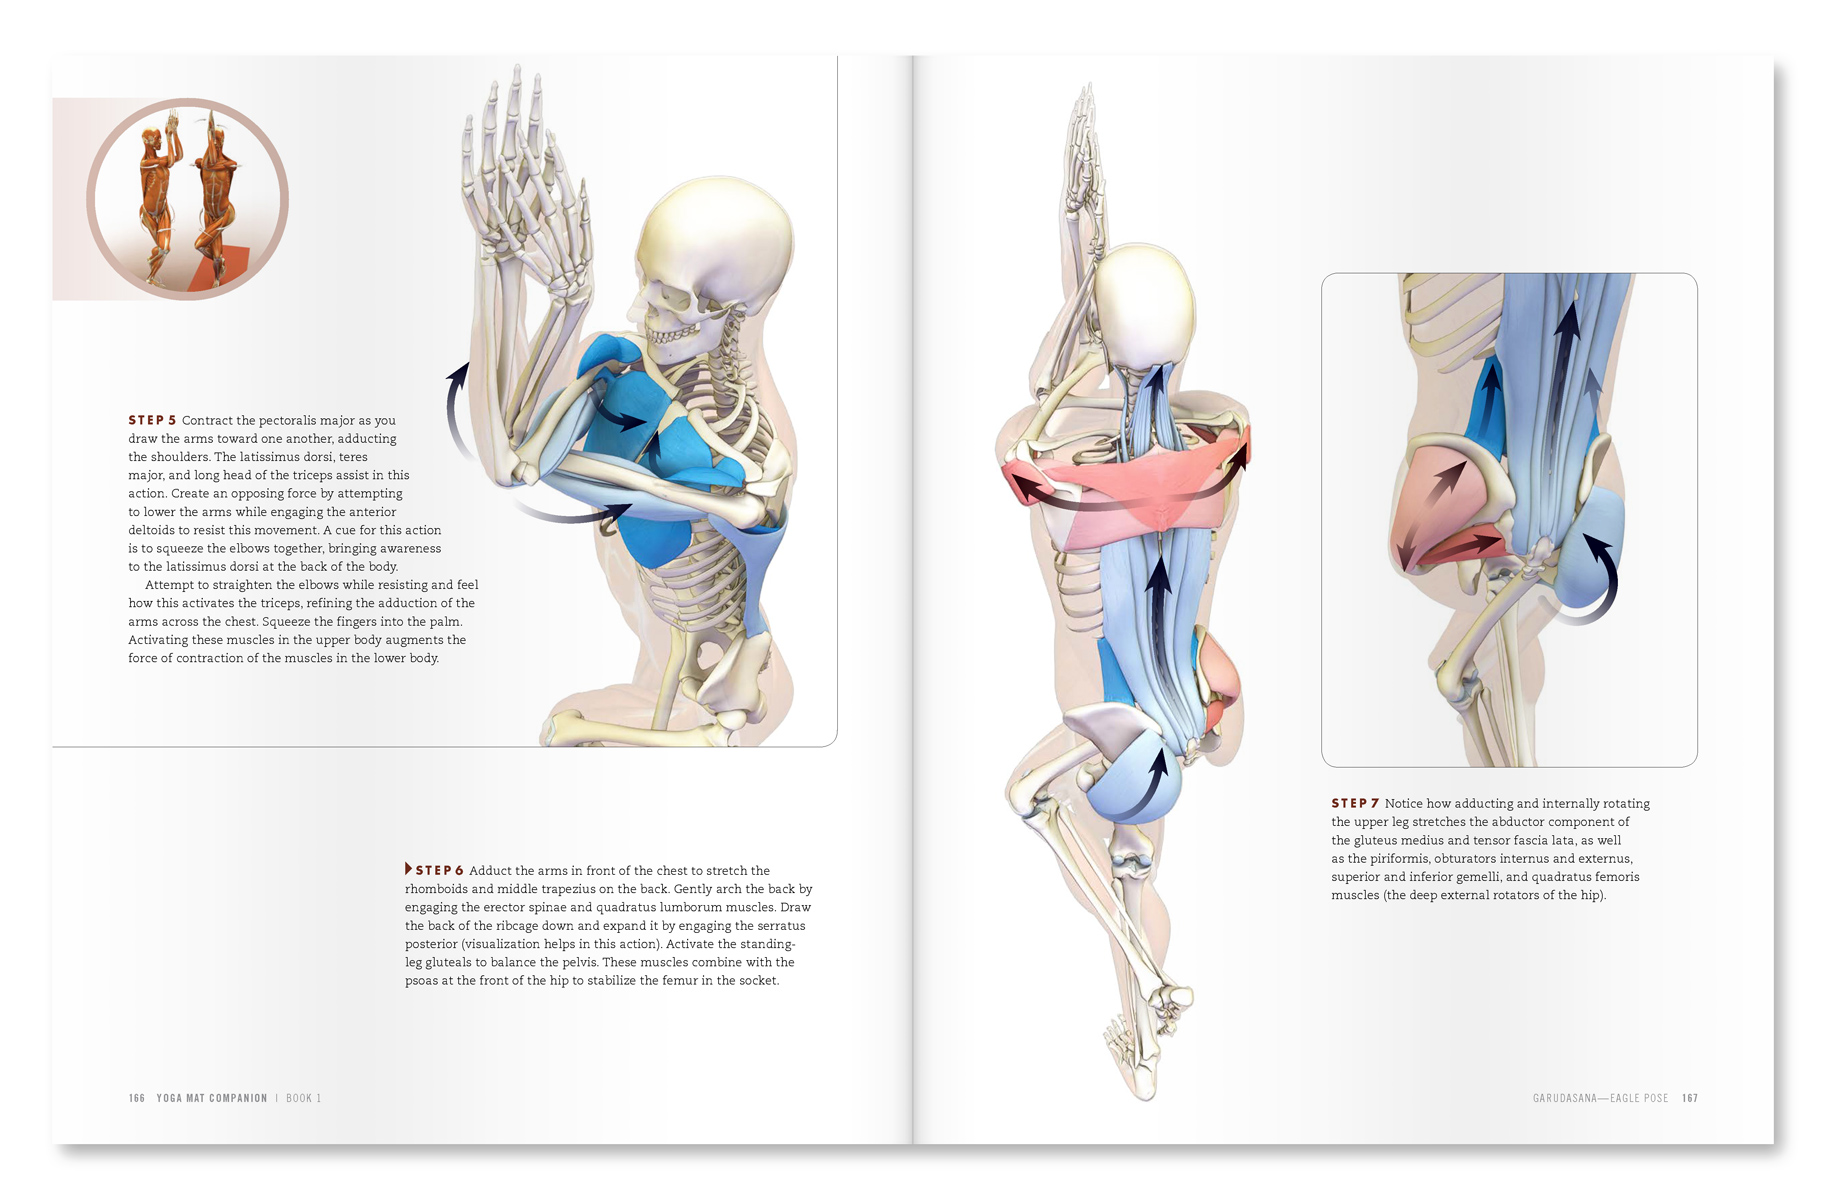
Muscles have evolved so that when they engage they not only move the joint but also stabilize it, maximizing joint congruency. Our books are designed to enhance the visual experience of this process for the reader. We use carefully designed vivid images that stimulate the visual cortex of the brain, in essence “lighting up” the muscles that are engaging in each part of the body during each pose. In fact, many practitioners say that they can actually “feel” the muscles when looking through the Key Muscles and Key Poses of Yoga. The Yoga Mat Companion series deepens this visual experience by illustrating each pose in a step-wise fashion. This visual experience then translates to improvement in your asanas. Click here to page through all of our books.
 |
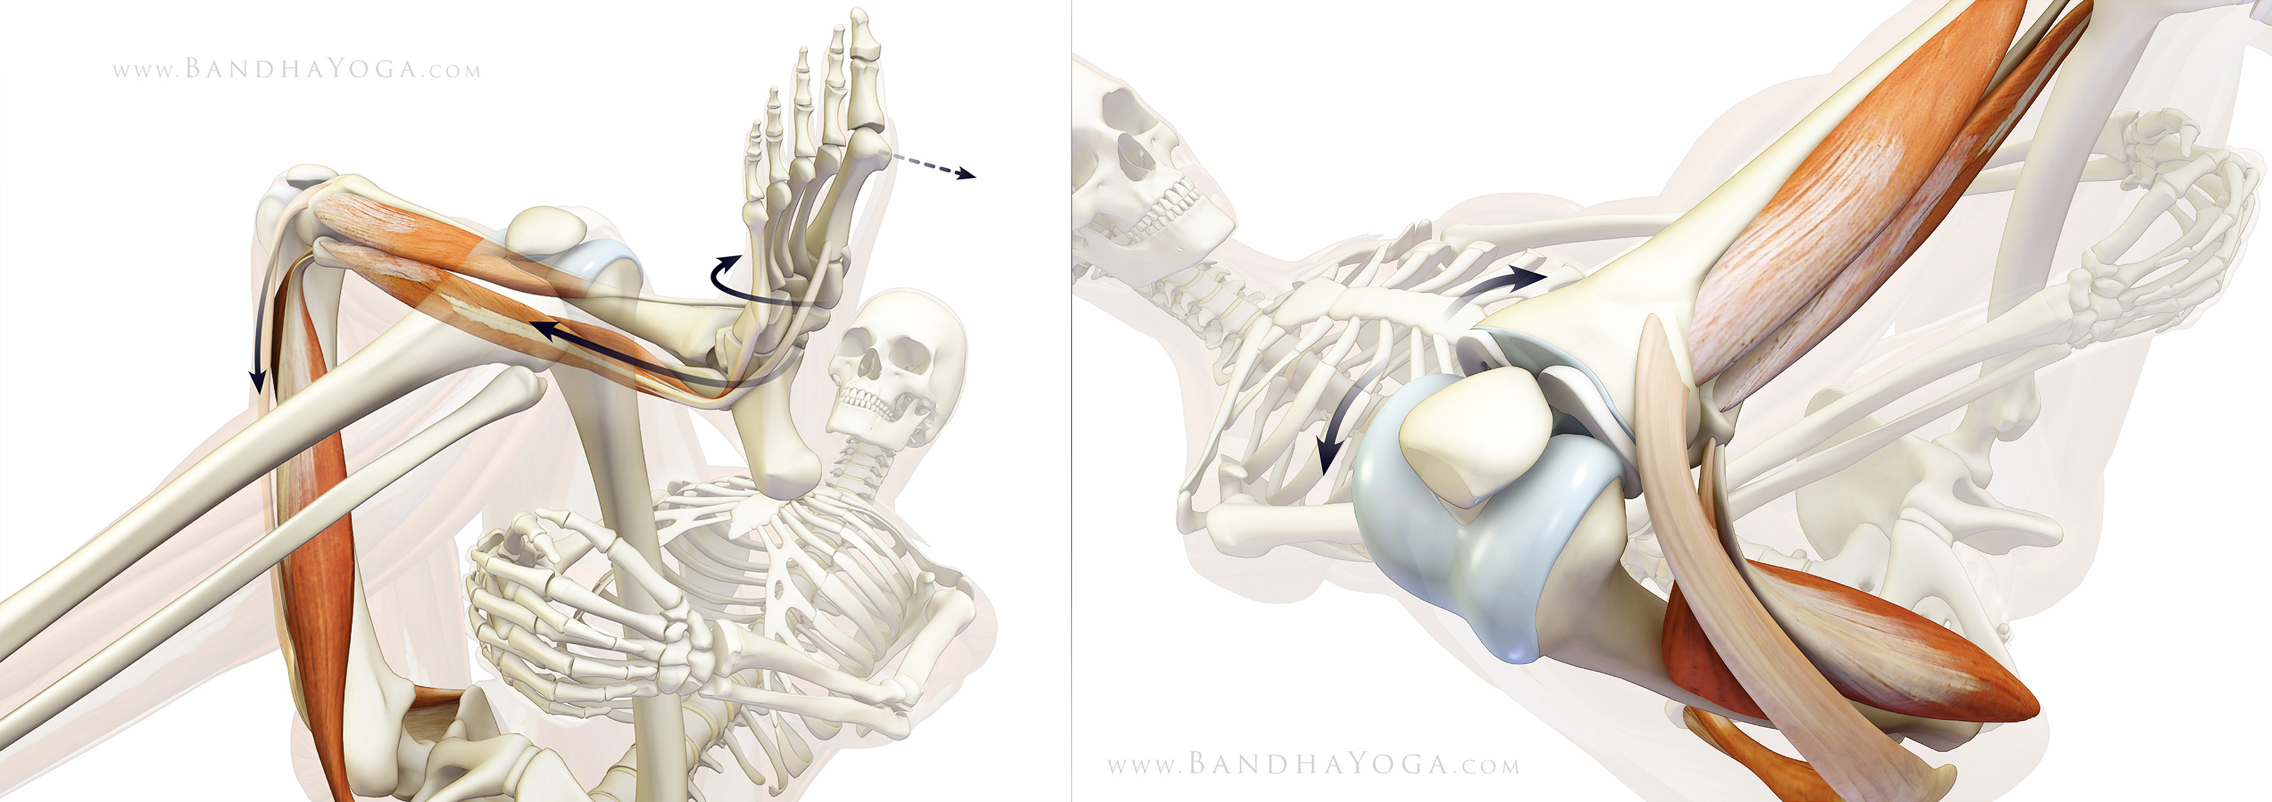
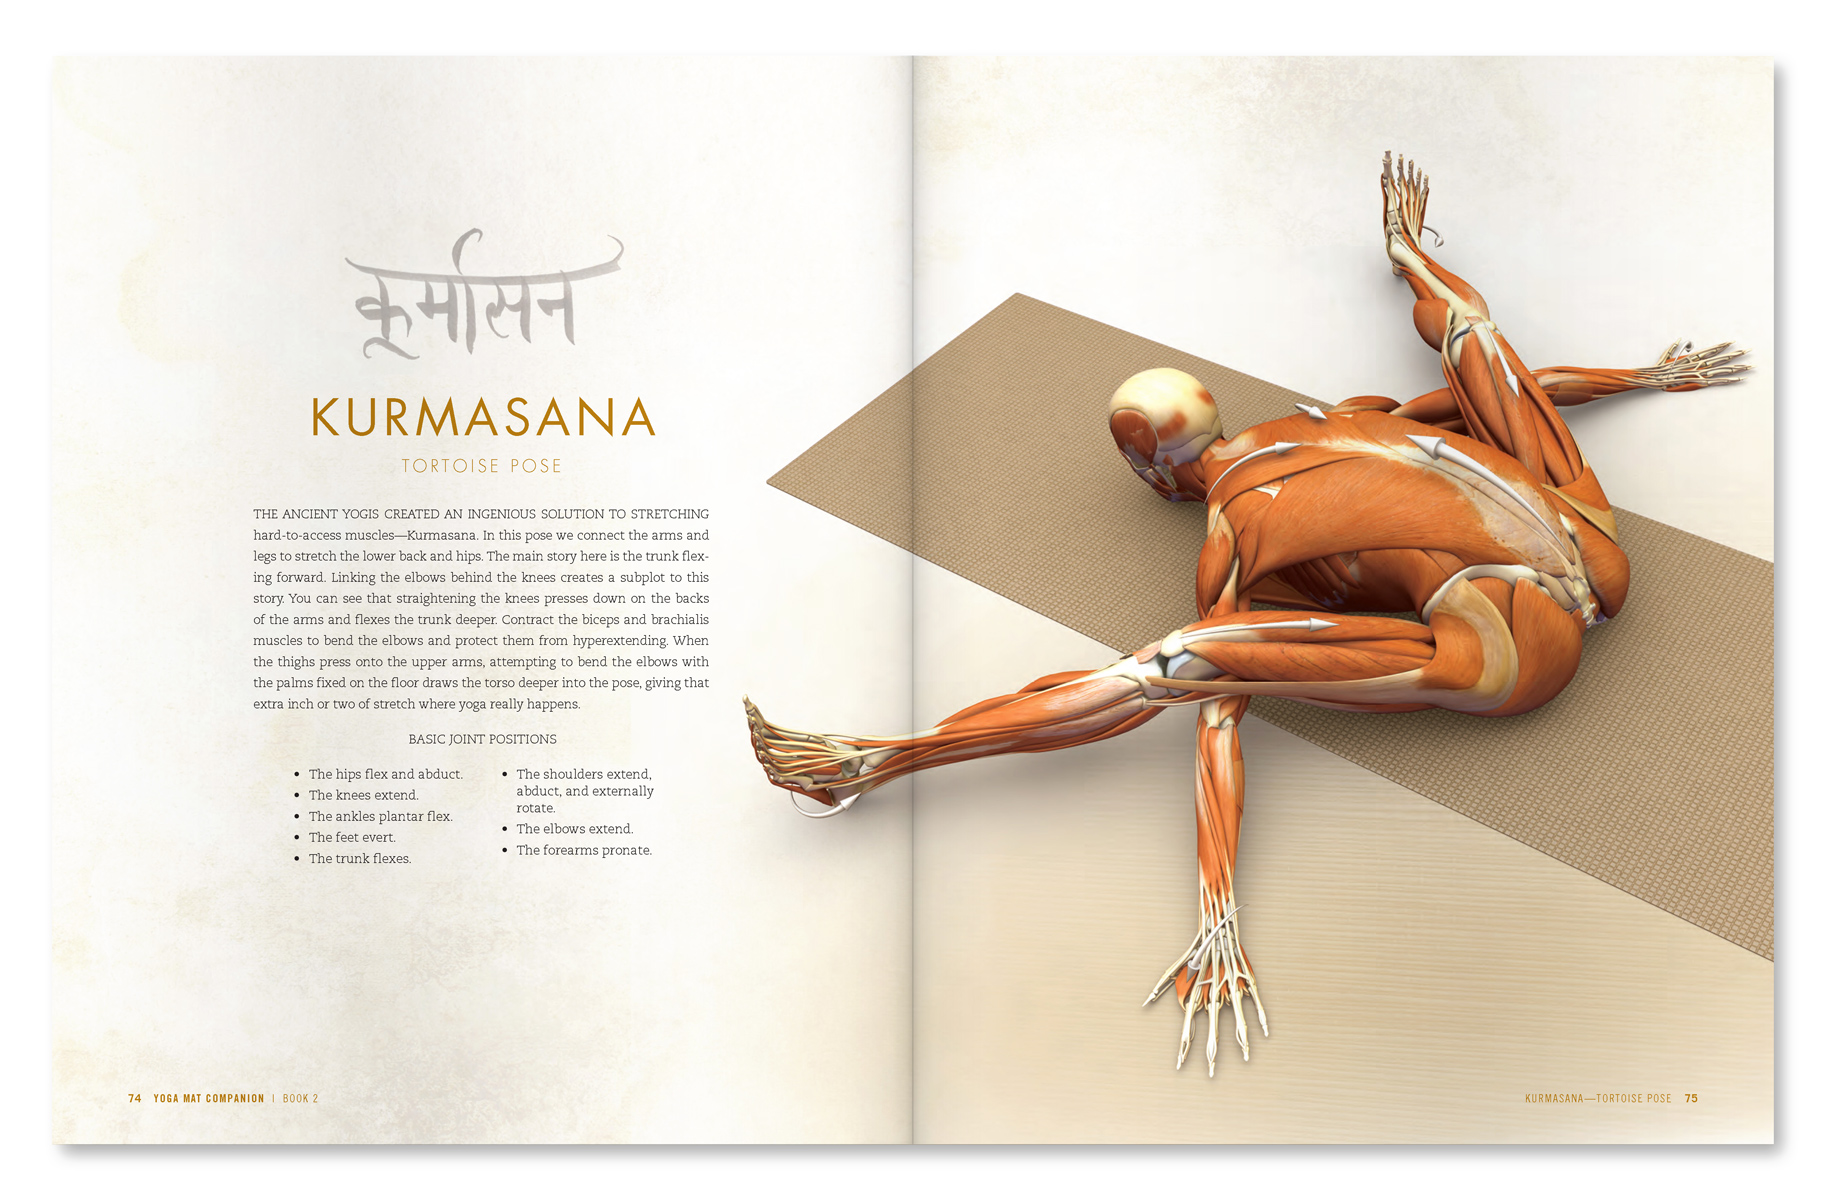
| An excerpt from "Yoga Mat Companion 4 - Anatomy for Arm Balances and Inversions". |
 |
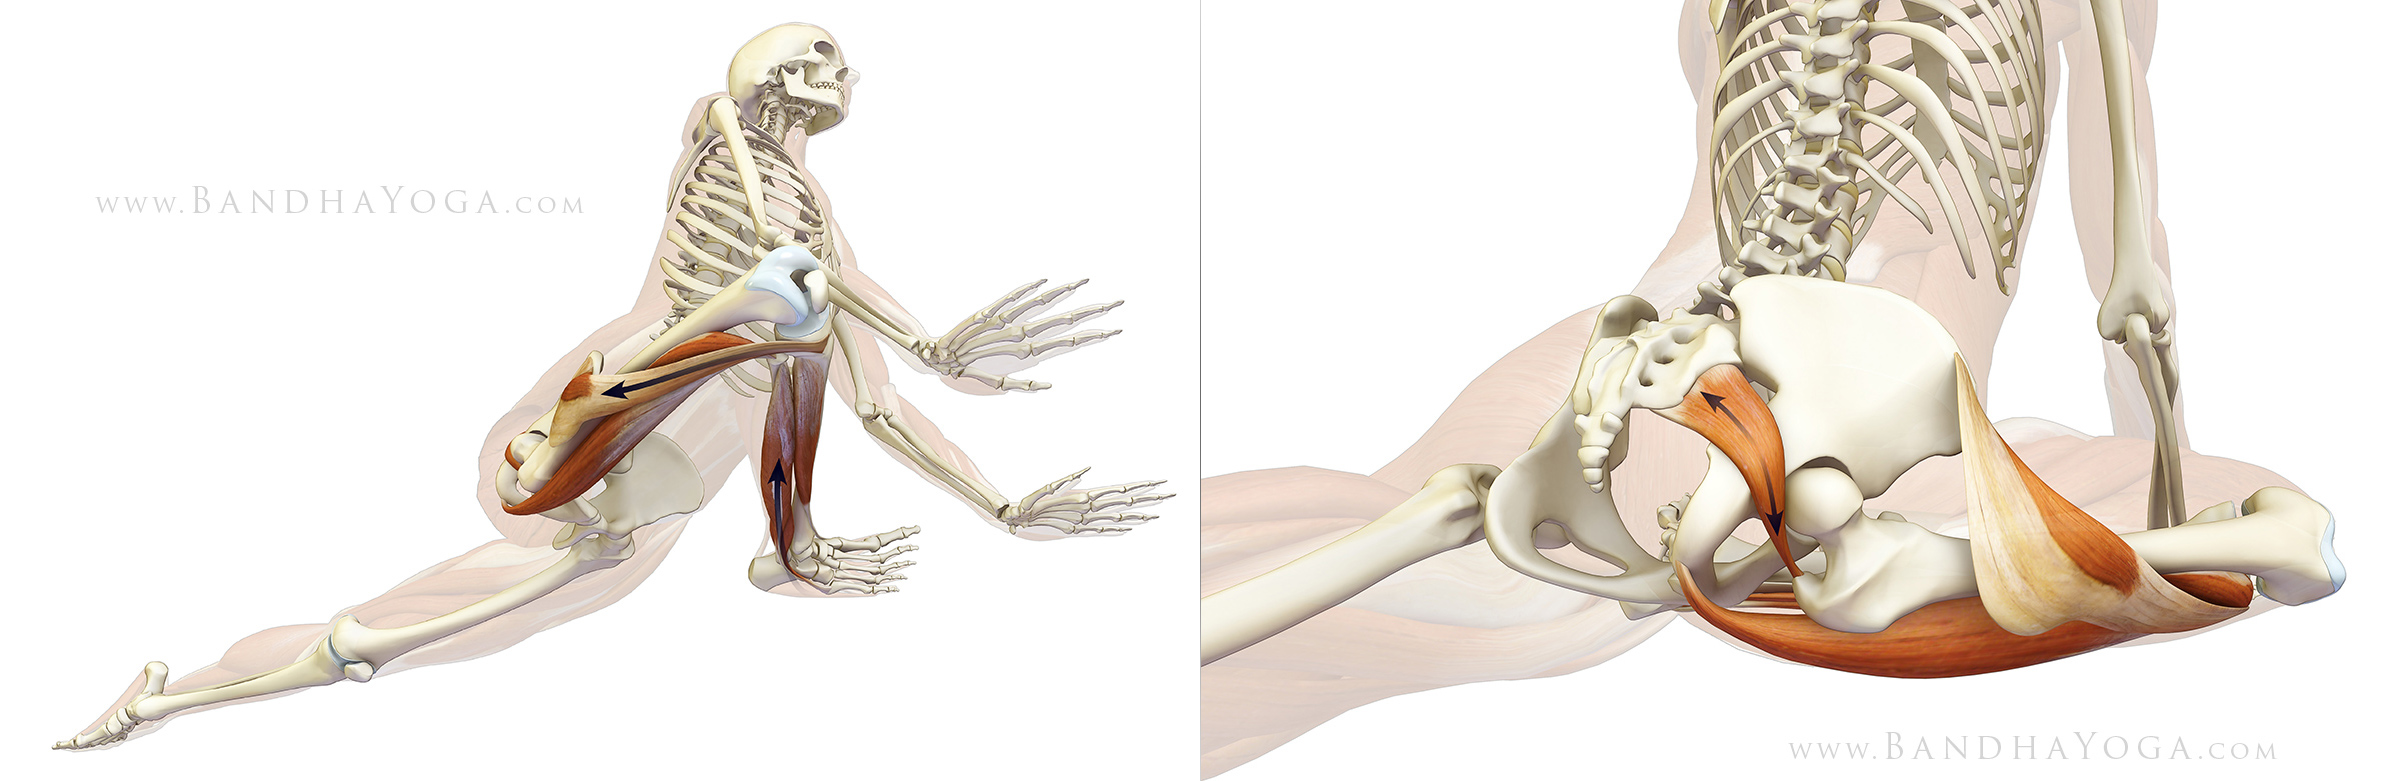
| An excerpt from "Yoga Mat Companion 2 - Anatomy for Hip Openers and Forward Bends". |
Thanks for stopping by. Be sure to tune in this week for our next post. Also, many thanks for your support by sharing us on Facebook, Twitter and Google Plus.
Namaste’
Ray and Chris