Update on Forearm Plank:
One of my goals in reviewing the scientific literature is to identify information that can be translated into a practical cues that you can integrate into your practice. With this in mind, I want to call your attention to a new study from the
Journal of Strength and Conditioning Research.
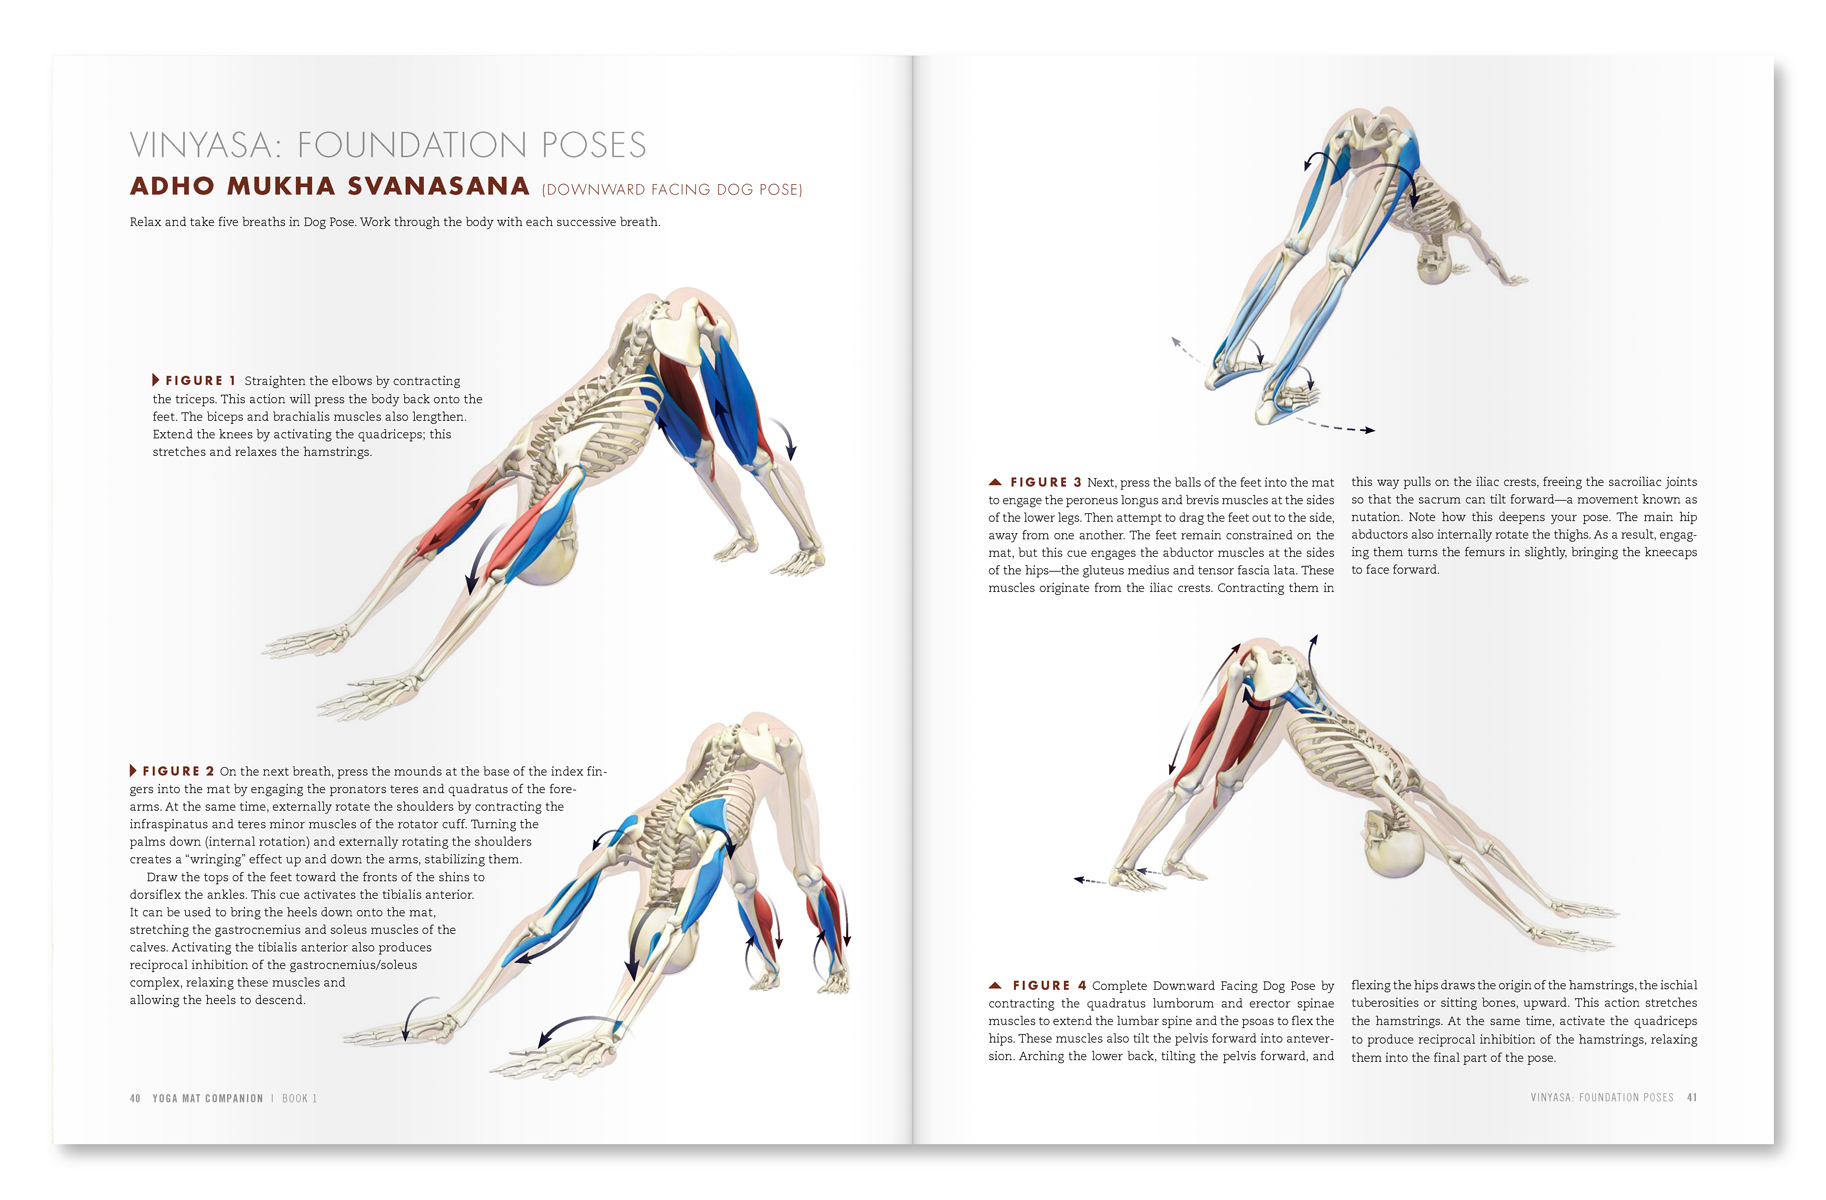
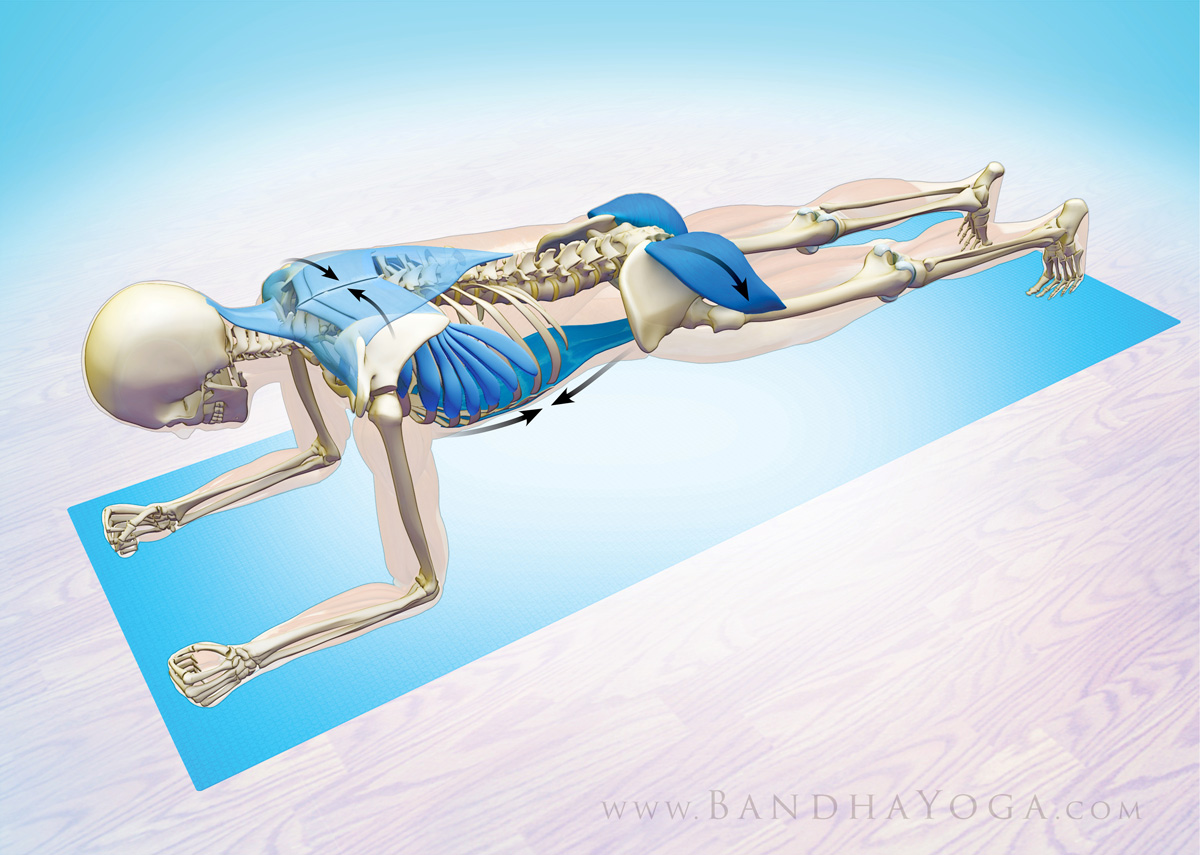
The investigators showed that drawing the shoulder blades (scapulae) towards the midline (adducting) and tilting the pelvis back and down (retroverting) resulted in greater activation of the rectus abdominis, external oblique, internal oblique and erector spinae muscles.
Figure 1 shows you the muscles involved in this cue. Engage your rhomboids and middle trapezius to draw your shoulder blades towards the midline. At the same time, engage your glutes and rectus abdominis to retrovert the pelvis. Take a look below at how this fits in with the other cues for forearm plank that I describe below on connecting your cuff to your core!
 |
| Figure 1: Adducting the shoulder blades and tilting the pelvis helps to activate your core. |
Your wrists are not an area where you want to “work through pain”...
Scientific studies have demonstrated that having a strong core can improve the efficiency of your rotator cuff. A strong and efficient rotator cuff leads to improved stability of your shoulder girdle. This decreases load transfer to your wrists in poses where you bear weight on the hands (like arm balances, Dog Pose and Chaturanga).
Conversely, if your core is weak, or you don’t properly engage it in these types of poses, your cuff is less efficient and your wrists have to bear more of the load. Practicing with imbalances of this nature can lead to a cycle that reinforces the imbalance and, ultimately, injury to the wrist (and shoulders).
The Sanskrit term “Ahimsa” means nonviolence or reducing harm (translation from Nicolai Bachman’s book “The Language of Yoga”). While this term is often used in relation to social ethics, it also applies to how we work with the body.
Reducing the risk of harm to your wrists (and other joints) can include decreasing the frequency and duration of poses that load the wrists and correcting imbalances in the postures. If you have developed wrist pain, you should consult a trained medical professional and work under their guidance. Managing wrist pain almost always includes a period of time off and resting from weight bearing poses, usually combined with some light wrist mobility exercises.
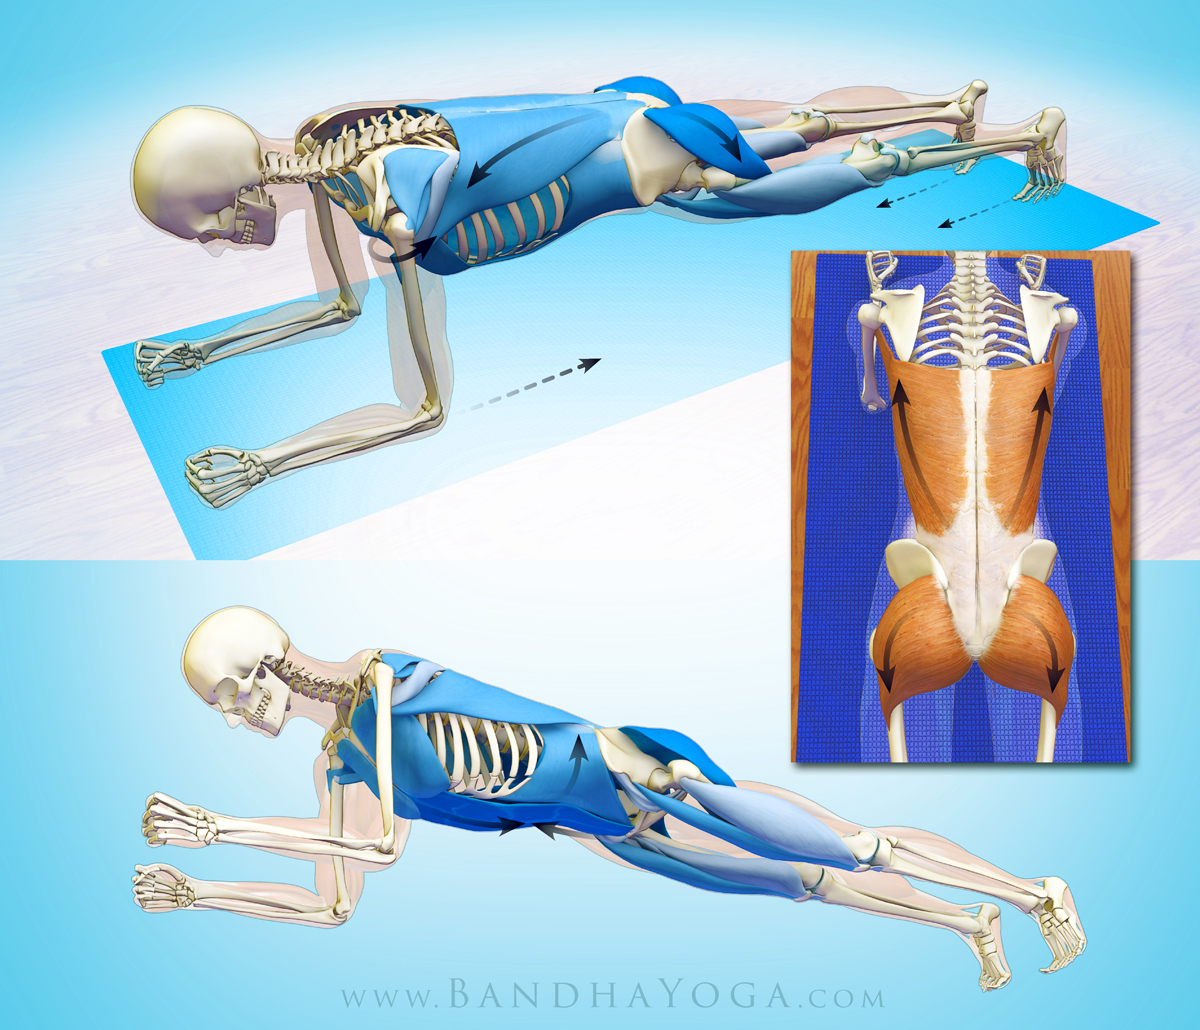
In the interim, I’ve found that Hard Style Plank Pose is a great pose to work on. That’s because it’s awesome for strengthening the core and addressing the underlying imbalance and it doesn’t involve weight bearing on the wrist. Figure 1 illustrates this pose.
 |
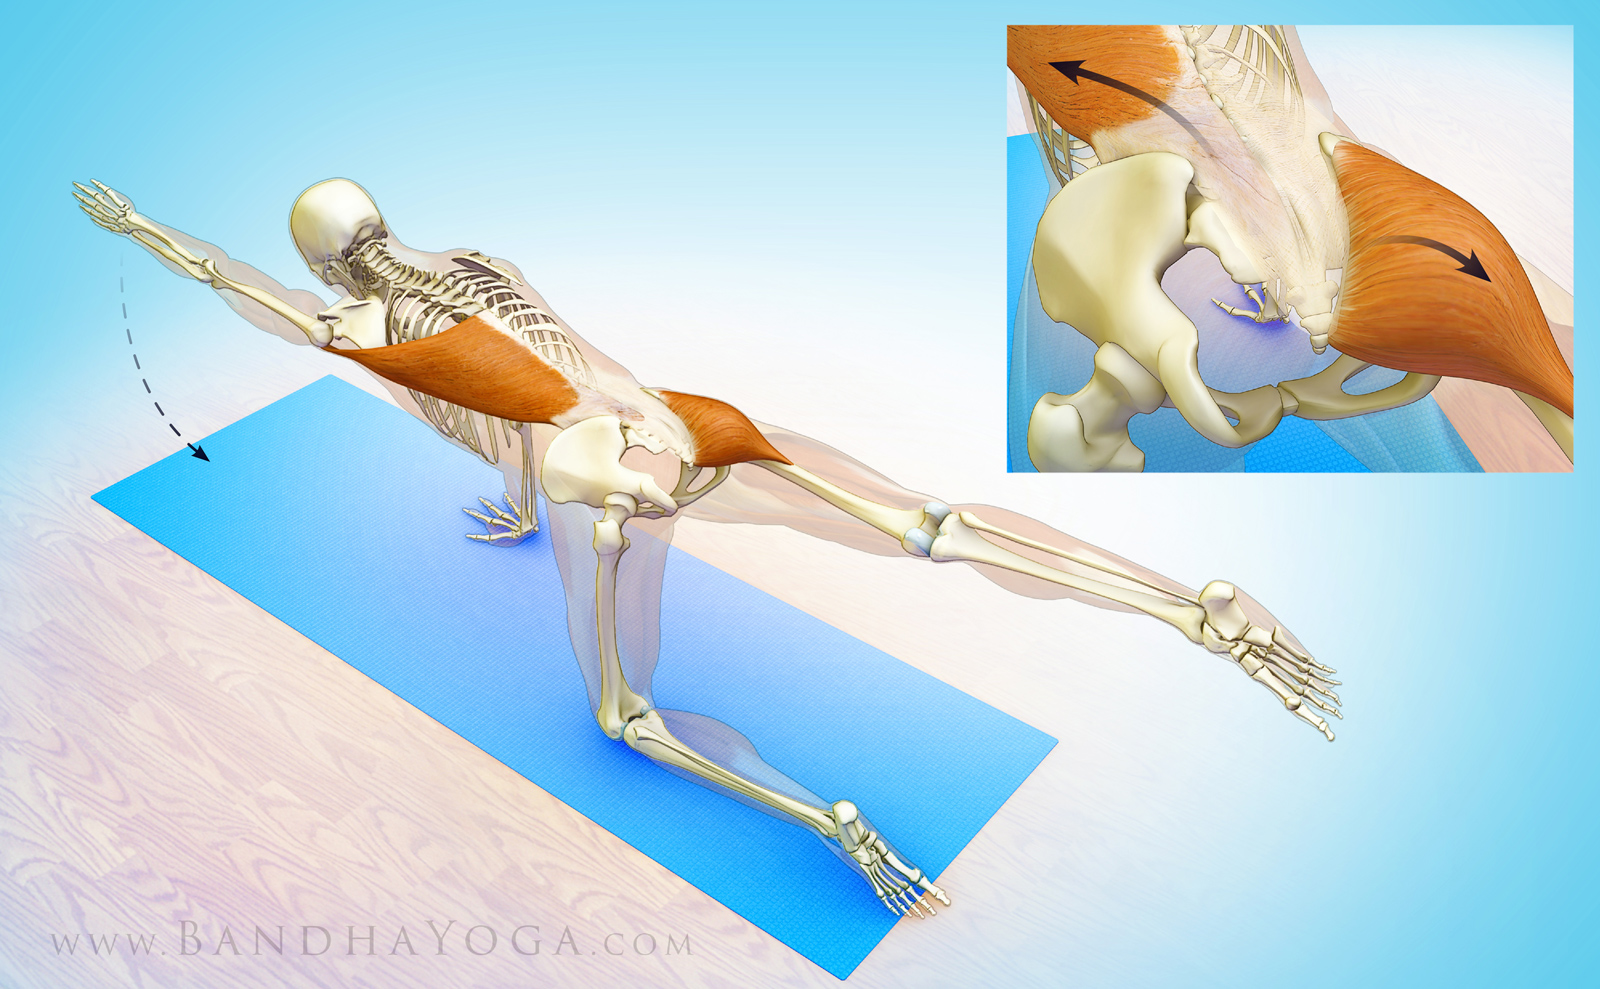
| Figure 2: Forearm Plank Pose with the posterior oblique myofascial subsystem. |
In Hard Style Plank, your weight is on your forearms, with the upper arm bones (the humerus) perpendicular to the floor (in Chaturanga, they are parallel to the floor). Clench your fists to strengthen the muscles that cross the wrists. Then press your forearms into the mat and gently attempt to internally rotate the shoulders. Your forearms are fixed on the mat and don’t actually move. Next, co-contract the external rotators of your shoulders by attempting to externally rotate them. The cue for this is to pretend that your forearms are like windshield wipers that are fixed in place. This co-contracts the subscapularis, infraspinatus and teres minor muscles of the cuff and connects them to your core. Finally, engage the lats and attempt to drag the forearms towards the feet while, at the same time, contracting your abs and gluts. Hold for five to ten seconds and repeat two times. Remember to breathe!
Figure 1 above illustrates the muscles involved here, with color-coding according to the strength of your engagement. Check out the posterior oblique subsystem of the lats, thoraco-lumbar fascia and gluts. Engaging this connection helps stabilize the SI joint. Click here for info and illustrations of side forearm plank and the another myofascial subsystem. Click here and here for more on the gluts and abs connection and the lumbar spine in Chaturanga.
As an aside, soaking your wrists in ice water between sessions of injuring them is a lousy solution; it doesn’t address the underlying imbalances and can lead to more injury. You have to dedicate time off from weight bearing to let your wrists heal, not to the “practice” of injuring them.
Thanks for stopping by--I hope you're enjoying learning about biomechanical concepts like the force couple. Stay tuned for the next post when I'll go over the hamstring connection to the pelvis and lumbar. Click here to browse through the Bandha Yoga book series on anatomy, biomechanics and physiology for yoga.
All the Best,
Ray Long, MD


 Your Rotator Cuff
 Your Piriformis Muscle
 Downward Dog Pose
 Warrior I
 Your Hamstrings
 Your Psoas
 Your Gluteus Medius