Working with the muscular stabilizers surrounding the individual joints is a central tenet of both injury prevention and rehabilitation. In this blog post we illustrate how to work with myofascial connections to protect your knee in Pigeon and Reclining Pigeon pose.
Let’s begin with an experience I had at one of my recent workshops in helping a student recover from a yoga injury. One of the participants mentioned to me that he had sprained his knee a couple of weeks before while overdoing it in Pigeon pose. I examined him and concluded he had a mild sprain. First, I told him to lose the neoprene sleeve he was wearing (which was doing nothing). Then we began working with the muscular stabilizers of the knee, in particular using a progressive series of postures that culminated in Lotus pose—all while paying close attention to engaging the muscles that provide dynamic stability to the knee joint. By the end of the workshop, his knee was completely pain free and felt normal. At which point he made an insightful comment: “injured my knee doing yoga wrong, healed it doing yoga right.” Put another way, “poses don’t injure people; doing poses incorrectly injures people—and doing them correctly heals.” With this in mind, let’s look at how to engage the muscular stabilizers and myofascial connections on the outside of the leg in Pigeon pose.
Here’s the cue…
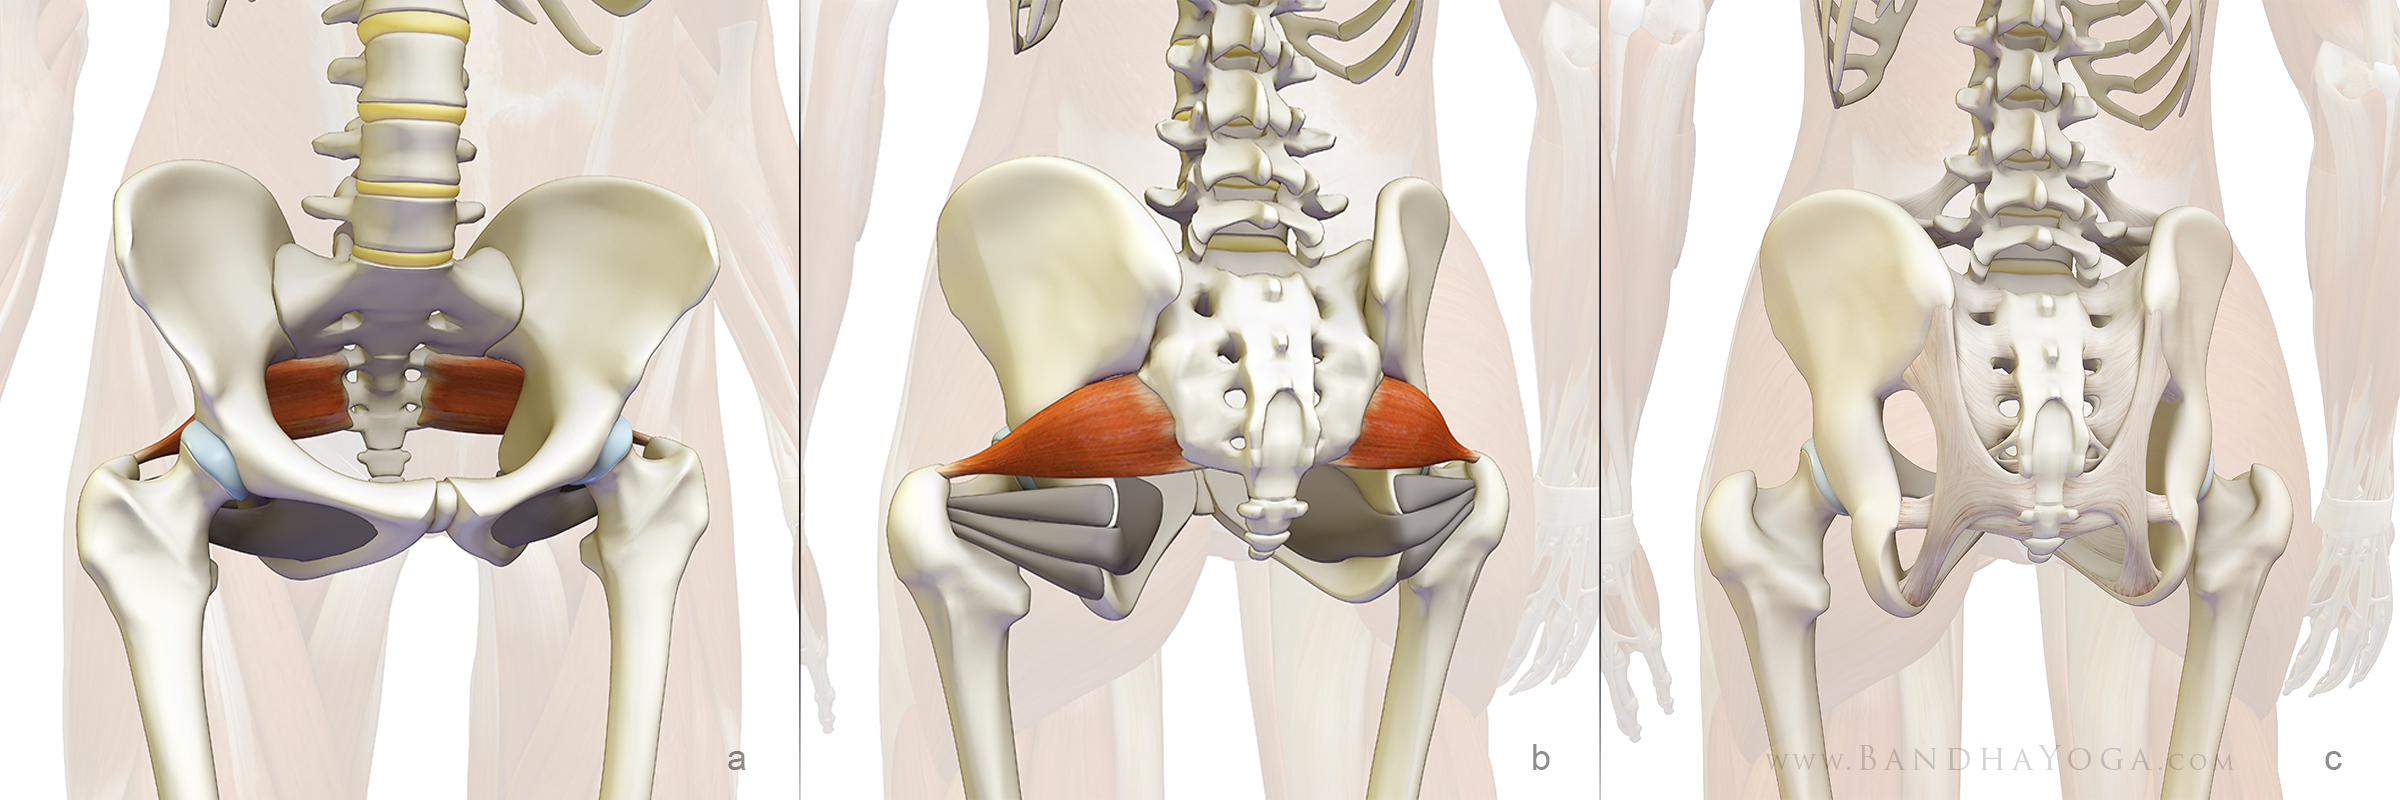
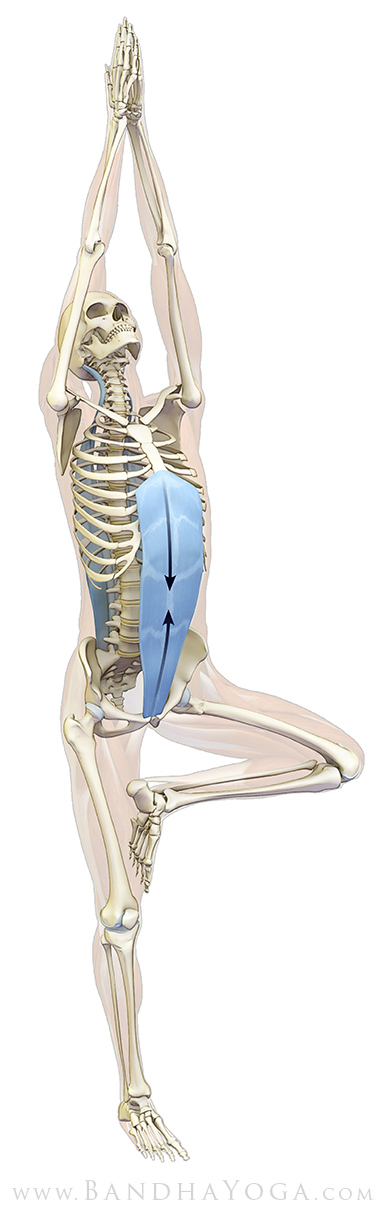
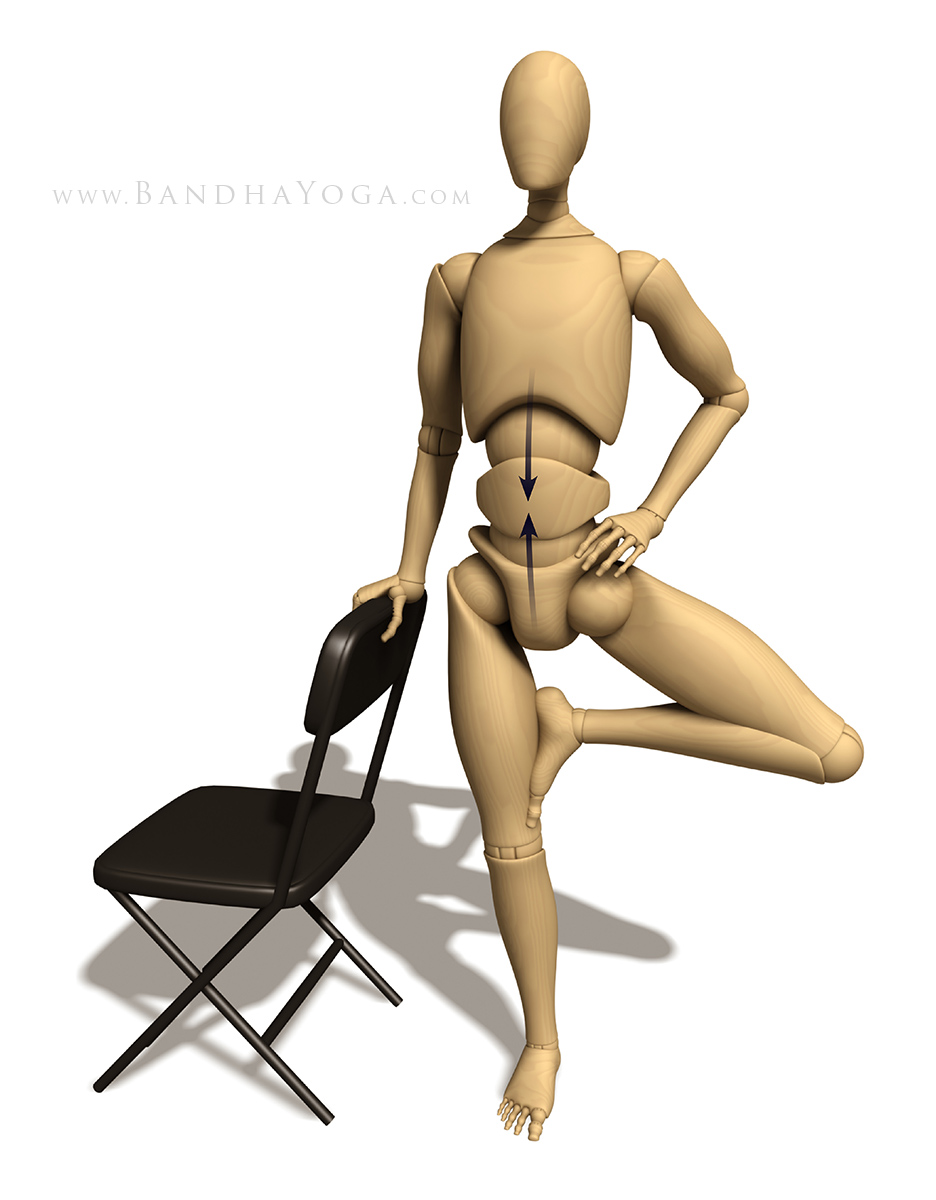
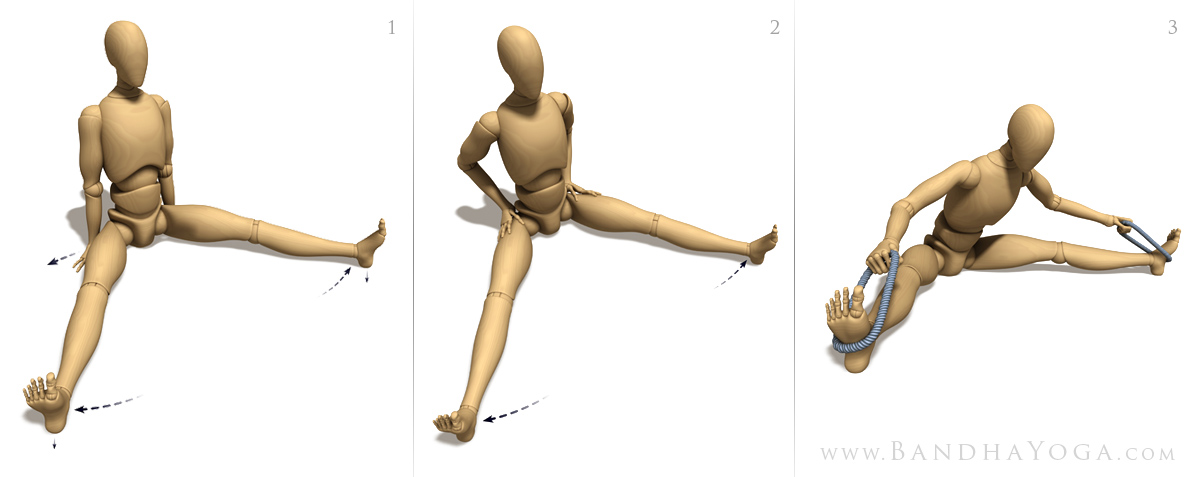
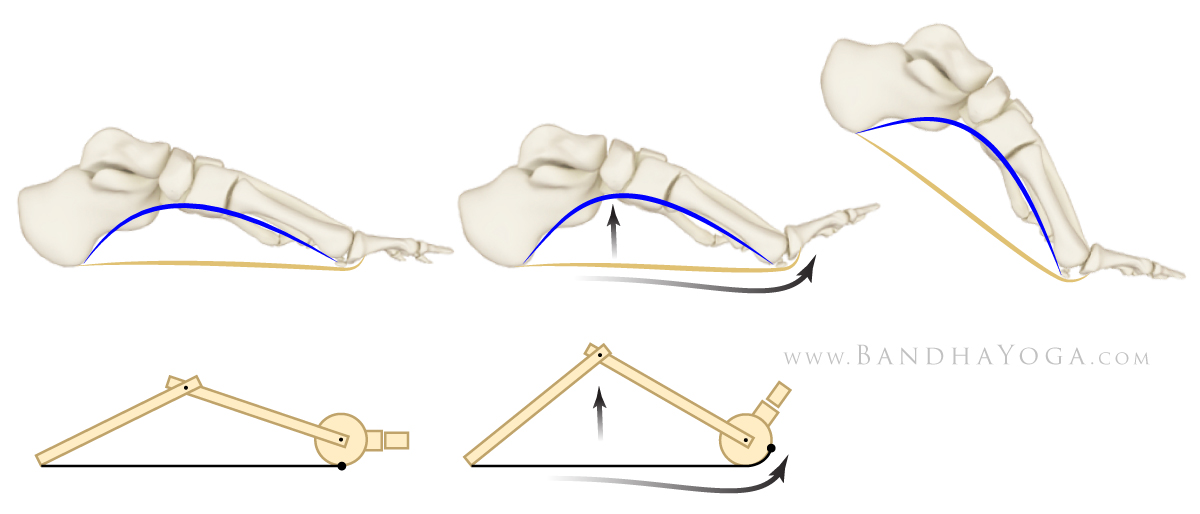
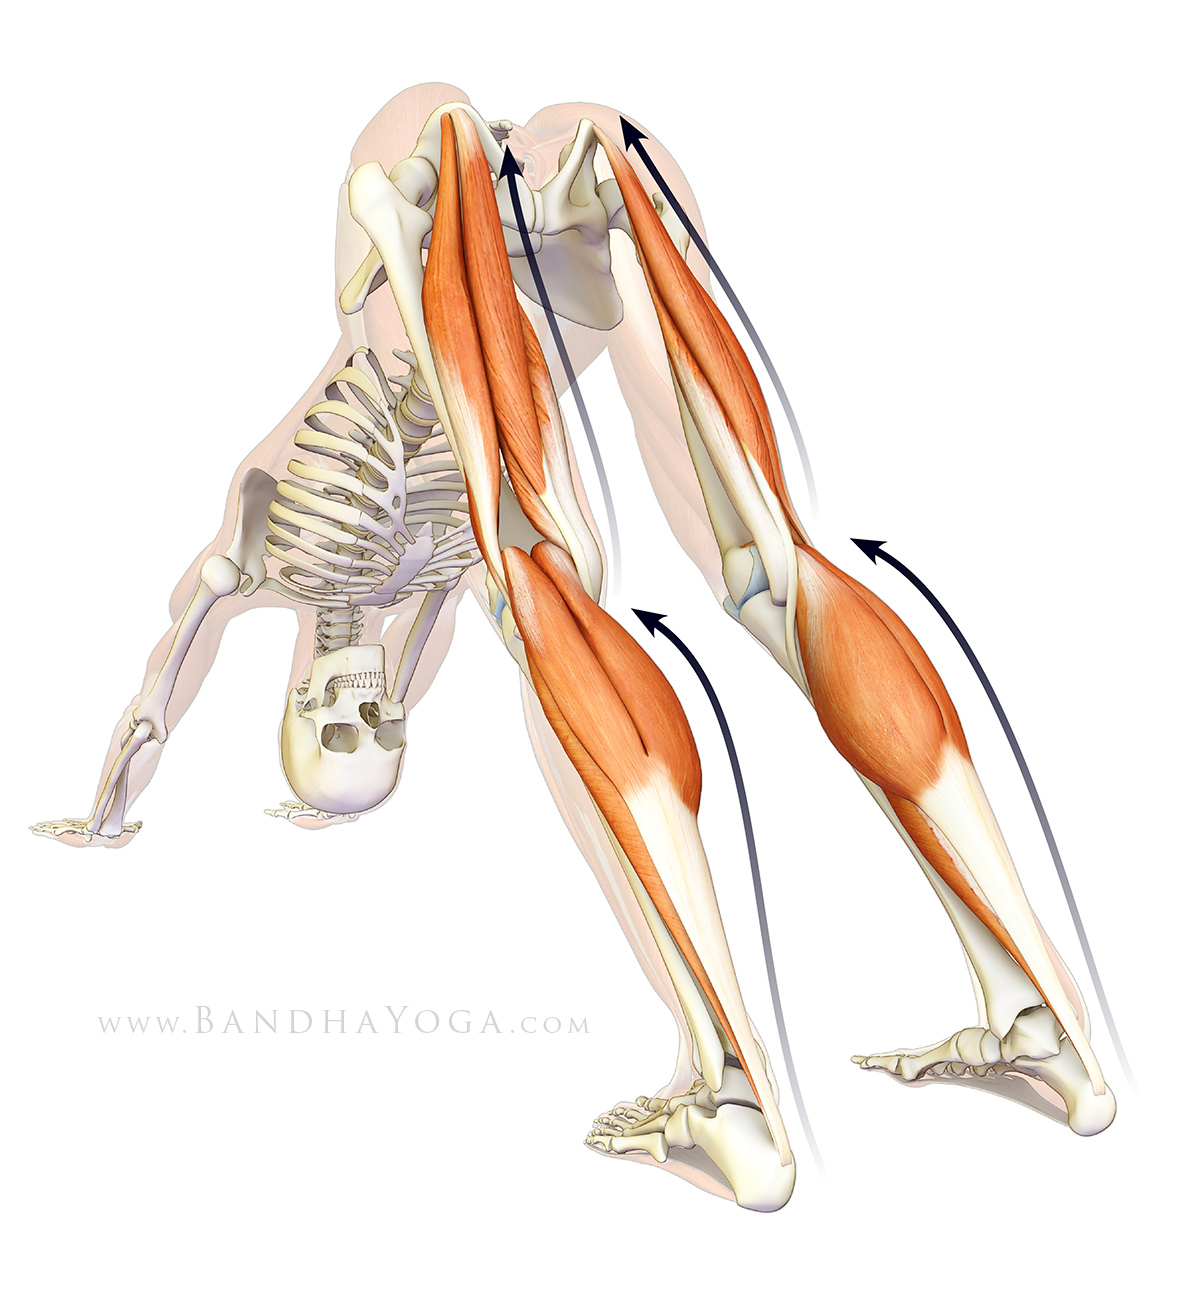
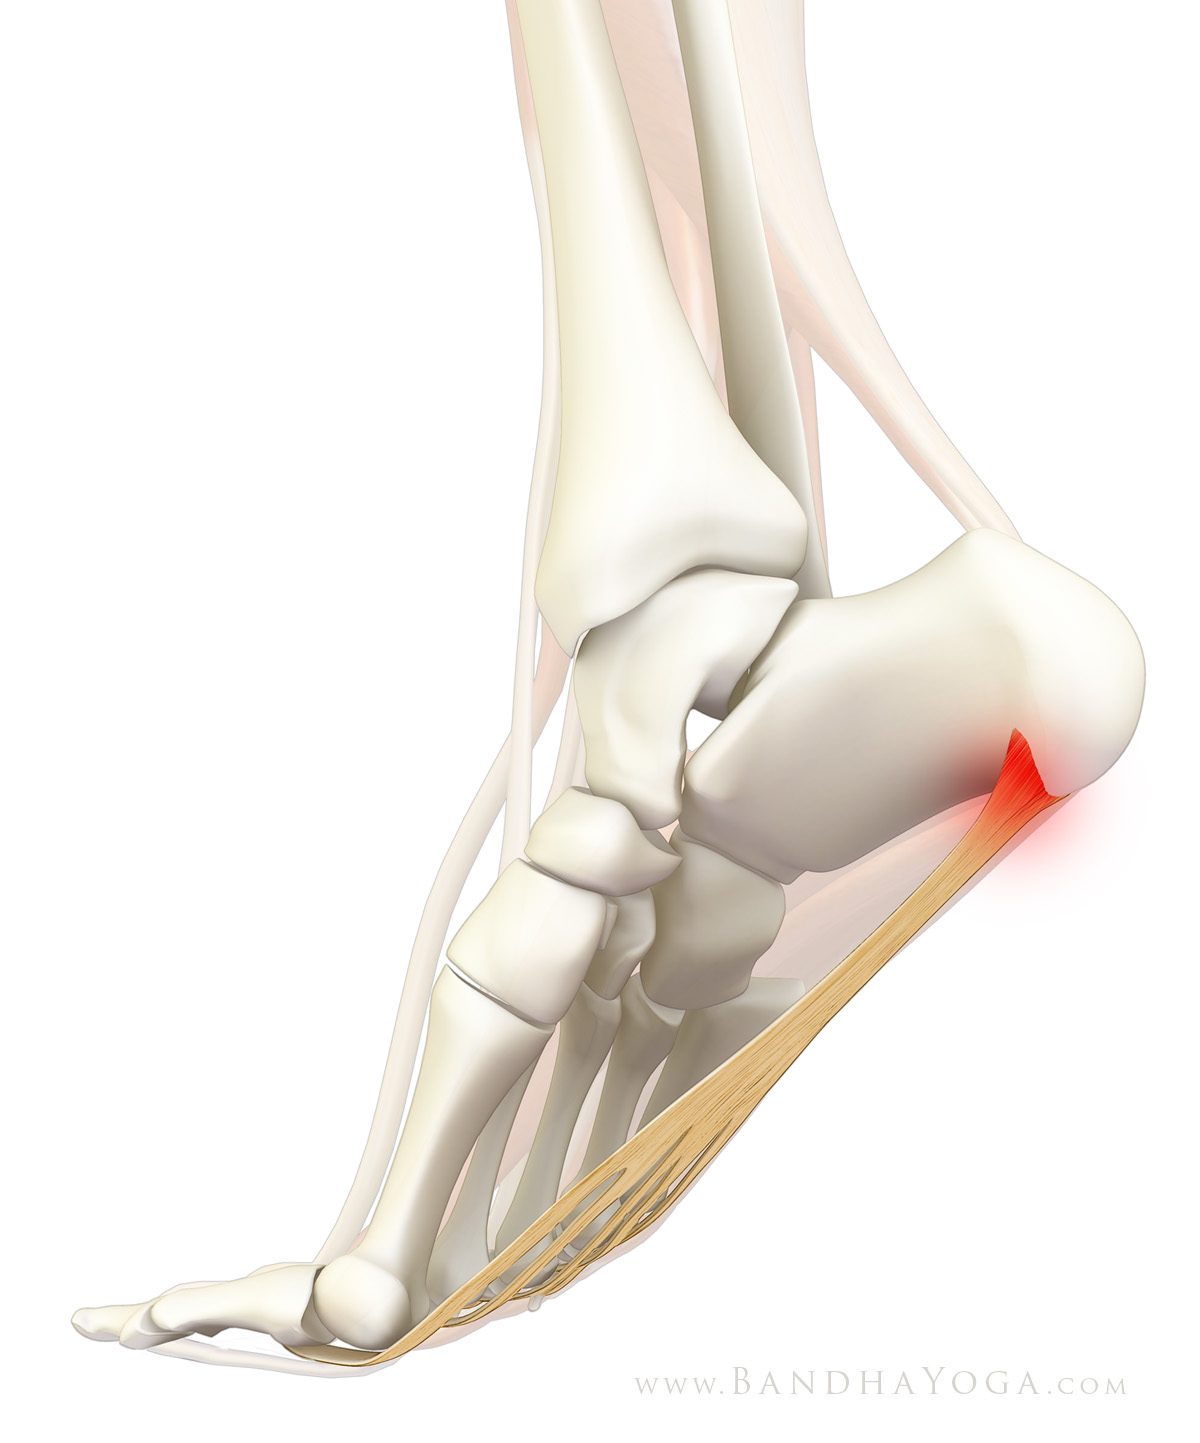
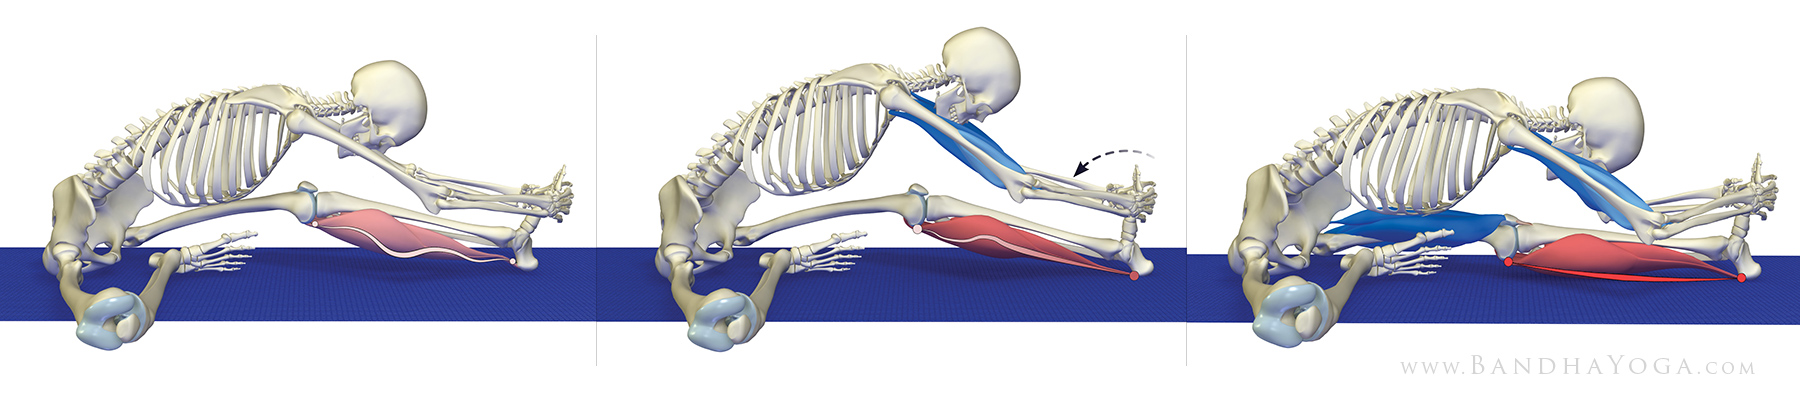
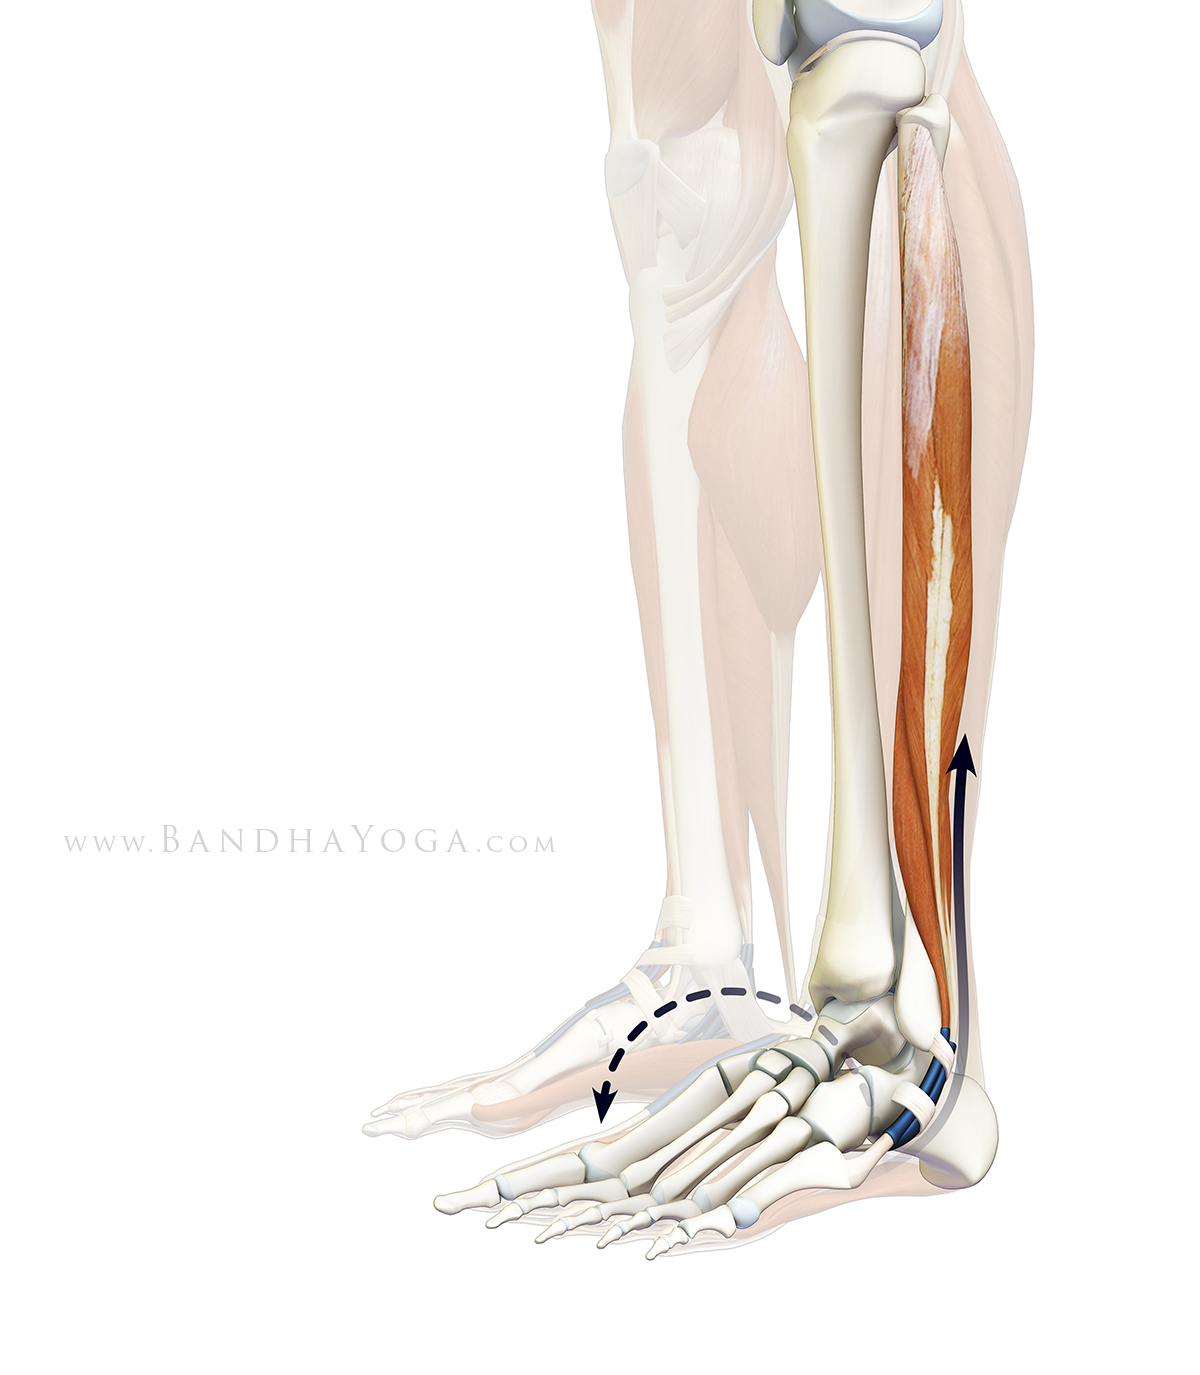
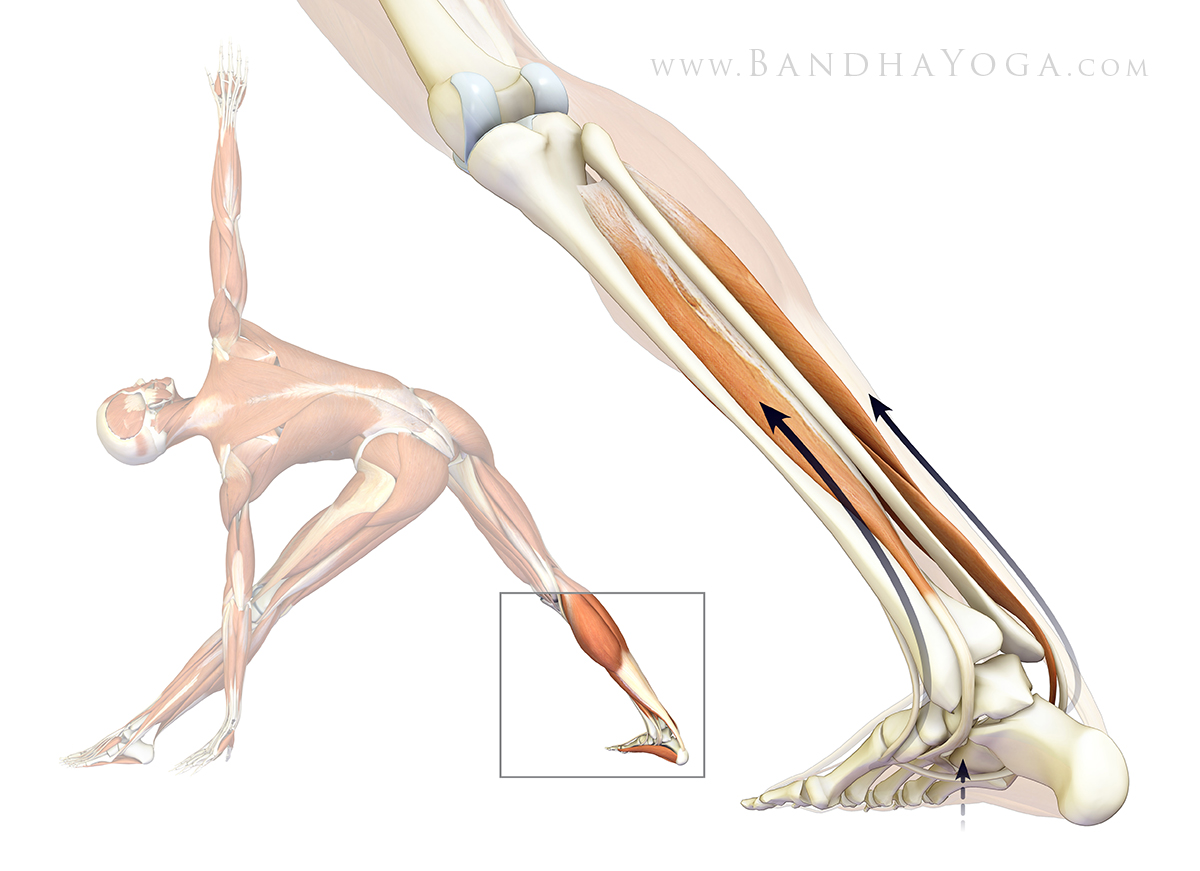
Maintain the ankle in a neutral or slightly dorsiflexed position, extend the toes and then press the ball of the foot forward (as shown). This engages the peroneus longus and brevis and tibialis anterior muscles of the lower leg, and activates a myofascial connection between these muscles and the TFL and biceps femoris muscles of the thigh. Slightly externally rotating the ankle activates the hamstrings on the lateral (outside) of the thigh. These actions create a type of dynamic “brace” on the outside of the leg, protecting the inside of the knee. Similarly, the outside of the knee is protected from overstretching. You can experience this opening on the inside of the knee even while you are reading this by crossing one leg over the other and activating these cues.
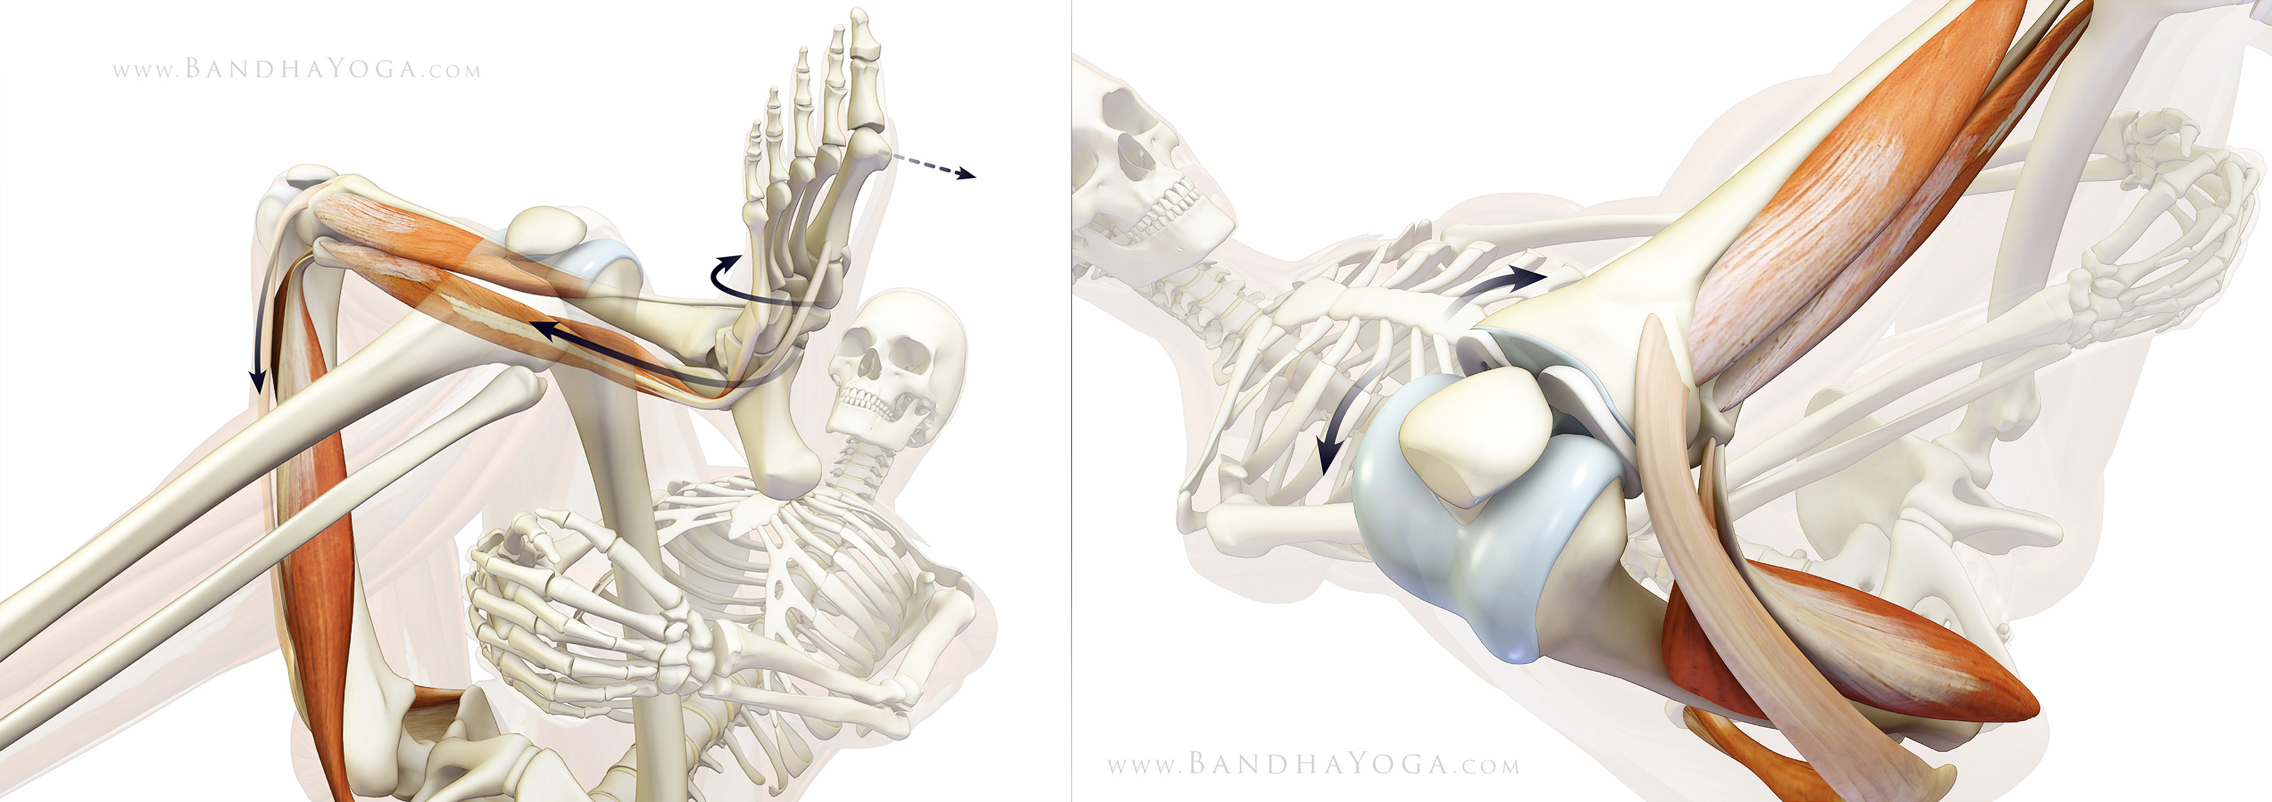 |
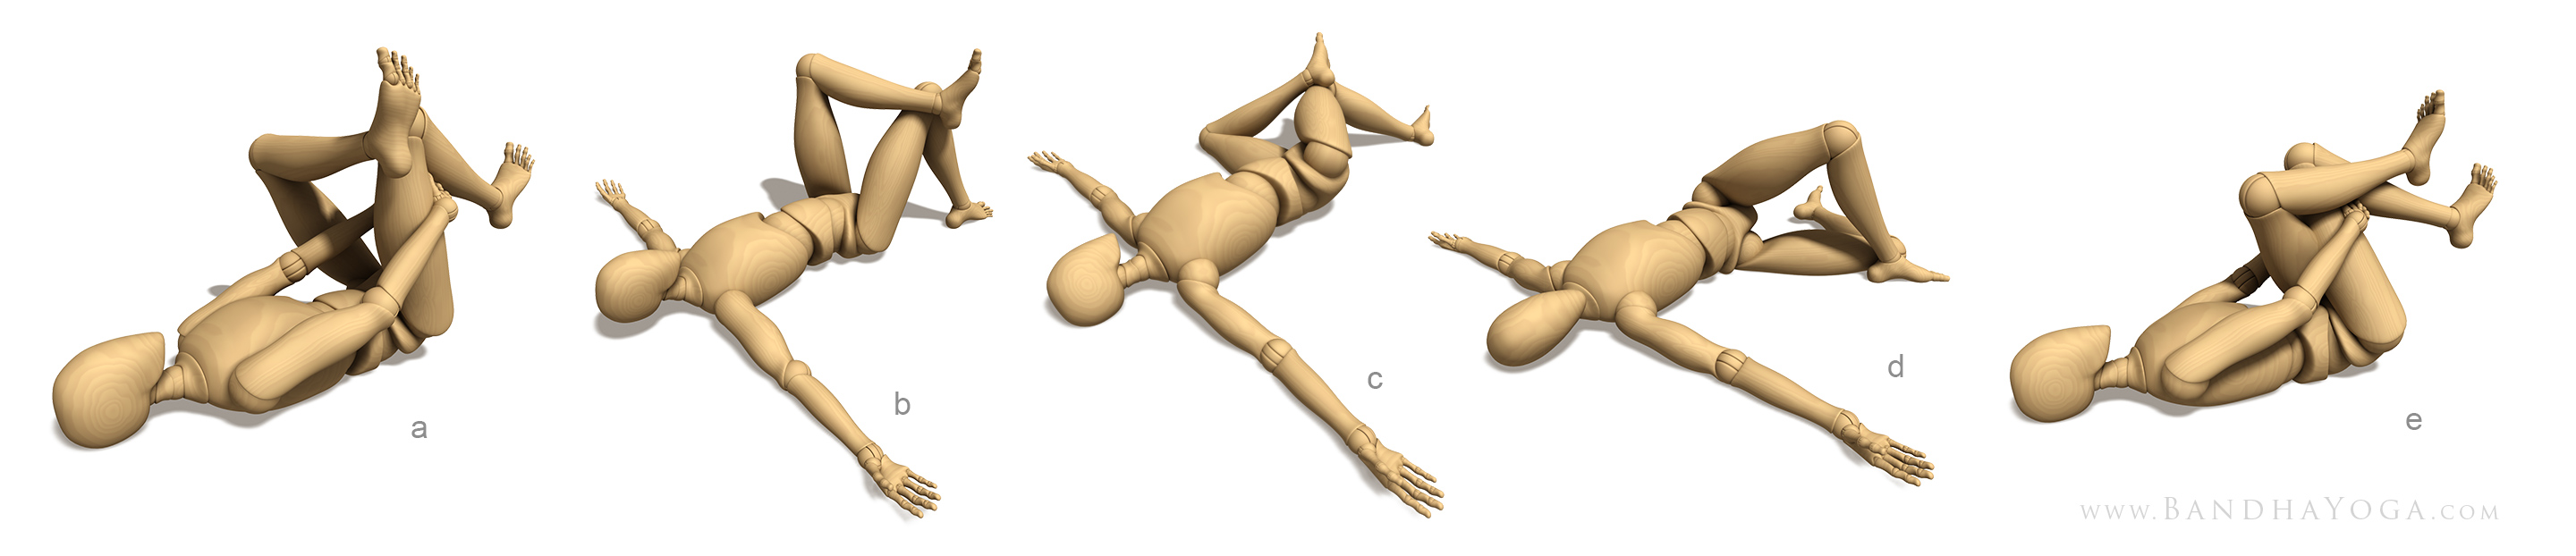
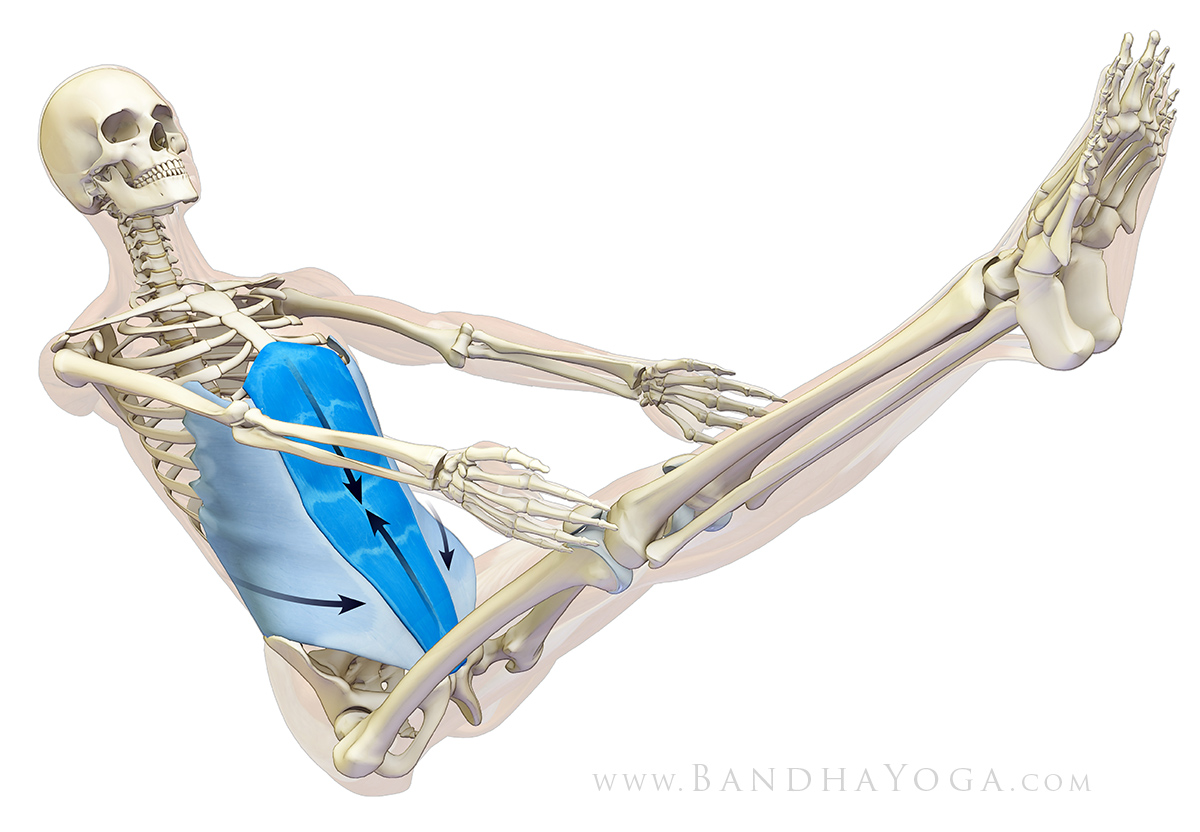
| Protecting the knee in Reverse Pigeon: Figure 1 (left) illustrates everting the ankle to access the muscles on the outside of the leg. Figure 2 (right) illustrates the opening on the inside of the knee. |
Figures 1 and 2 illustrate this cue for Reverse Pigeon and figures 3 and 4 for Pigeon Pose. Click here for an animated video of the piriformis muscle in Reverse Pigeon pose and click here for an animated video that illustrates joint reaction forces and the beneficial effect of releasing the internal rotators for Lotus pose.
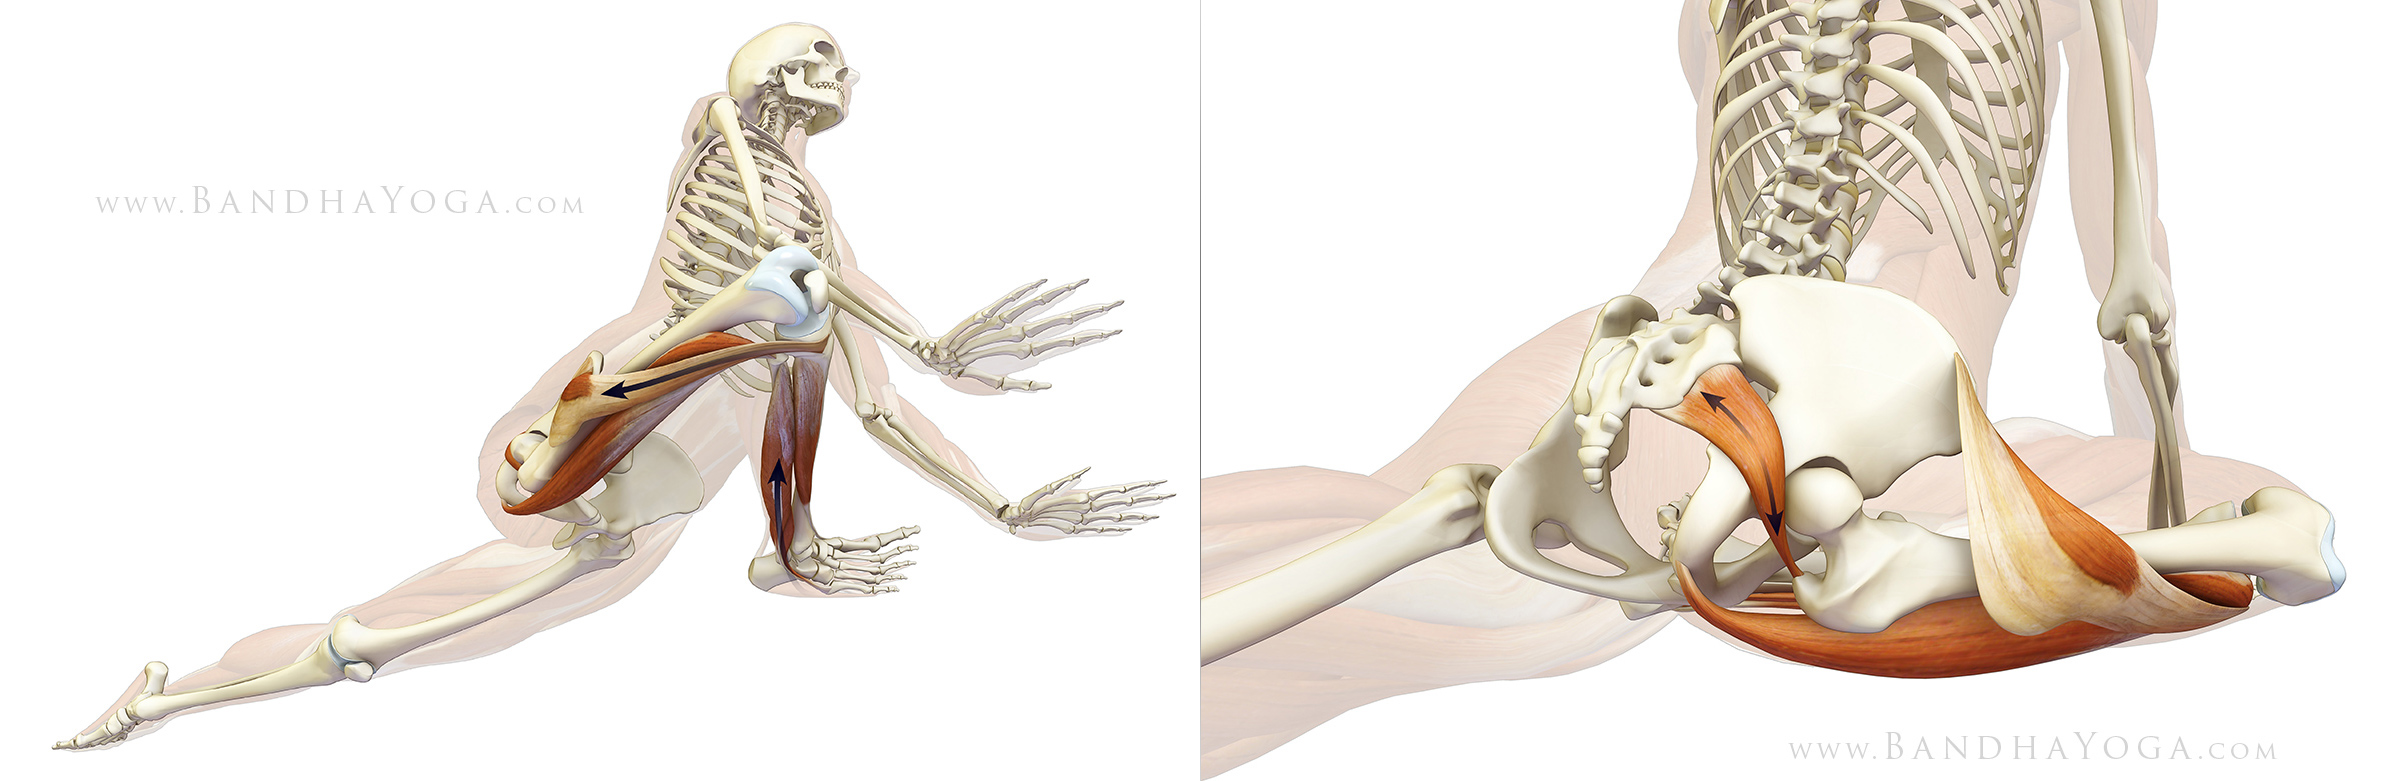 |
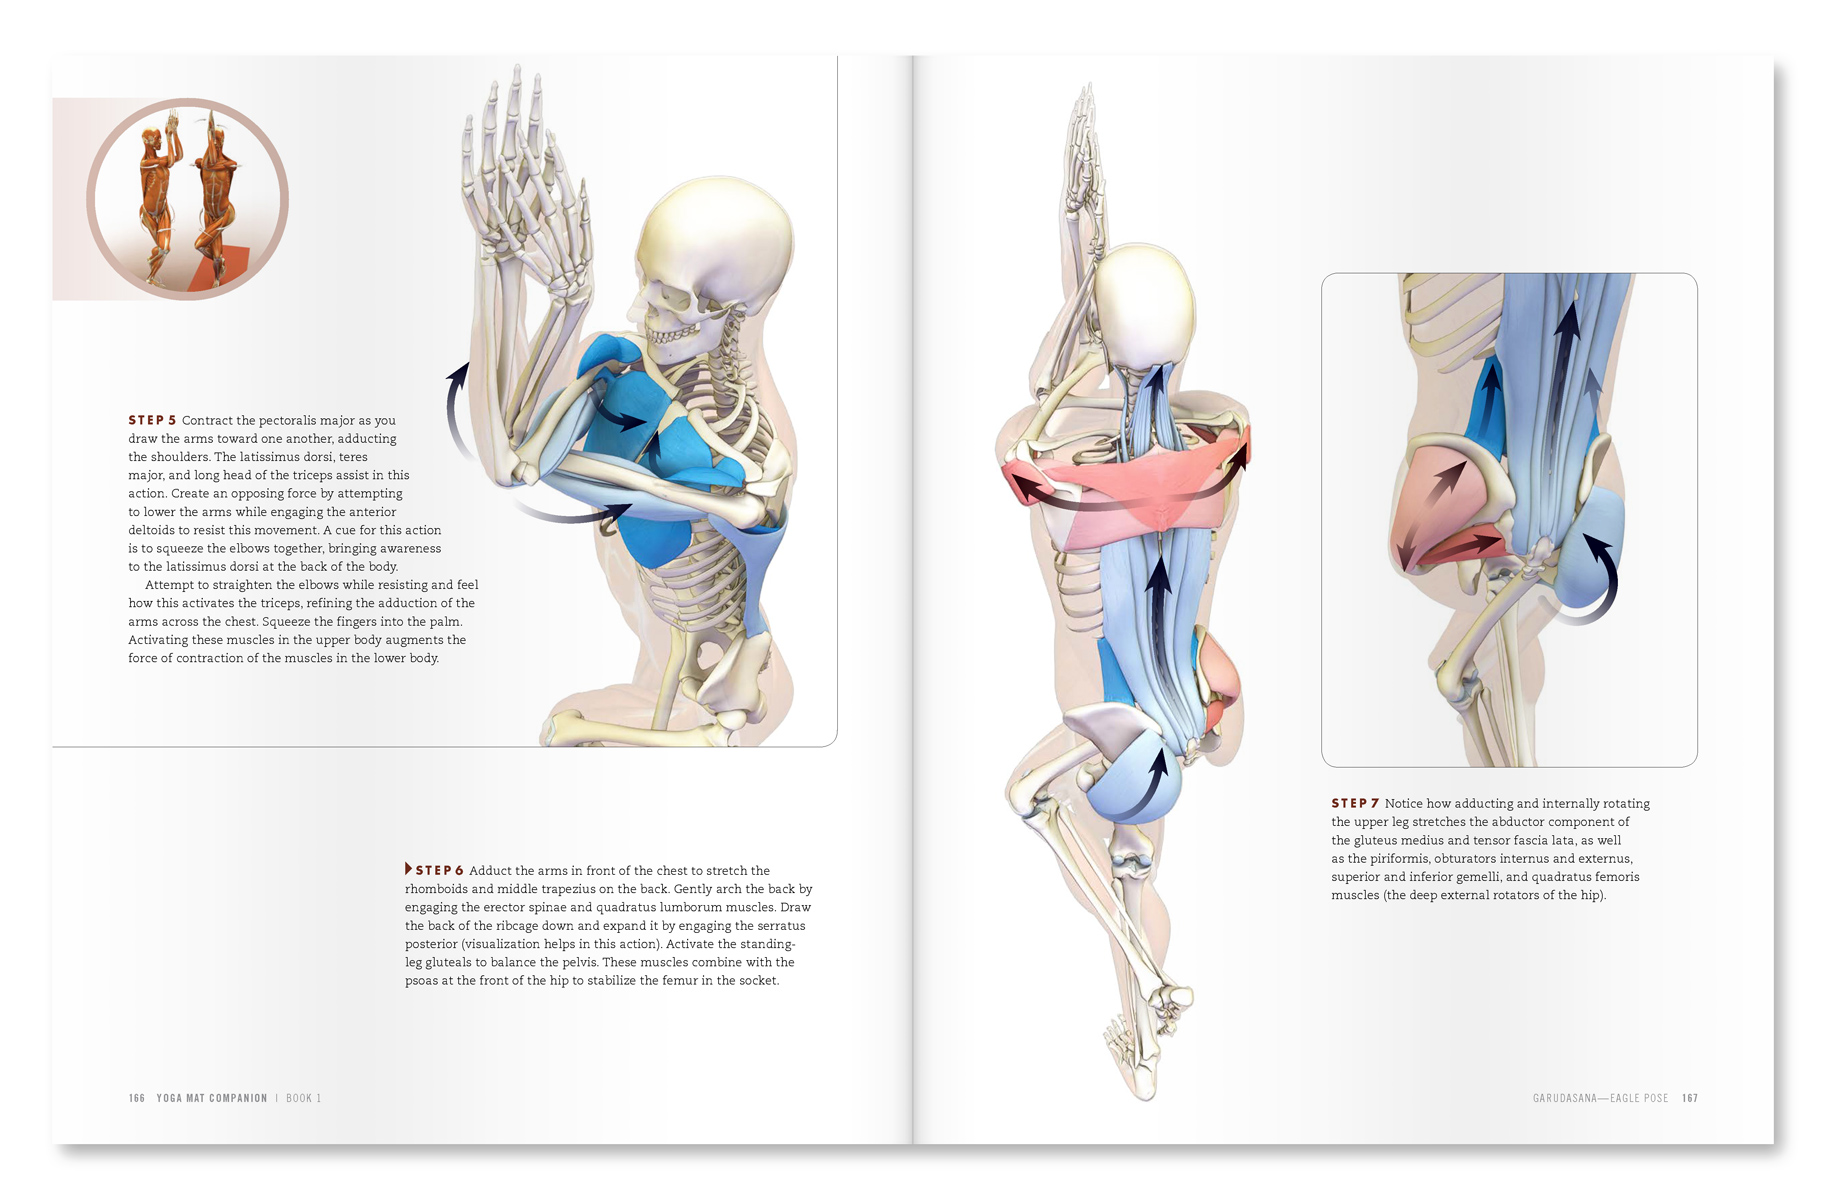
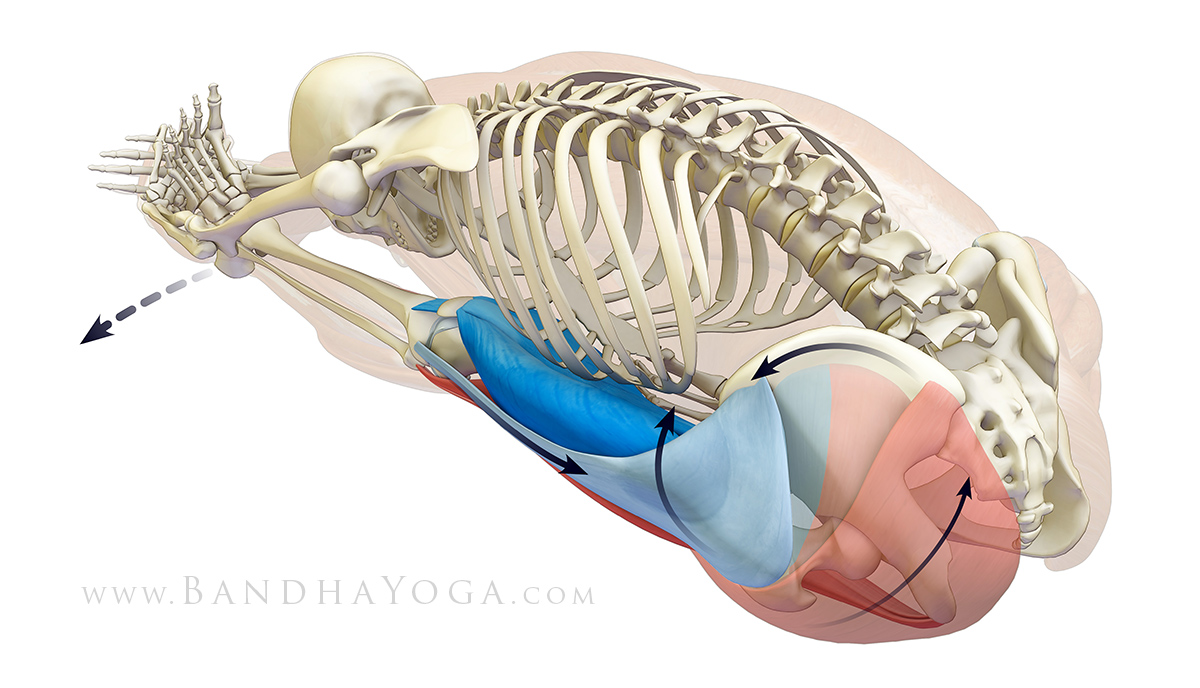
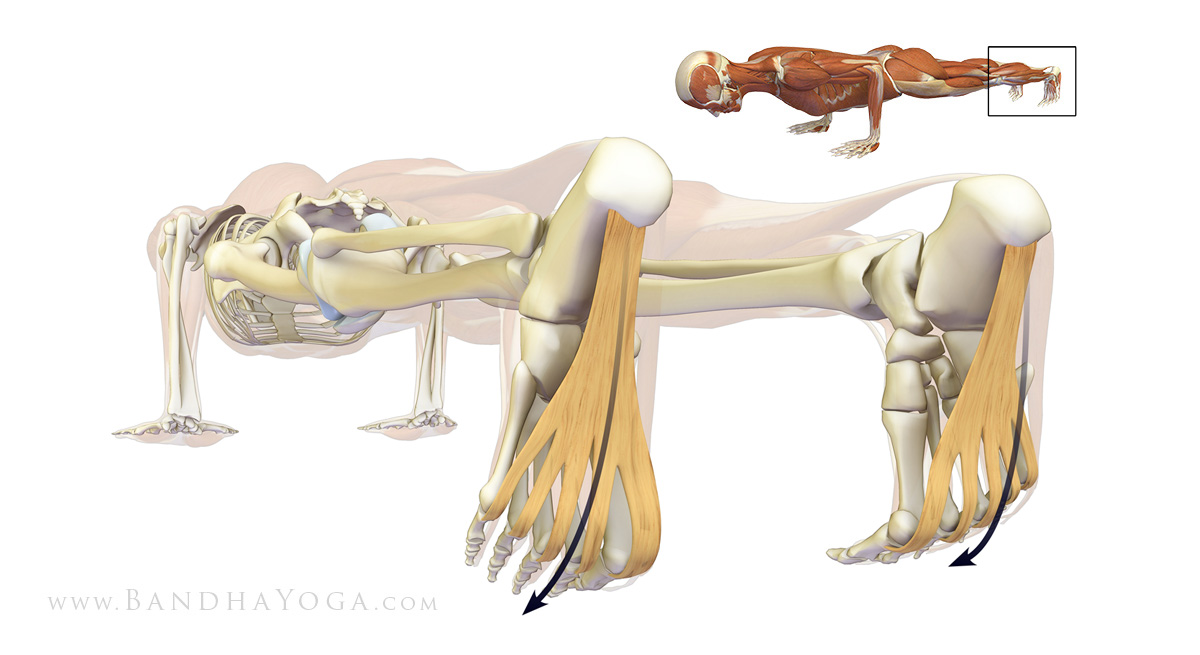
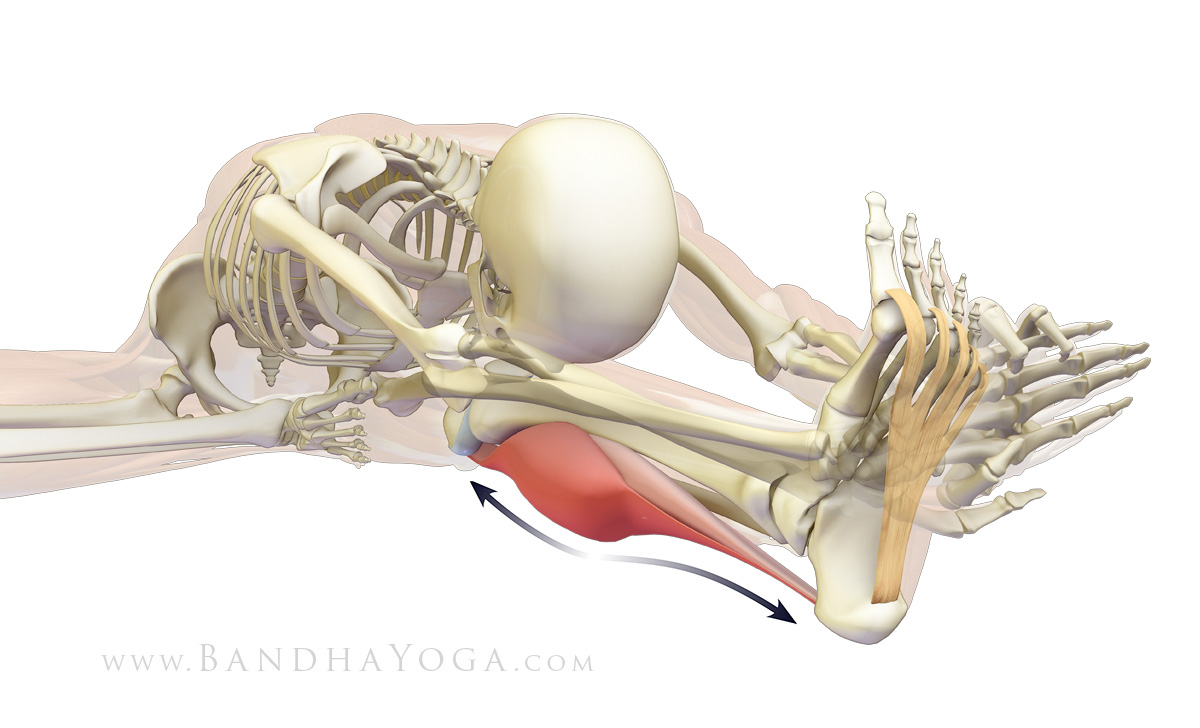
| Protecting the knee in Pigeon Pose: Figure 3 (left) illustrates engaging the muscles on the outside of the knee. Figure 4 (right) shows the piriformis muscle stretching in Pigeon Pose. |
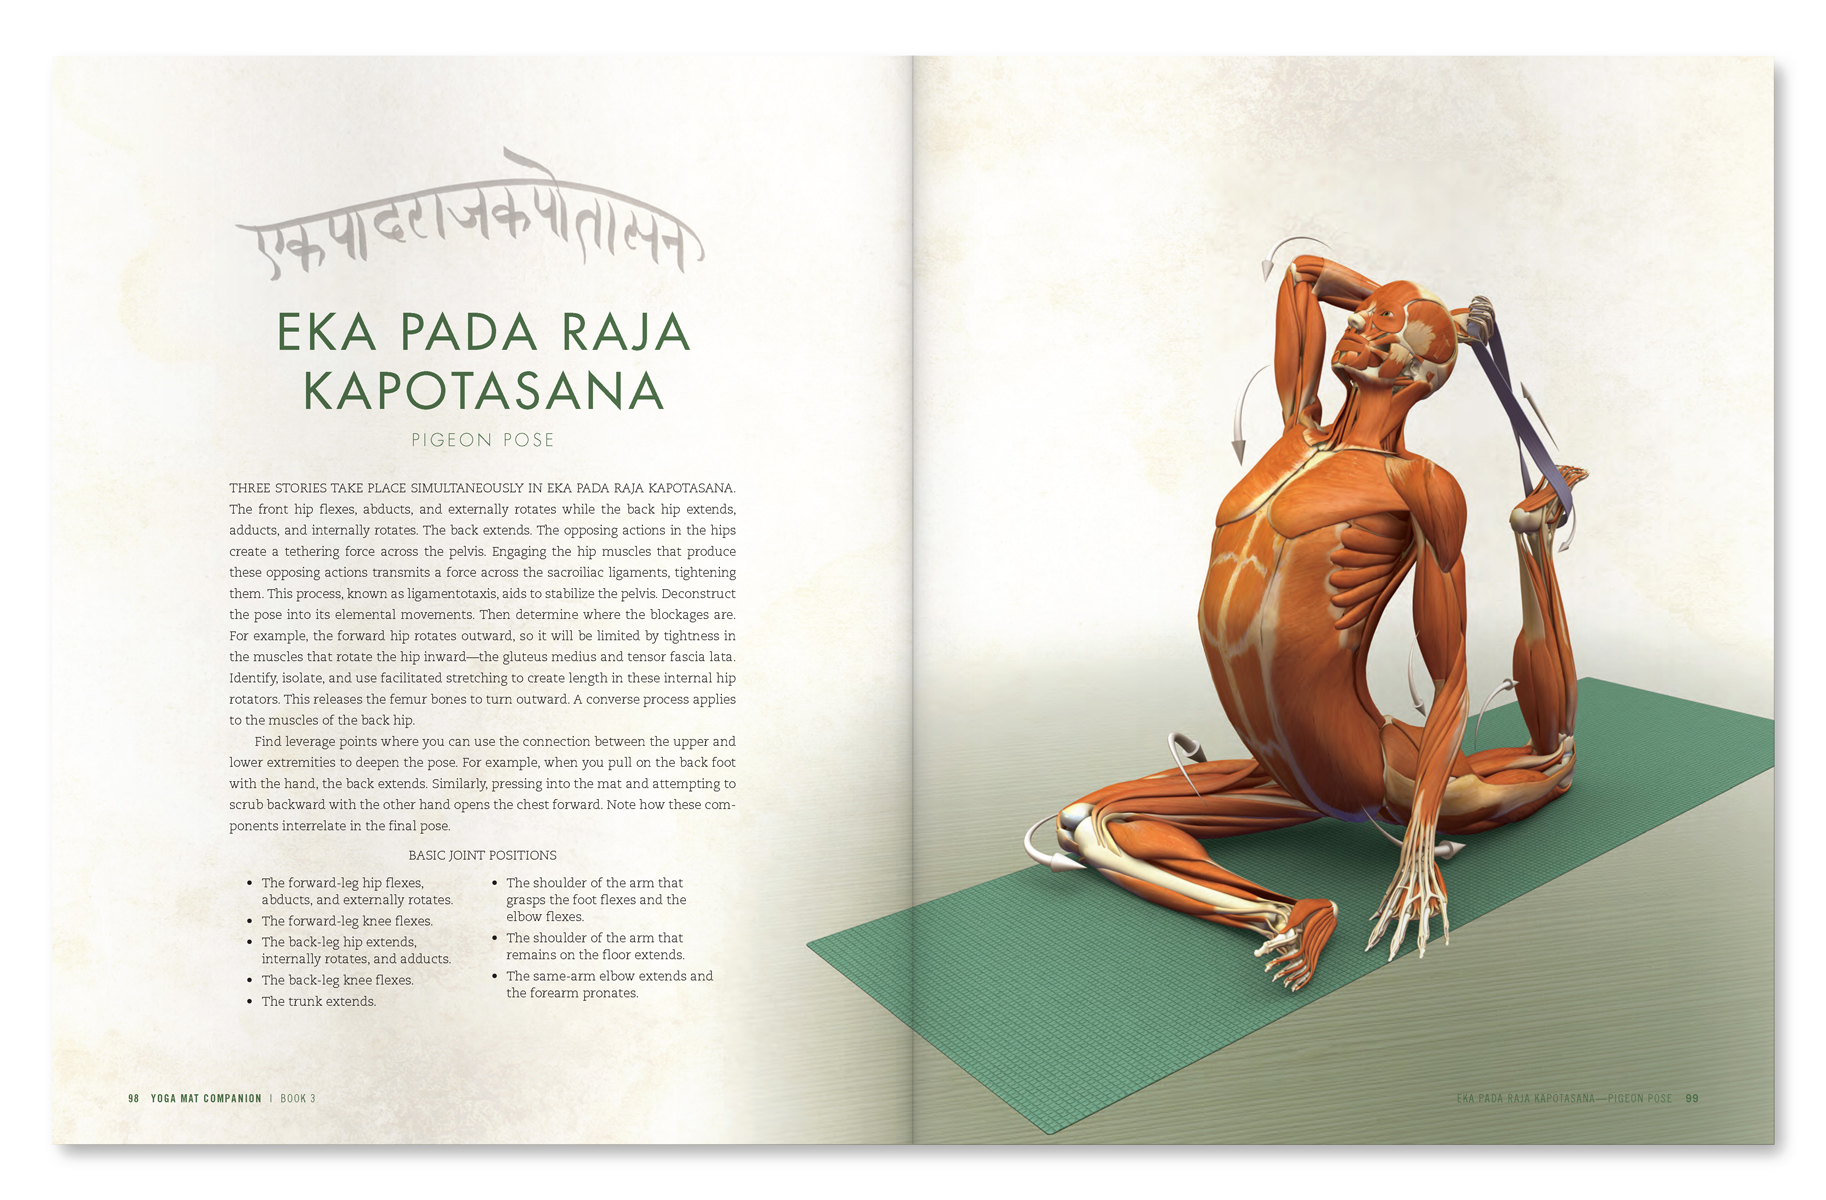 |
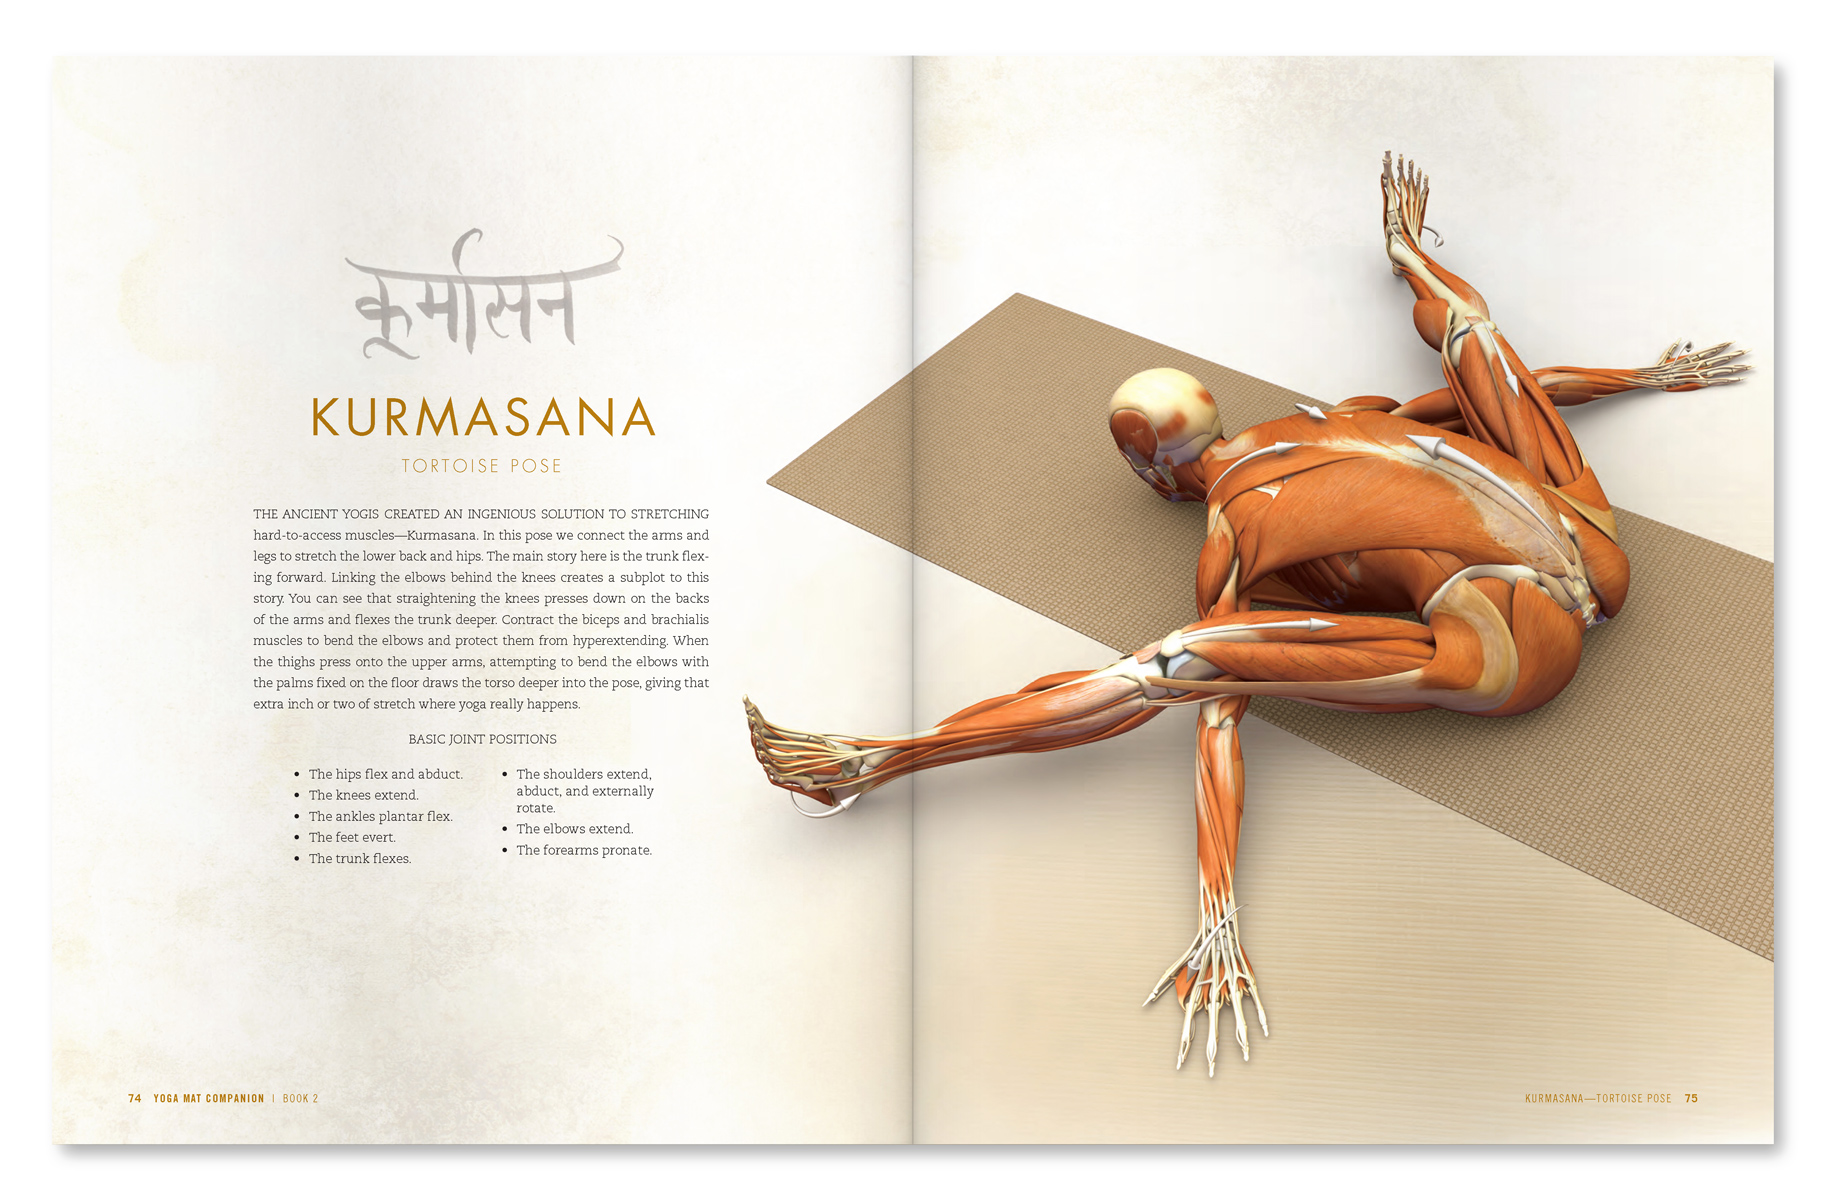
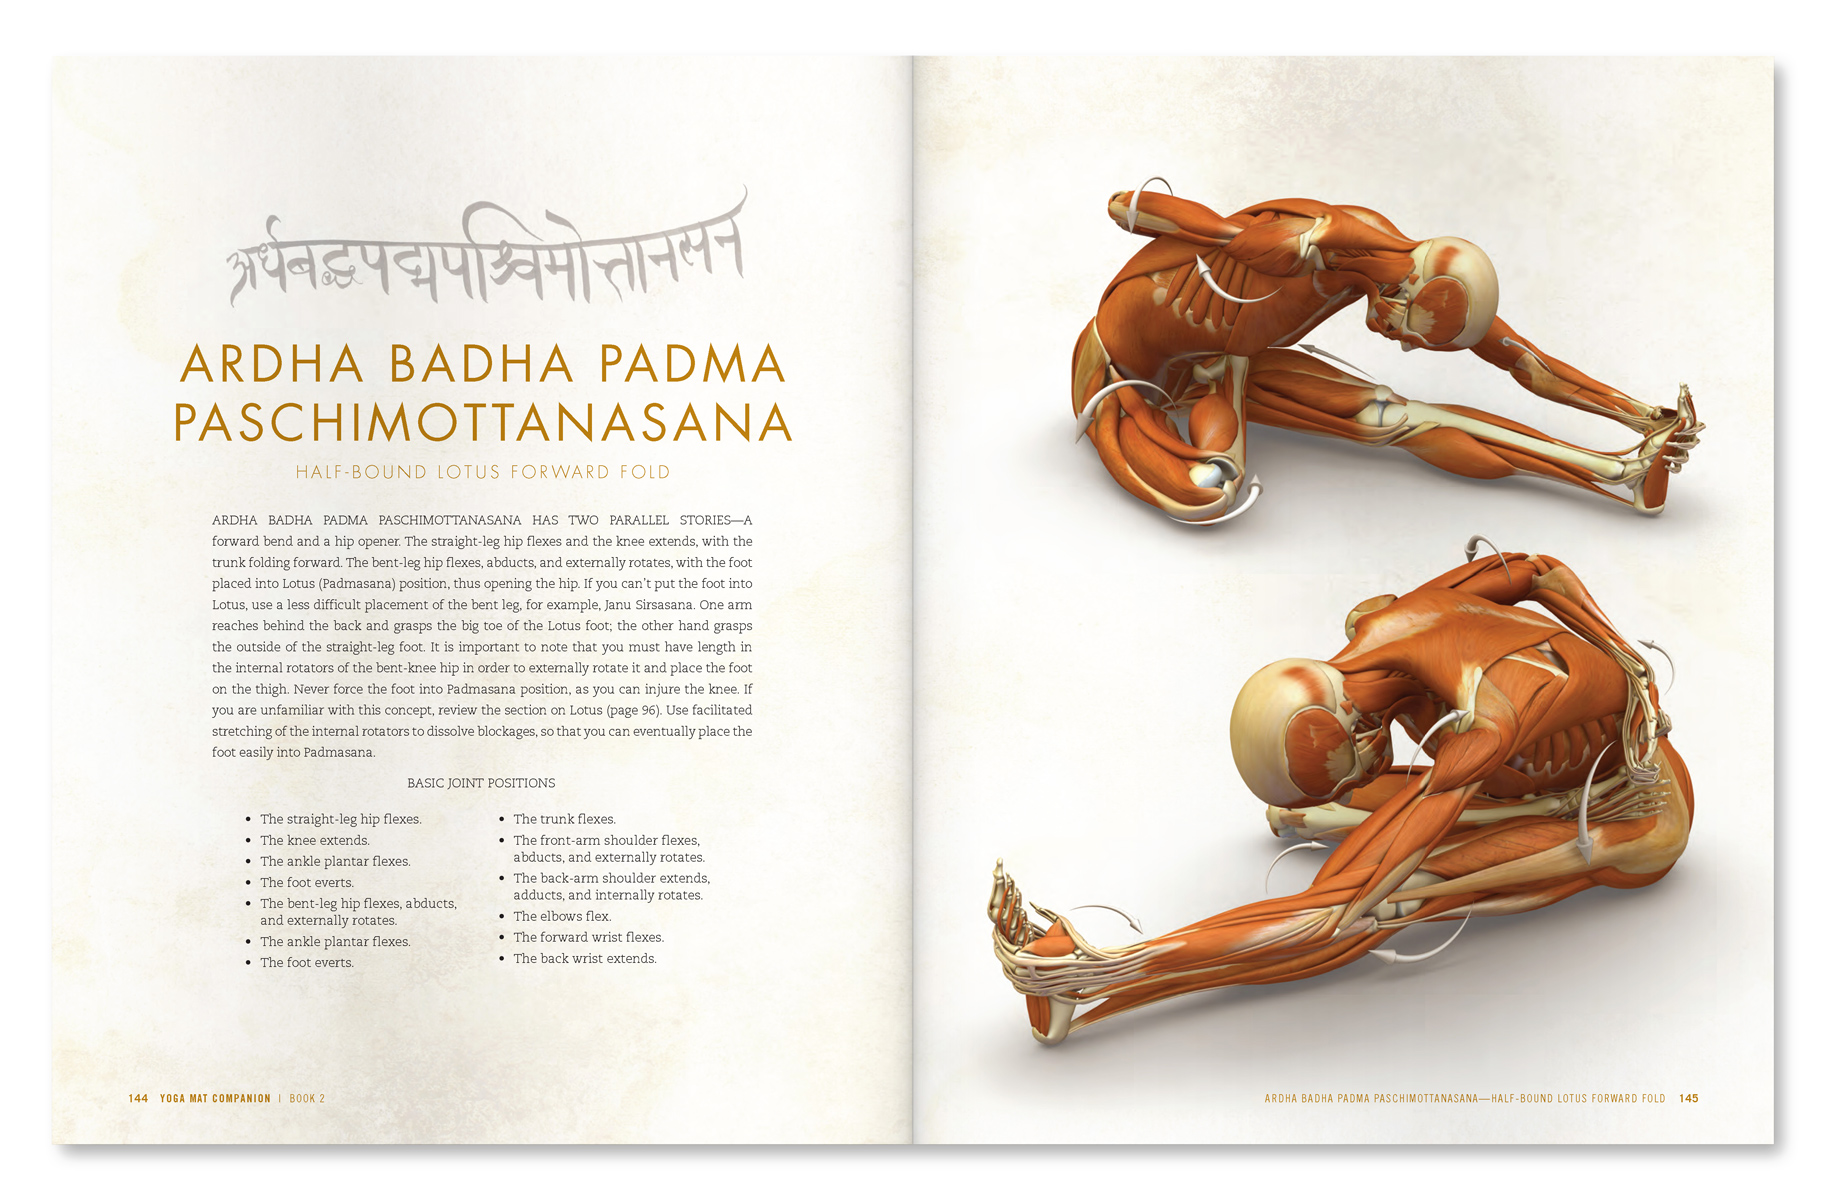
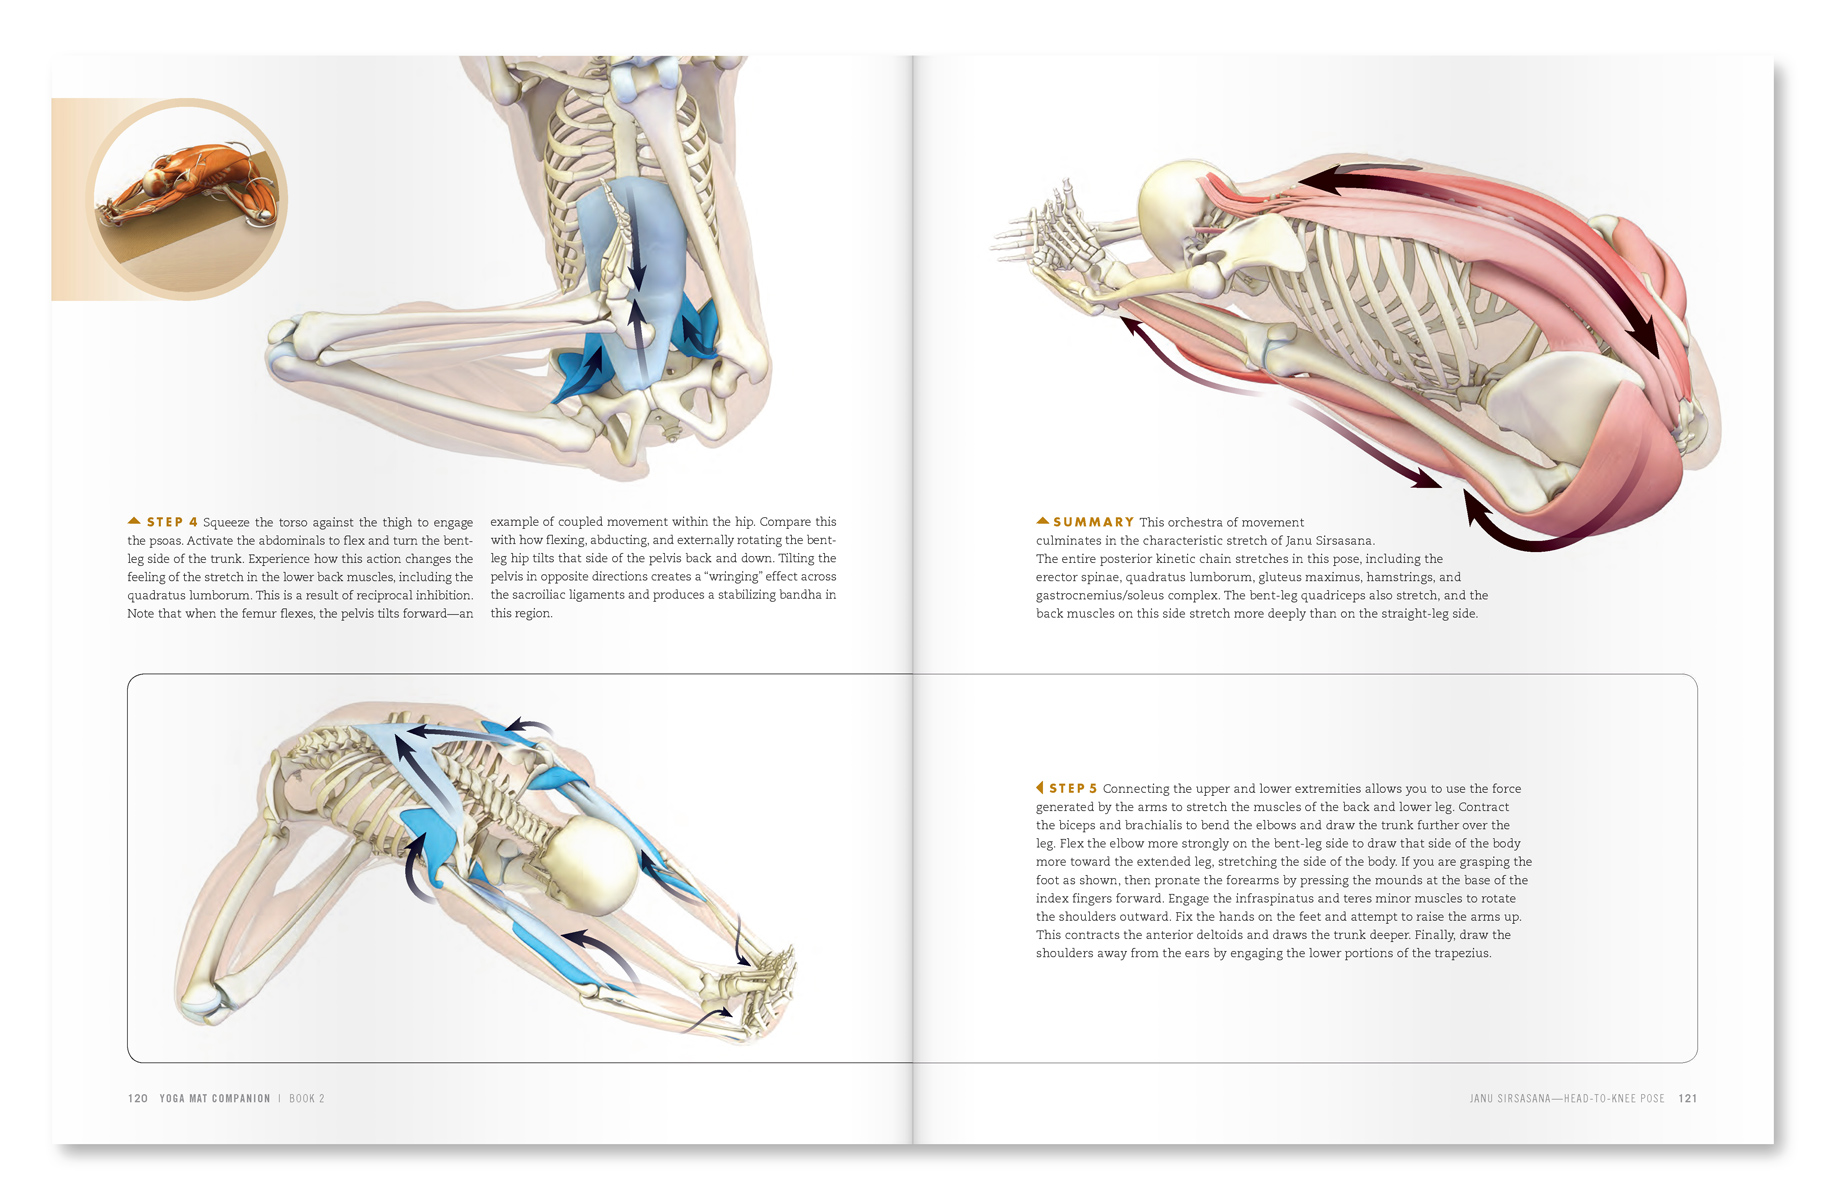
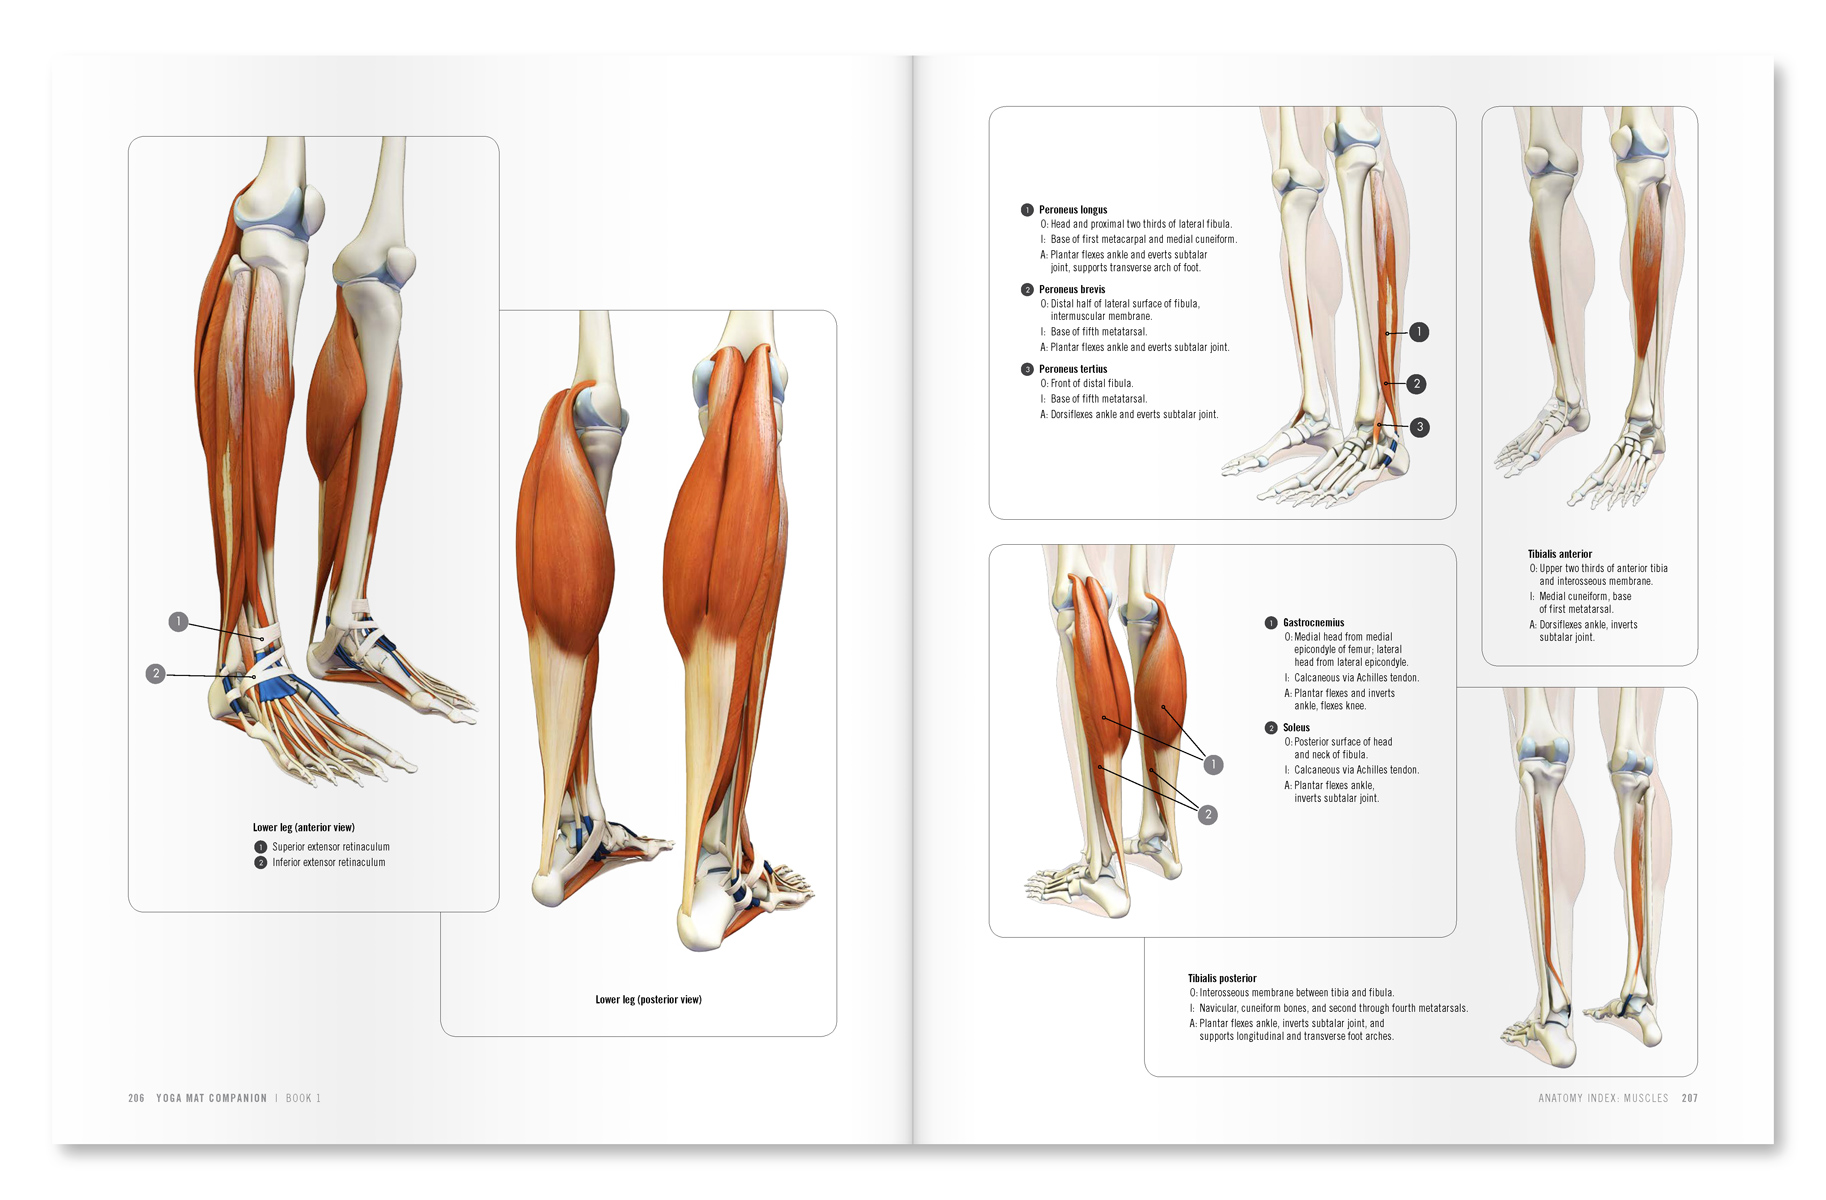
| An excerpt from "Yoga Mat Companion 3 - Anatomy for Backbends and Twists". |
 |
| An excerpt from "Yoga Mat Companion 3 - Anatomy for Backbends and Twists". |
Thanks for checking in. We greatly appreciate when you share us on Facebook, Twitter and Google Plus. For many more tips on combining Western science and yoga, check out The Key Muscles and Key Poses of Yoga and the Yoga Mat Companion series (you can page through each book on the right of this page).
All the Best,
Ray Long, MD
All the Best,
Ray Long, MD