
If a picture's worth a thousand words, then what is an animated video worth? In this blog post we look beneath the skin to see what happens with the piriformis muscle in Reverse Pigeon Pose and provide an overview of the muscle, its attachments and action, and its role in stabilizing the sacroiliac joint. We also examine the use of joint rhythm to optimize the stretch.
The piriformis muscle originates on the anterior (front) surface of the sacrum and inserts onto the greater trochanter of the femur (thigh bone). Figures 1 (a) and 1 (b) are front and back views of the piriformis muscle. Figure 1 (c) illustrates the stout ligamentous stabilizers of the sacroiliac joint.
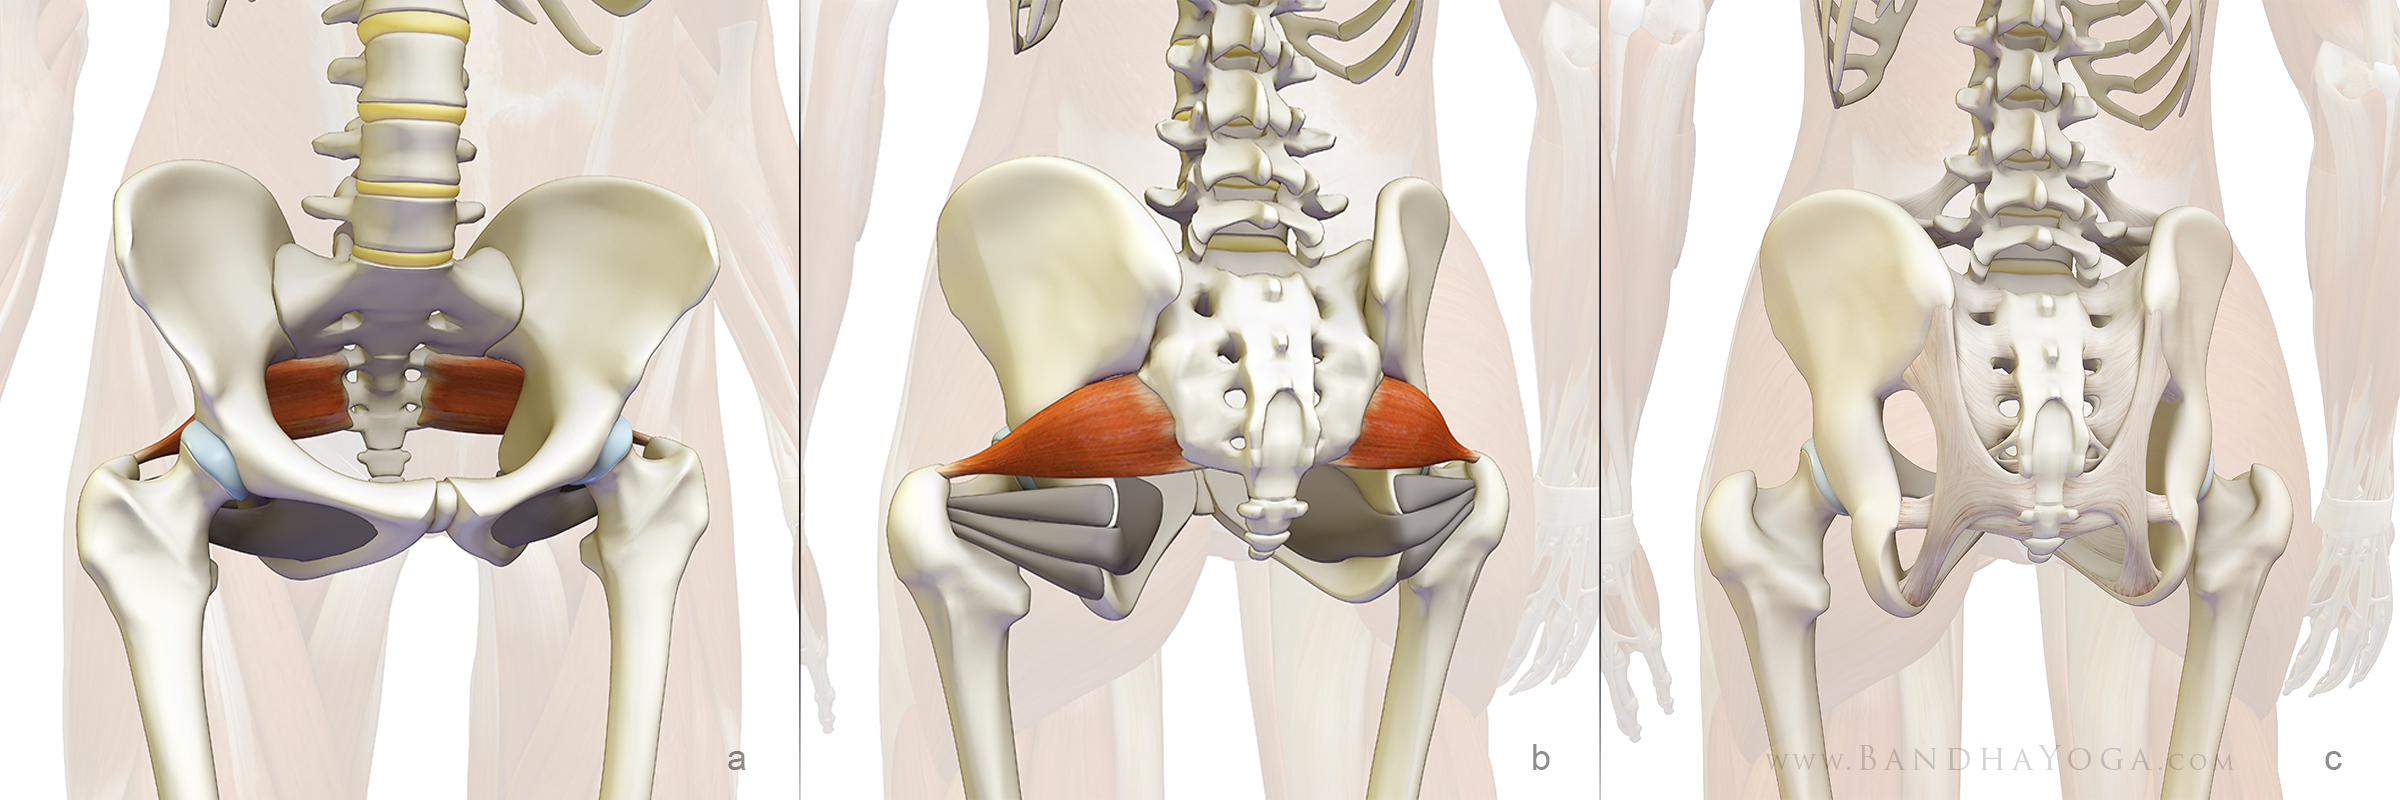 |
| Figures 1 (a) is a front view of the piriformis, (b) is a back view and (c) illustrates the ligaments that stabilize the sacroiliac joint. (click on image to enlarge) |
Note that the piriformis is a muscular stabilizer of the sacroiliac joint. Imbalances between the piriformis muscles can contribute to subtle asymmetries within the pelvis, which can then be transmitted to the vertebral column. This underscores the importance of achieving a balanced stretch between the two sides when working with this muscle in yoga. Learn more about the stabilizers of the sacroiliac joint and lumbar spine in our post on the thoracolumbar fascia. We discuss the details of the static and dynamic stabilizers of the joints in The Key Muscles and Key Poses of Yoga.
Here's the biomechanics...
To understand why Reverse Pigeon Pose works to stretch the piriformis we need to know that the actions of this particular muscle vary according to the position of the hip joint. For example, when the hip is in a neutral position, the piriformis acts to externally rotate (turn outward), flex and abduct the hip joint. When the hip is flexed beyond about 60 degrees the piriformis becomes an internal rotator and extensor (and remains an abductor). Muscles stretch when we move a joint in the opposite direction of the action of the muscle. In Reverse Pigeon Pose, the hip is flexed and externally rotated, thus stretching the muscle (which extends and internally rotates the hip in this position). This video illustrates the stretch (click on image to open in a separate window).

When viewing the video, note how flattening the back moves the origin of the piriformis on the sacrum further away from its insertion on the femur, thus accentuating and refining the stretch. This is an example of lumbar-pelvic and femoral-pelvic rhythm. The last section of the video, where we have digitally hidden one half of the pelvis to expose the movement of the sacrum, illustrates this concept. Learn more about joint rhythm in our post “Preventative Strategies for Lower Back Strains in Yoga.”
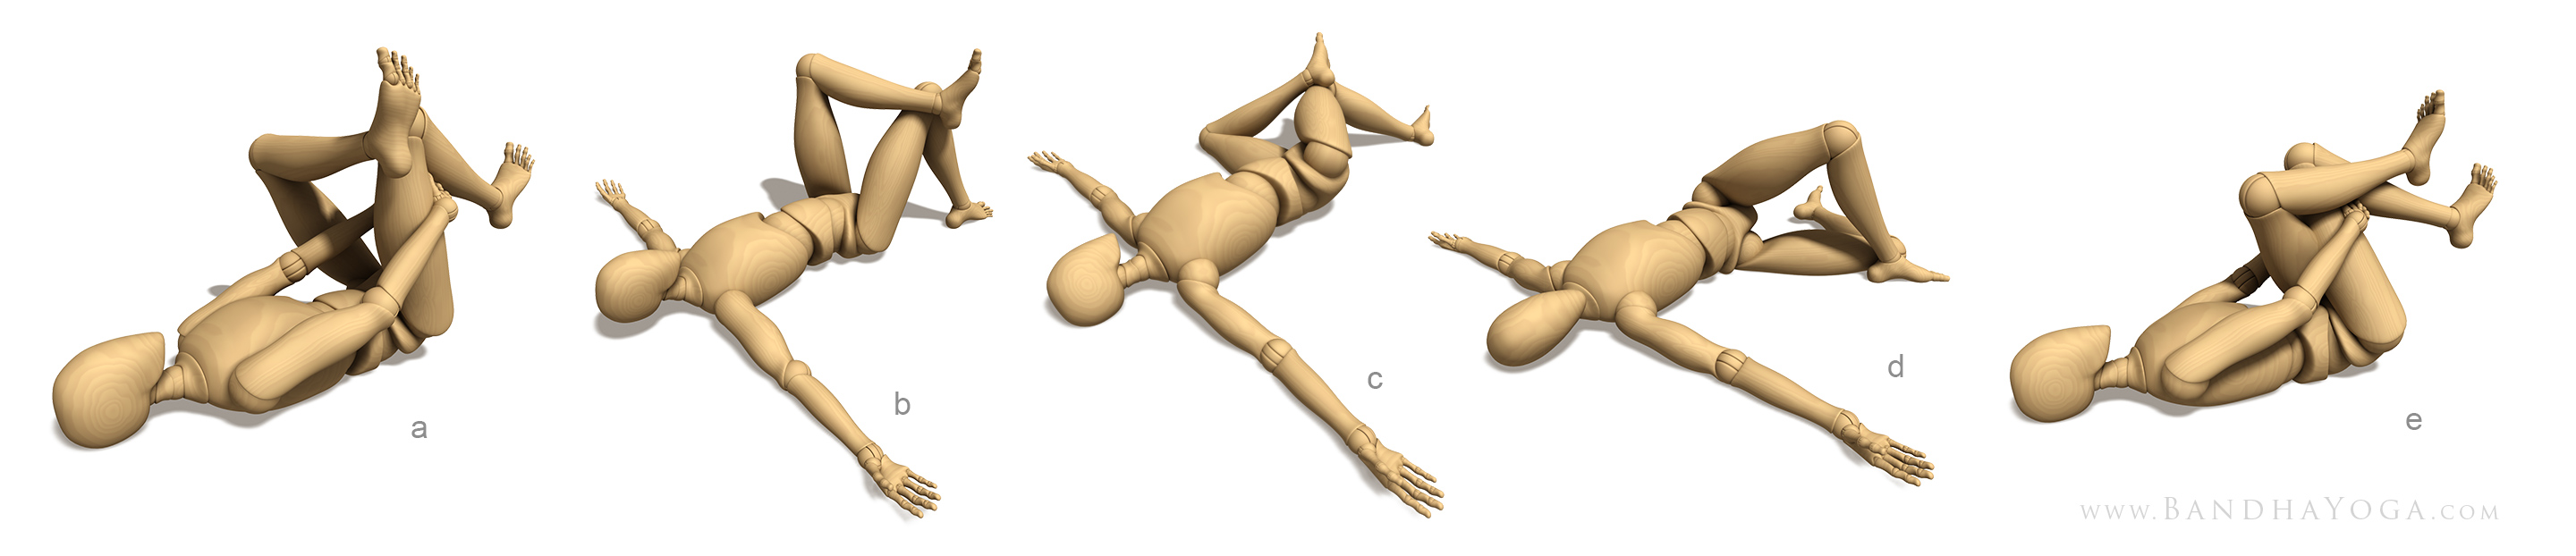 |
| Figure 2: variations for stretching the piriformis muscle. |
Figure 2 illustrates some variations for this stretch. Figure 2 (a) is the classic stretch that is typically utilized in yoga. Figure 2 (b) is a modification for persons that cannot practice the full stretch. This variation is also useful to experience the effect of flattening the lumbar in the pose. Figure 2 (c) stretches the piriformis of the lower side leg by adducting and internally rotating the femur. Figure 2 (d) adducts (draws toward the midline) the upper side leg, thus opposing the action of the piriformis for abducting the femur. Figure 2 (e) illustrates a variation commonly employed in physical therapy as part of the regimen for Piriformis Syndrome, a condition that can cause sciatica (we cover this condition in an upcoming post). In this variation, the upper leg crosses all the way over, thus adducting the femur and stretching the muscle. This is a good alternative for those who experience knee issues in the classic stretch. Our next post illustrates a technique for protecting the knee in Reverse Pigeon Pose (and similar asanas).
I typically do several 20-30 second stretches on each side, easing into and out of the pose. We explain the rationale for this length of time in a pose in the blog post on Hanumanasana (front splits). If you experience pain in this (or any) stretch, carefully come out of the pose. Folks with sciatic type pain should consult a health care practitioner who is appropriately trained and qualified to diagnose and manage such conditions. Follow their guidance, working with yoga as an adjunct in prevention and treatment (where appropriate). Click here to learn about Piriformis Syndrome and how yoga can help.
Now you're ready to take the Bandha Yoga QuickQuiz for the piriformis muscle! Click here to start.
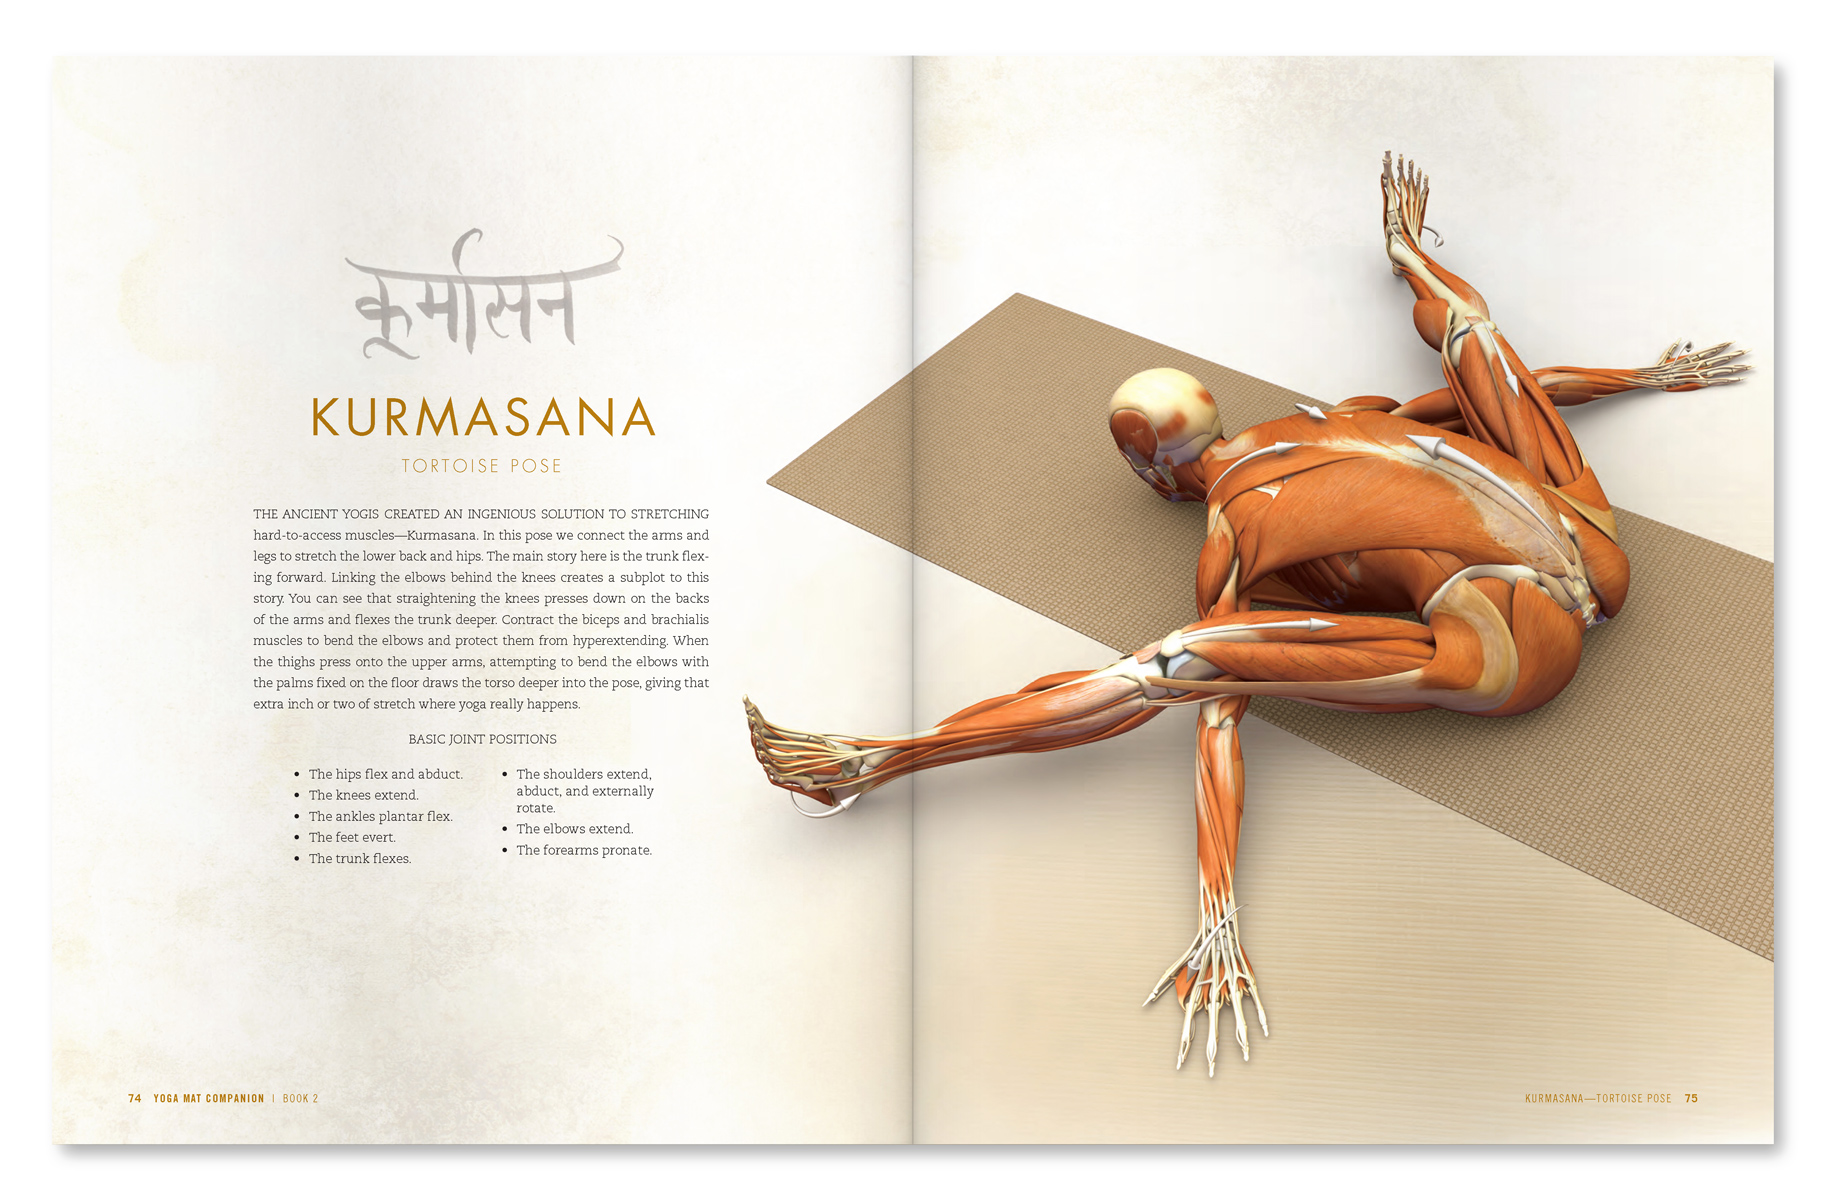 |
| An excerpt from "Yoga Mat Companion 2 - Anatomy for Hip Openers and Forward Bends". |
 |
| An excerpt from "Yoga Mat Companion 2 - Anatomy for Hip Openers and Forward Bends". |
Now you're ready to take the Bandha Yoga QuickQuiz for the piriformis muscle! Click here to start.
Thanks for stopping by. Stay tuned for our next post on protecting the knee in poses like Reverse Pigeon. We also greatly appreciate when you share our posts on Facebook, Twitter and Google Plus.
Namaste'
Ray and Chris
Thank you....as always you give me great information to share with my students that want and need great visual explanation. Pam Greenough
ReplyDeleteExcellent Pam--thanks for your support of our work! All the Best with your teaching~Ray
Deletety soooo much
ReplyDelete:) Ray
DeleteGreat information we will share in our teacher training this week in Edinburgh. Thank you as always. Namaste.
ReplyDeleteThanks Anon--good luck with the TT! Ray
Deleteneed workshops in the bay area
ReplyDeleteHi Dolores,
DeleteContact my assistant Carol and she'll help you set it up! carol@bandhayoga.com
Best~Ray
Great alternative for people who experience knee problems in this pose!
ReplyDeleteHi Femke--yes, that works well and stretches the muscle too. Thanks for commenting~Ray
DeleteRay & Chris - the format you use to present material is so useful and easily applicable. I absolutely loved the retreat at beautiful Blue Spirit Costa Rica last year; you couldn't have chosen a better spot. I learned so much and also got to enjoy myself at the same time. Will definitely do it again!
ReplyDeleteNamaste, Rachelle
Hi Rachelle--apologies for the delayed reply, was on the road. Great to see your comment. I love Blue Spirit too! Hope to see you there again. Best~Ray
DeleteWhat would I do without these periodic lessons? I get so much out of them. Now...how to download and print so I can share with students? Is there a way?
ReplyDeletecer
Hi Anon,
DeleteDelighted that you enjoy the lessons. Check out the free E-book. It's in PDF so you can print as well. All the Best with your teaching! Ray
Brilliant!
ReplyDeleteThank you. Seeing a video of the muscle moving makes it so much easier to understand how it actually works.
Thanks Anon! Ray
DeleteThis info makes me much more confident about explaining the actions of the piriformis. Thanks!
ReplyDeleteHi. I have been frustrated by the mechanics of this stretch for awhile, and thought that yoga teachers had made wrong assumptions. This gives actual understanding. Love y'all's approach, and look forward to studying with you in the future.
ReplyDeleteGood to hear, Joe. Yes, that stretch requires a bit deeper understanding of the action of the muscle to see how the stretch works. Most of the time we look at it as an external rotator, but the action changes in this position and that makes the stretch. Thanks for commenting! Ray
DeleteWow! This is great. I have an older friend who suffers from sciatica which is apparently related to the piriformis. I'm hoping this explanation will be helpful to him.
ReplyDeleteThanks Oriane! I find the video really helpful in understanding this. Good luck to you and your friend~Ray
DeleteRelevant, clearly explained & specific. Thankyou. Jane E Seymour
ReplyDeleteThank you, Jane--much appreciated, that is how we try to make the blogs! Ray
DeleteThe videos are a huge help. I know all of the names and locations, but to see it in action makes a big difference. Thanks for all you and Chris do.
ReplyDeleteThanks Jonathan--good to hear you like the videos! Ray
DeleteGratitude for sharing your vast knowledge!
ReplyDeleteYou're welcome, Zaj~Ray
DeleteThis is great, thank you so much for your posts. It really helps having the videos and visuals. I hope to be able to make it to your workshop one of these days!
ReplyDeleteThanks Amita, delighted that you enjoy our work! Hope to see you at one of our workshops~Ray
DeleteThank You for the details and descriptions. This is spectacular work.
ReplyDeleteHello Paul--you're welcome. Many thanks for your compliment on our work! Ray
DeleteWoww..!!! I never see these type of videos.Awesome Videos ..Thanks Ray and Chris.
ReplyDeletedank u wel!!!!!!!!!!!!!!!!!!!!!!!!!!!!!!!!1
ReplyDelete