This blog post continues the theme of balancing the pelvis in yoga asanas. Our last post focused on using the adductor magnus to turn the pelvis in Warrior I; this post zooms in on the hip abductors for Revolved Half Moon Pose.
As I discussed in “Connecting to Your Feet in Yoga”, you can learn a great deal about biomechanics by examining how the body responds to pathological conditions. In that post, I looked at a variation of flat foot deformity, the ligaments and muscles involved and how to work with yoga to strengthen the arches of the feet. Here, I examine what happens with the pelvis when the hip abductors are not functioning properly. Then I illustrate how to use this knowledge to refine asanas like Revolved Triangle and Revolved Half Moon.
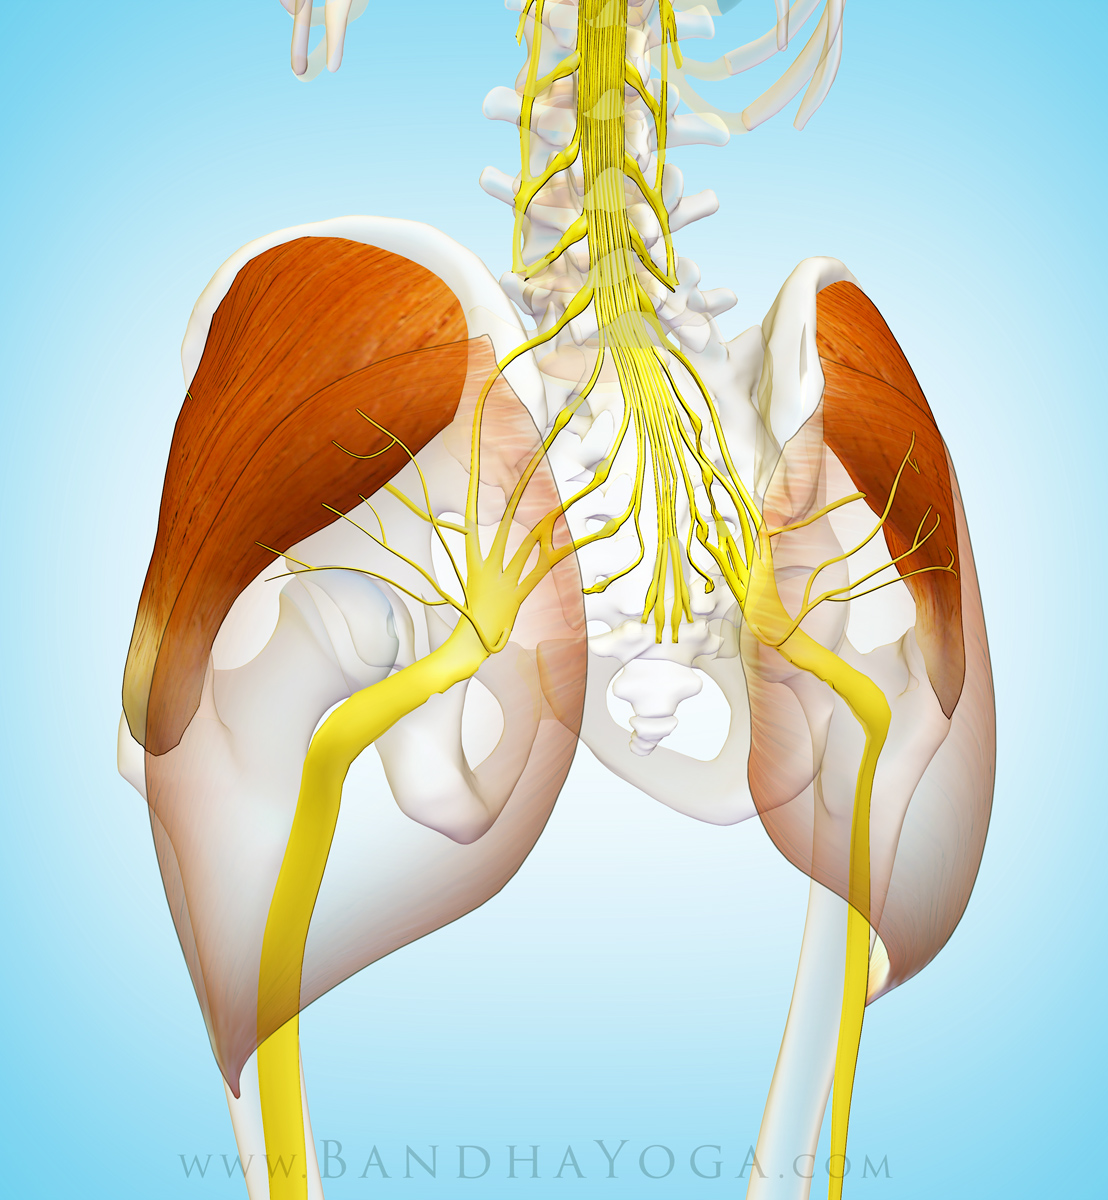
Balancing the pelvis is a key factor in normal gait as well as yoga poses. Conversely, persons with weakness in the hip abductors develop what is known as a “Trendelenberg” gait, where the pelvis tilts up and shifts toward the affected side during the stance phase of walking. A variety of conditions can affect the hip abductors, including hip pain (from arthritis) and injury to the nerve supply of the gluteus medius.
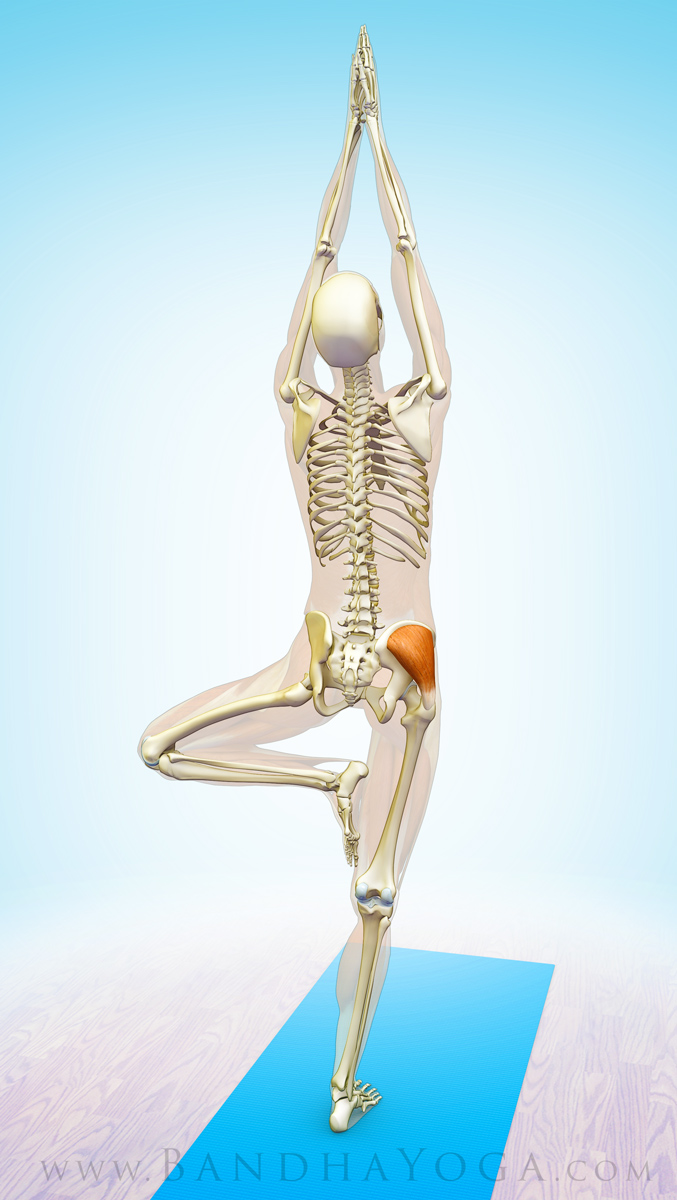
In medicine, we test the function of the hip abductors by having the patient stand on one leg in the “Trendelberg Test”. When the muscles are competent, they automatically engage to draw the pelvis level; when the muscles are weakened, the pelvis on the standing leg side lifts (while the lifted leg side sags downward). At the same time, the spine curves toward the affected hip, with the shoulder girdle tilting towards that side. Figure 1 illustrates the Trendelenberg Test. Note how the pelvis tilts and the spine laterally flexes when the gluteus medius does not engage properly.
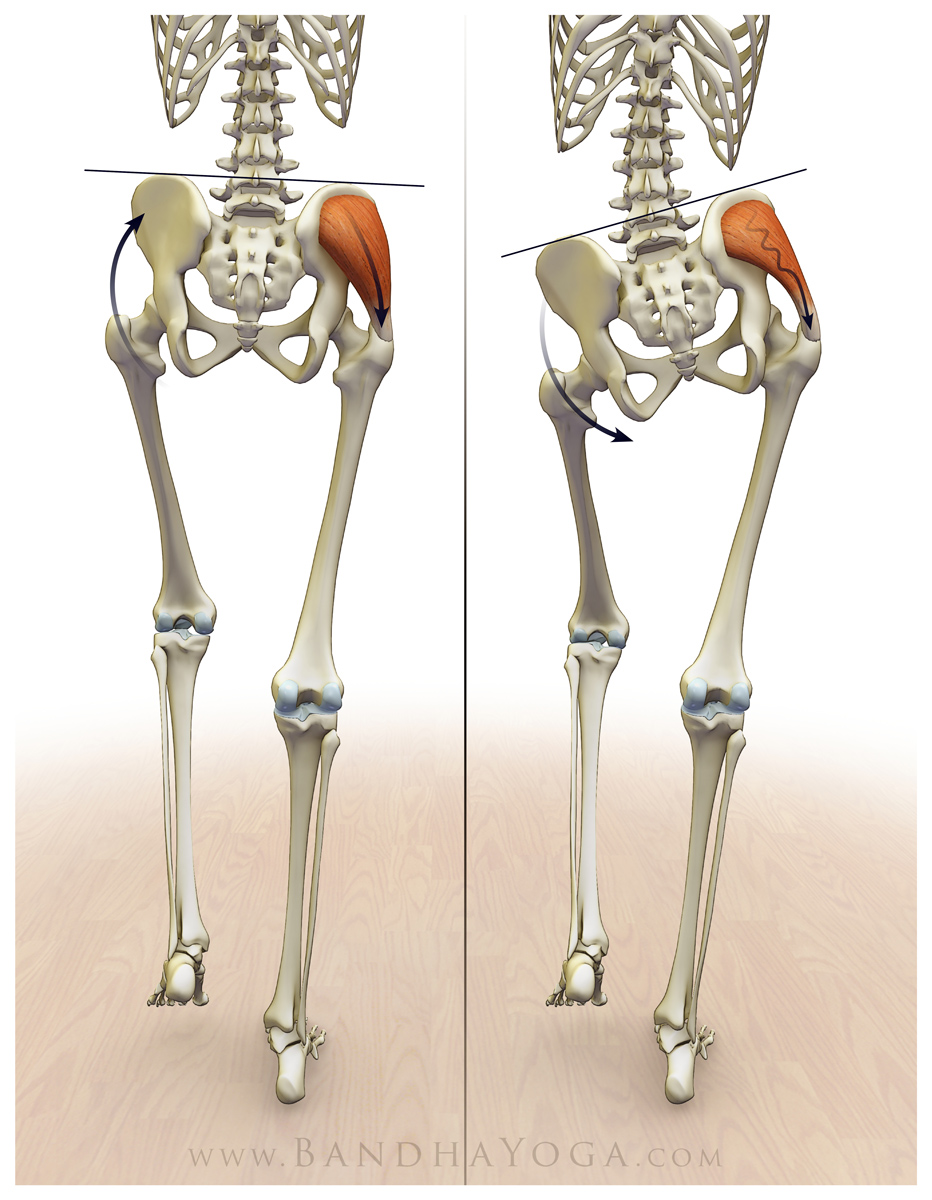 |
| Figure 1: The Trendeleberg Test; Image on the left illustrates the gluteus medius engaging to stabilize the pelvis. Image on the right illustrates pelvic tilt and lateral spine flexion with the dysfunctional gluteus medius. |
The spine compensating for the tilt of the pelvis is an example of lumbar-pelvic rhythm. Click here to read more on this important subject in our blog post, “Preventative Strategies for Lower Back Strains in Yoga”. Click here to learn more about the muscles involved in one-legged standing in our blog post, “Improving Stability in One Legged Standing Poses.”
Now, let’s look at how we can apply this knowledge to help lift the back leg in Revolved Half Moon Pose…
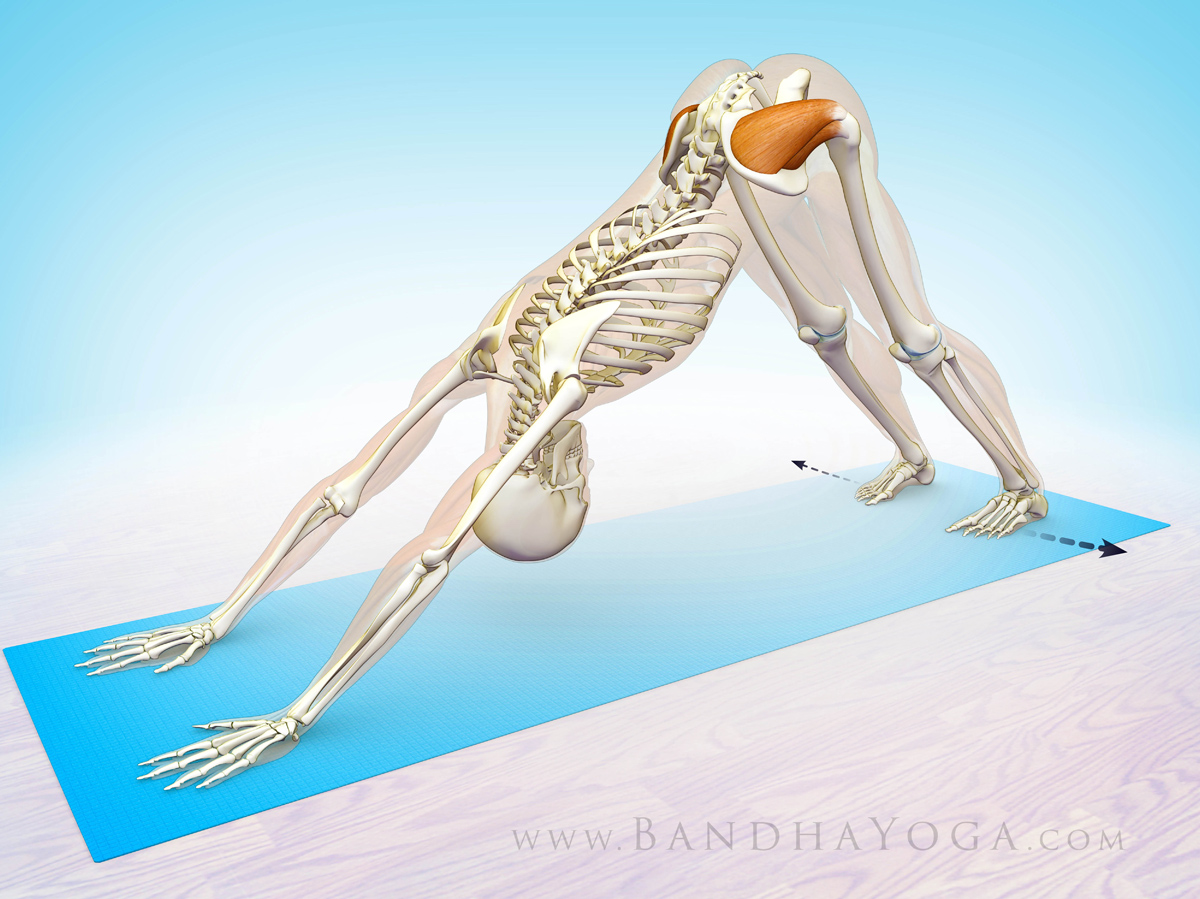
I begin by training awareness of the abductor muscles (especially the gluteus medius) in Revolved Triangle Pose. The cue for this is to fix the forward foot on the mat and attempt to drag it to the outside, while resisting with the hand. You will note that this helps to bring the pelvis in line with the rest of the body. Figure 2 illustrates the preparatory poses for this asana and Figure 3 illustrates the cue.
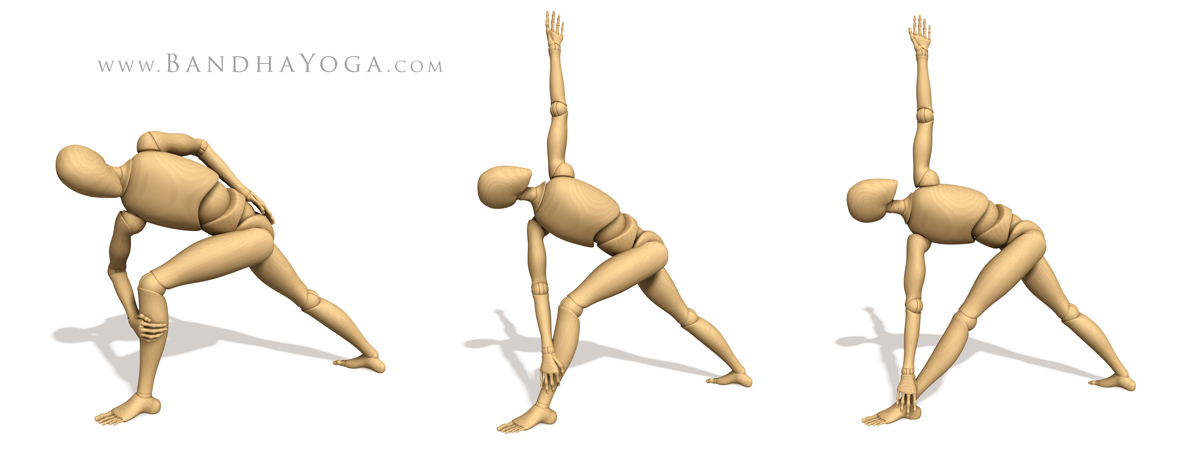 |
| Figure 2: Preparatory poses for Revolved Triangle Pose. |
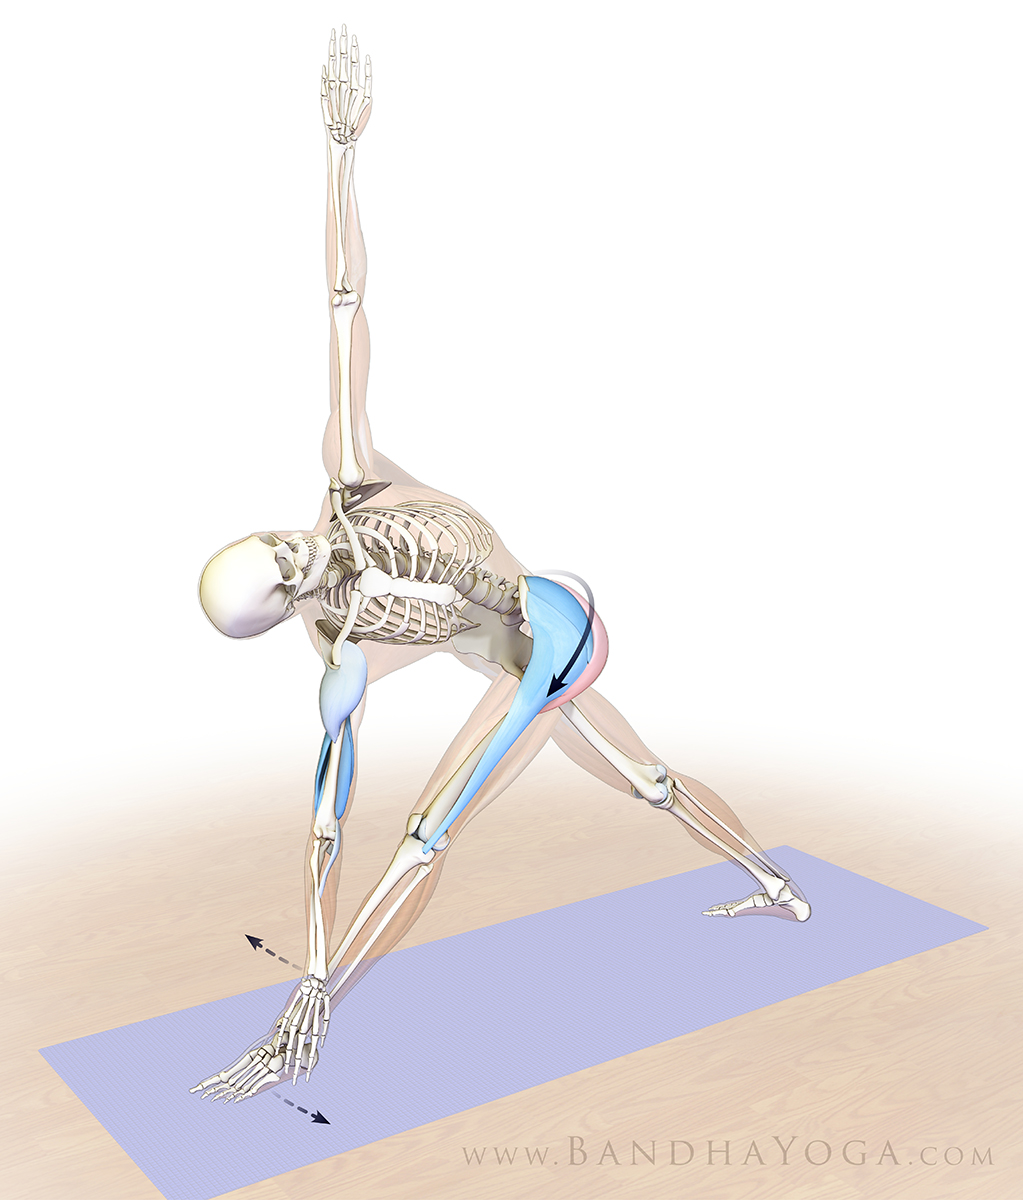 |
| Figure 3: Engaging the hip abductors in Revolved Triangle Pose. |
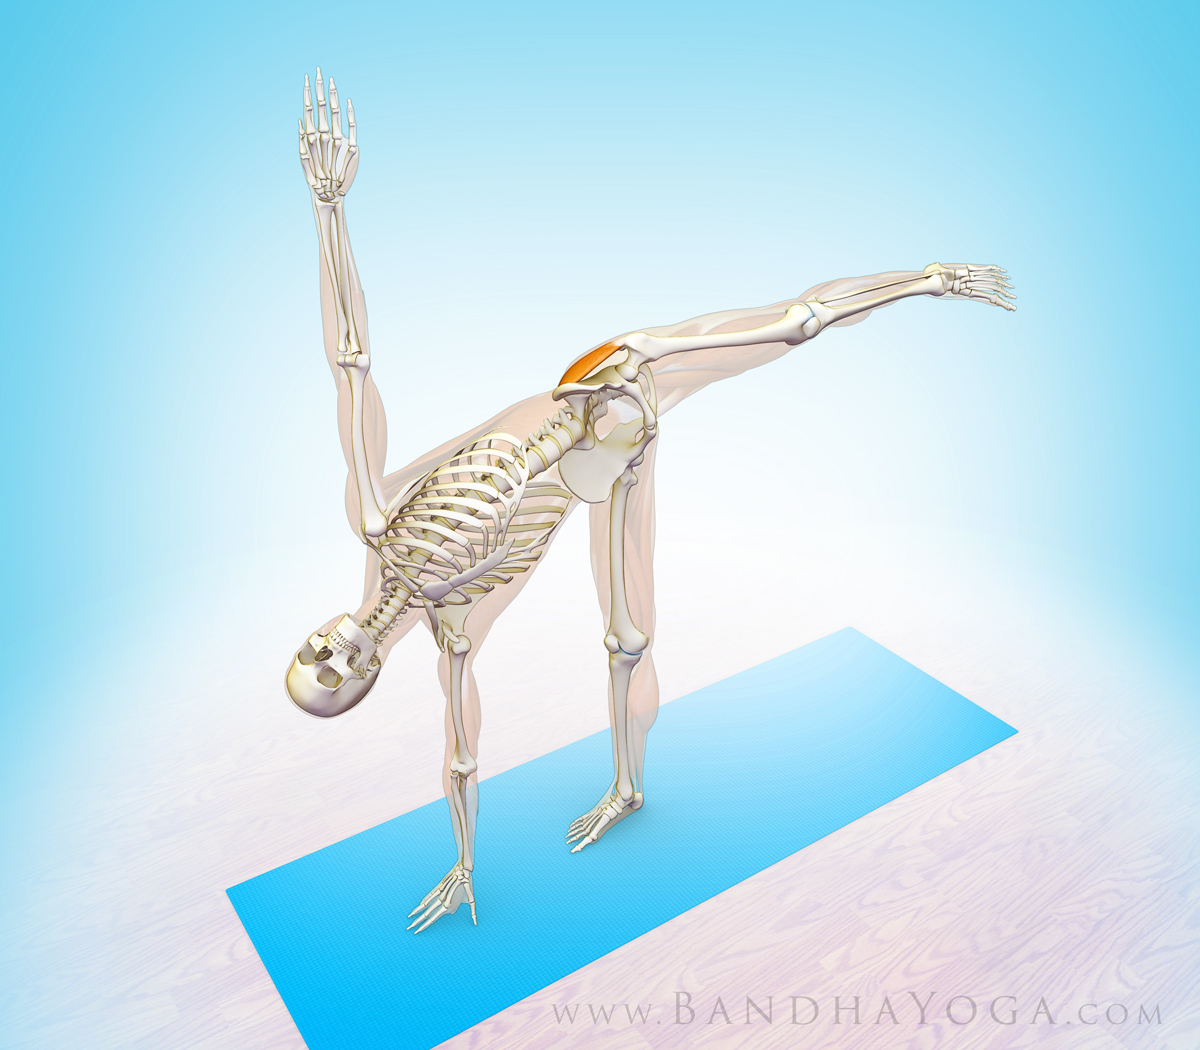
Next, I use sequential muscular engagement to lift the back leg in Revolved Half Moon Pose, beginning with the hip abductors of the standing leg. Engaging these muscles acts to lift, rotate and stabilize the pelvis on the side of the lifted leg (in a fashion similar to what we learned with the Trendelenberg Test). Then I engage the muscles that lift the leg itself, including the gluteus maximus and its synergists of hip extension (the hamstrings and adductor magnus). The gluteus maximus contracts eccentrically.
Finally, I use the quadriceps to straighten the knee. Figure 4 illustrates the preparatory poses for Revolved Half Moon Pose. Figures 5 and 6 illustrate engaging the hip abductors in the standing leg to lift the side of the pelvis for the raised leg. Figure 7 illustrates the final step--engaging the hip extensors and the quadriceps of the raised leg. Work with a chair or block to gain stability if you are new to the pose.
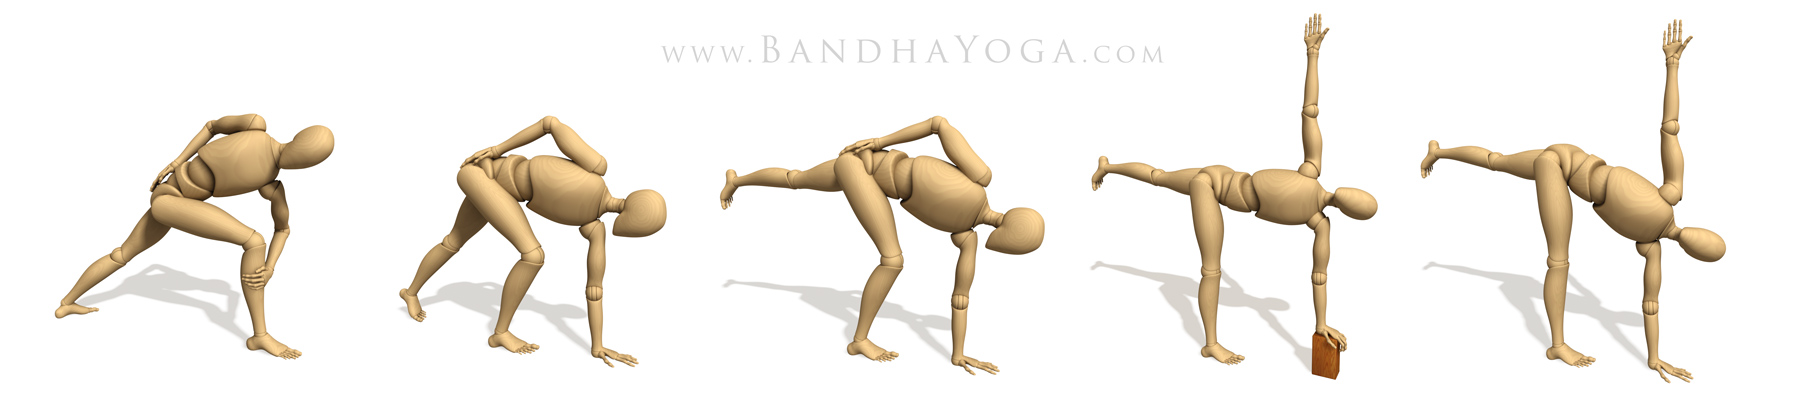 |
| Figure 4: The preparatory poses for Revolved Half Moon Pose. |
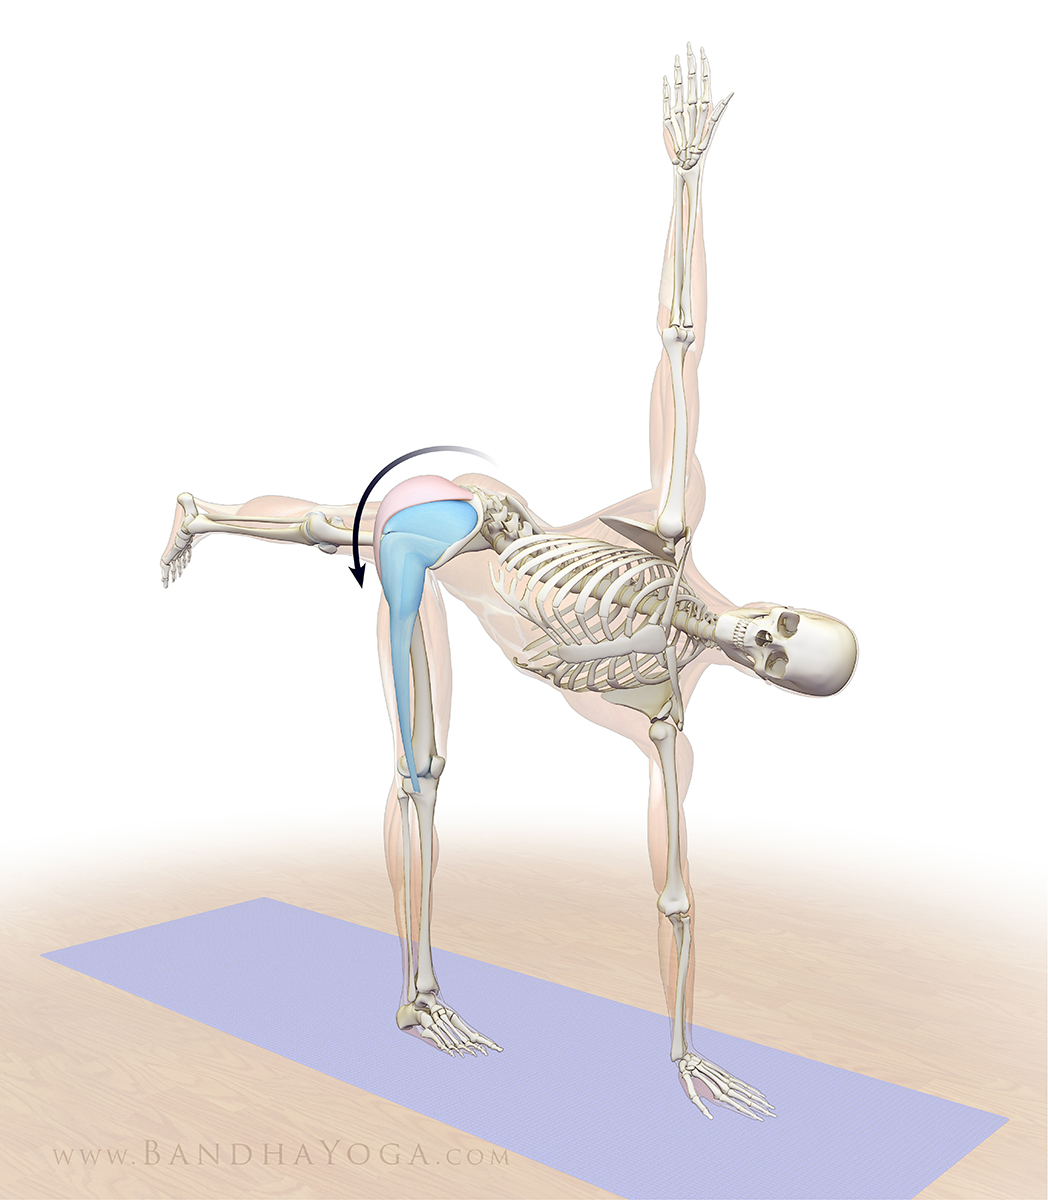 |
| Figure 5: Engaging the hip abductors to lift the pelvis on the side of the raised leg. |
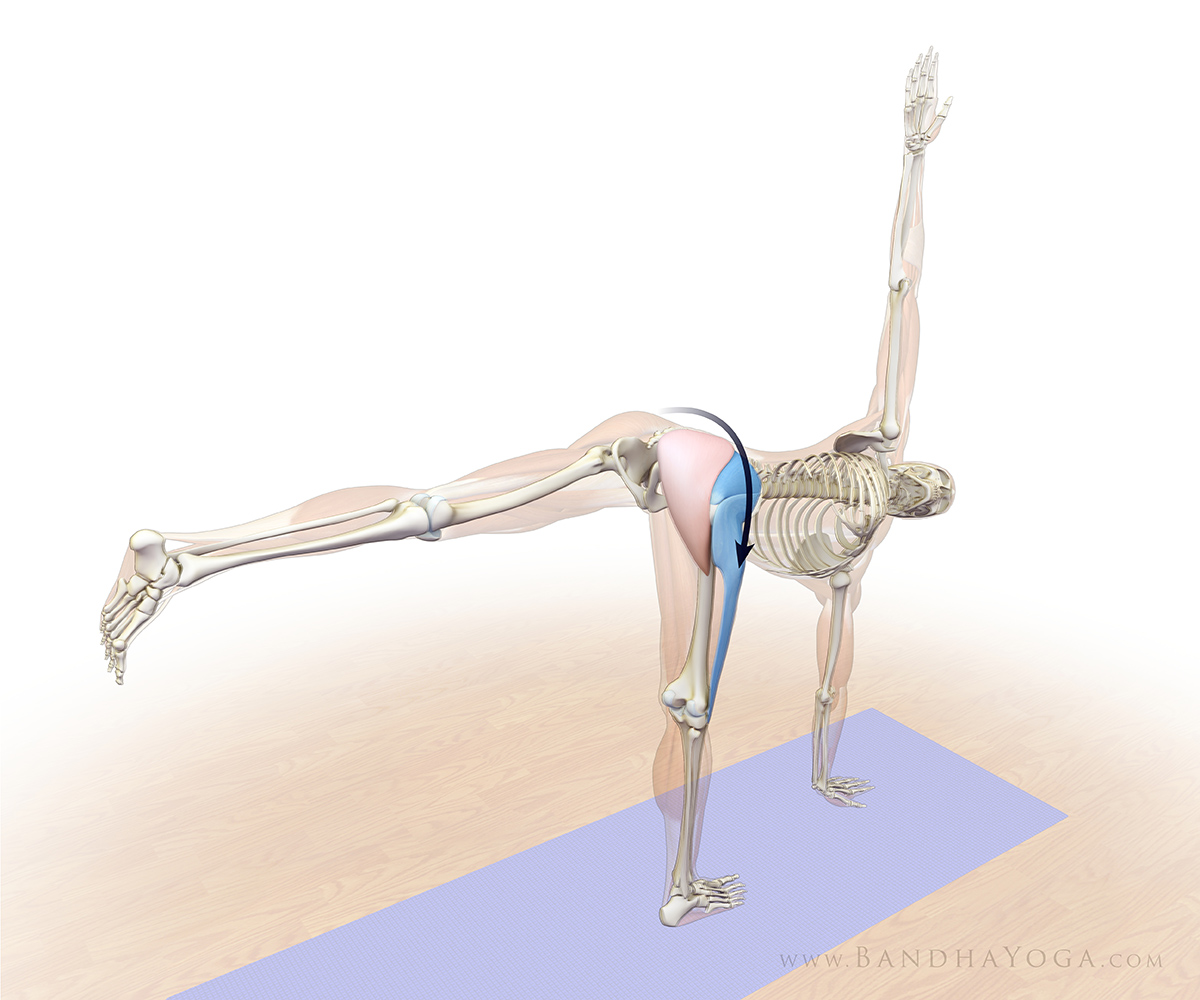 |
| Figure 6: Engaging the hip abductors to lift the pelvis on the side of the raised leg. |
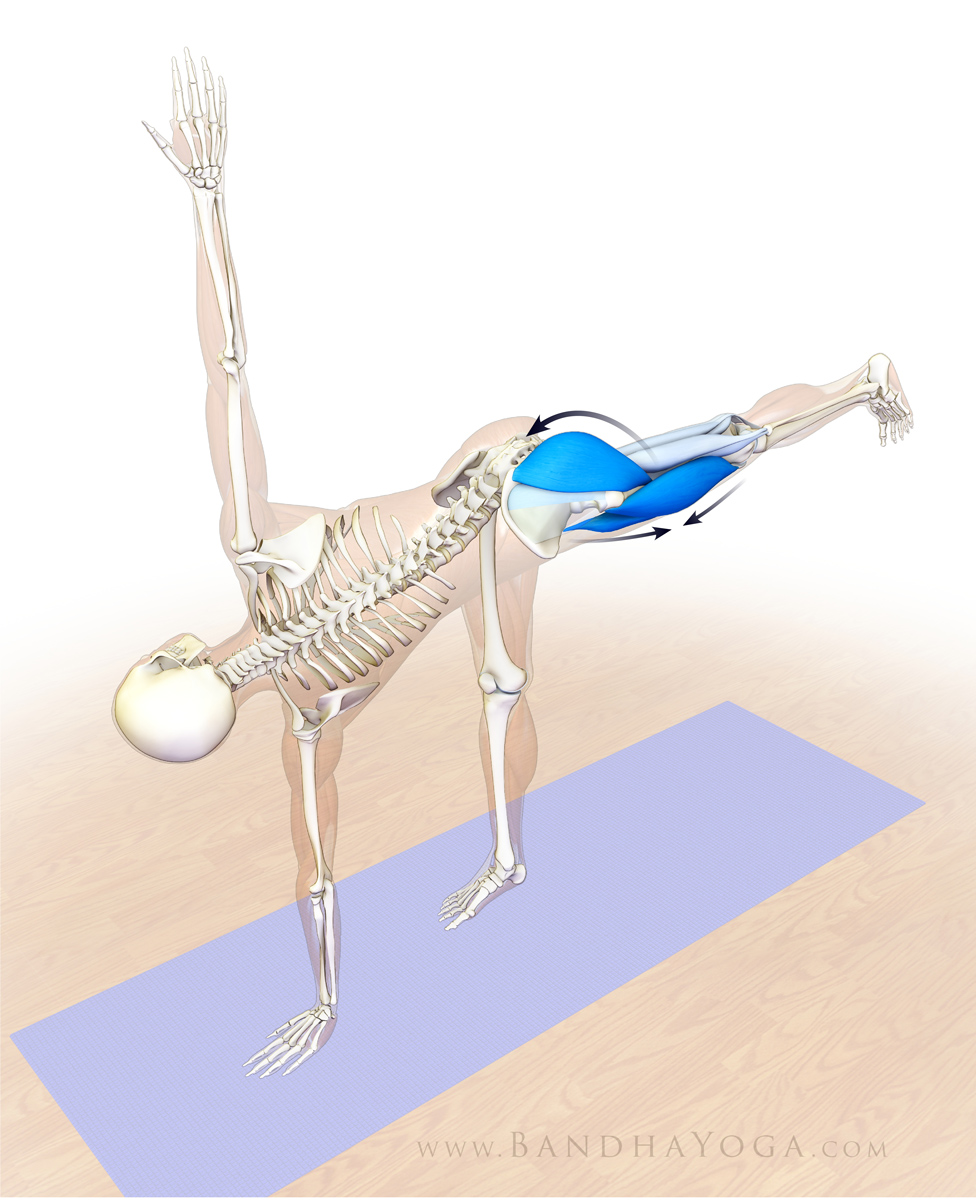 |
| Figure 7: Engaging the hip extensors of the raised leg (gluteus maximus, hamstrings, adductor magnus) and knee extensor (quadriceps). |
Note that the deep external rotators of the standing leg also facilitate stabilizing the pelvis in Revolved Half Moon Pose. Figure 8 illustrates these muscles.
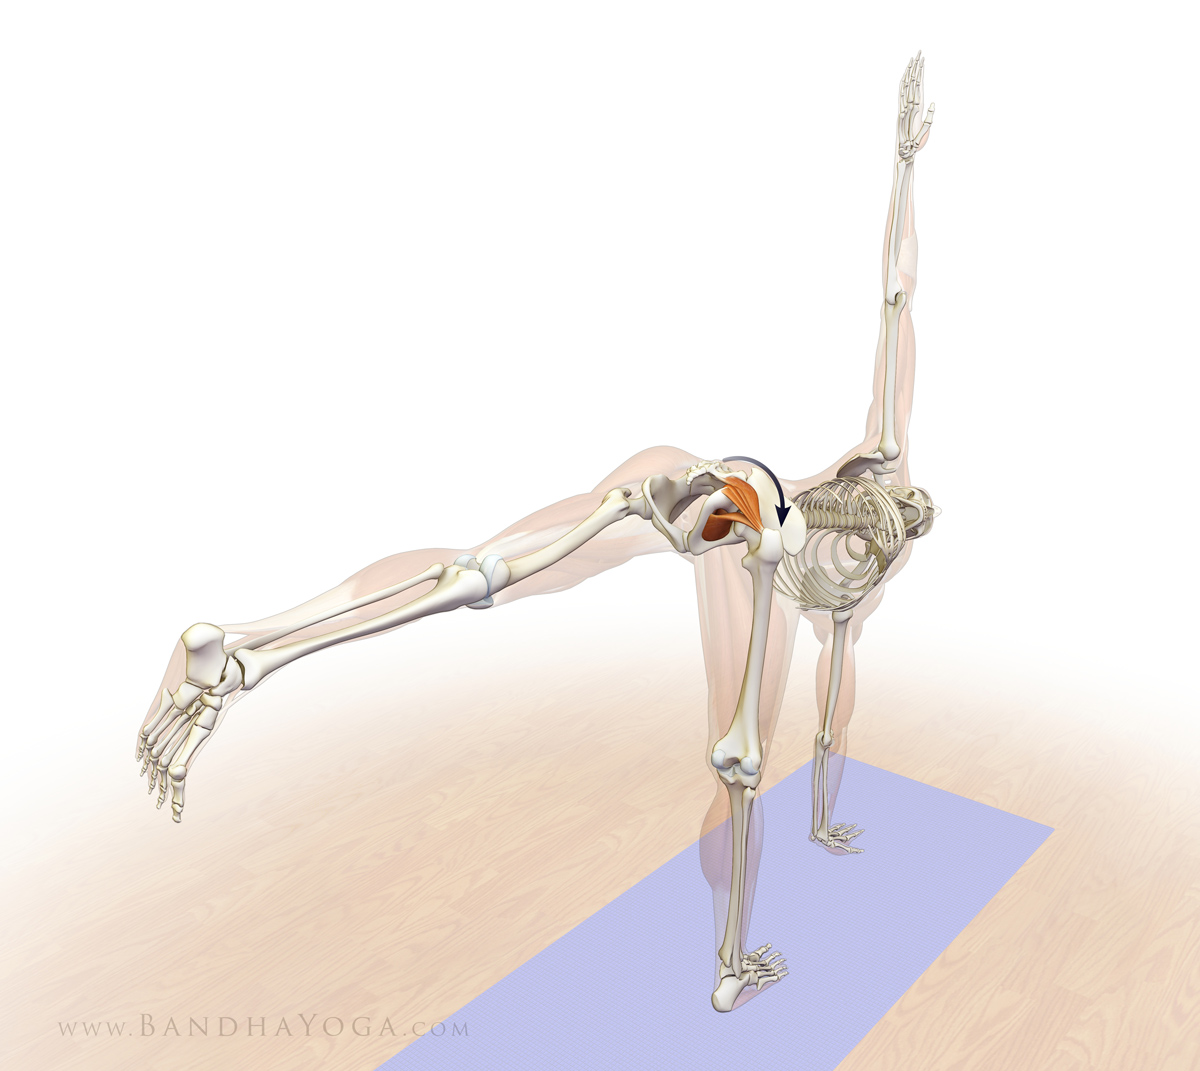 |
| Figure 8: The deep external rotators stabilizing the pelvis in Revolved Half Moon Pose. |
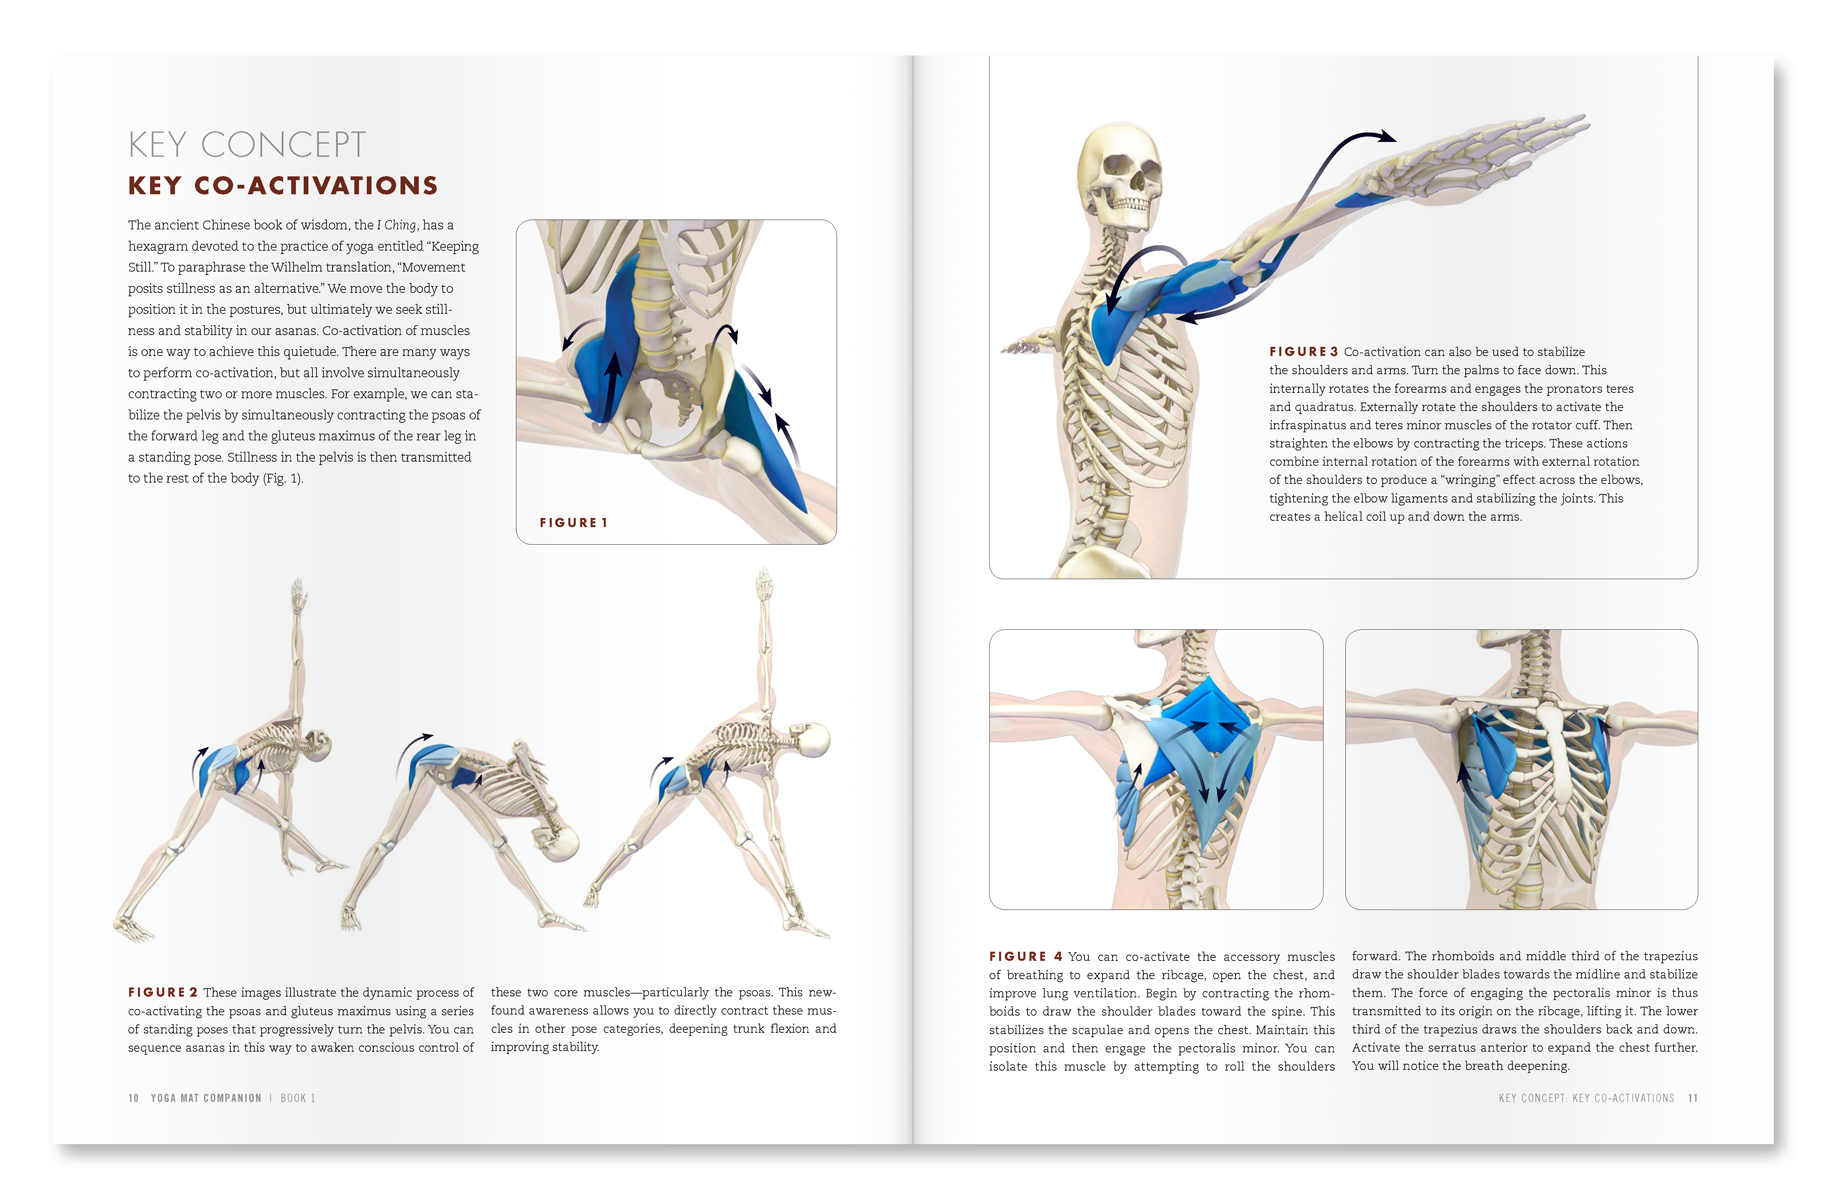
These steps are an example of anatomic sequencing for yoga. Each muscle group is engaged in a specific order to achieve optimal form and stability. The Yoga Mat Companion Series gives you step-by-step anatomic sequencing for all of the major asanas, with a variety preparatory poses as well. Use these books to design your classes and optimize your practice. We’re pleased to announce that all of our books are now available in digital format for Kindle and other devices. Click here to learn more… Feel free to browse through all of our books by clicking here.
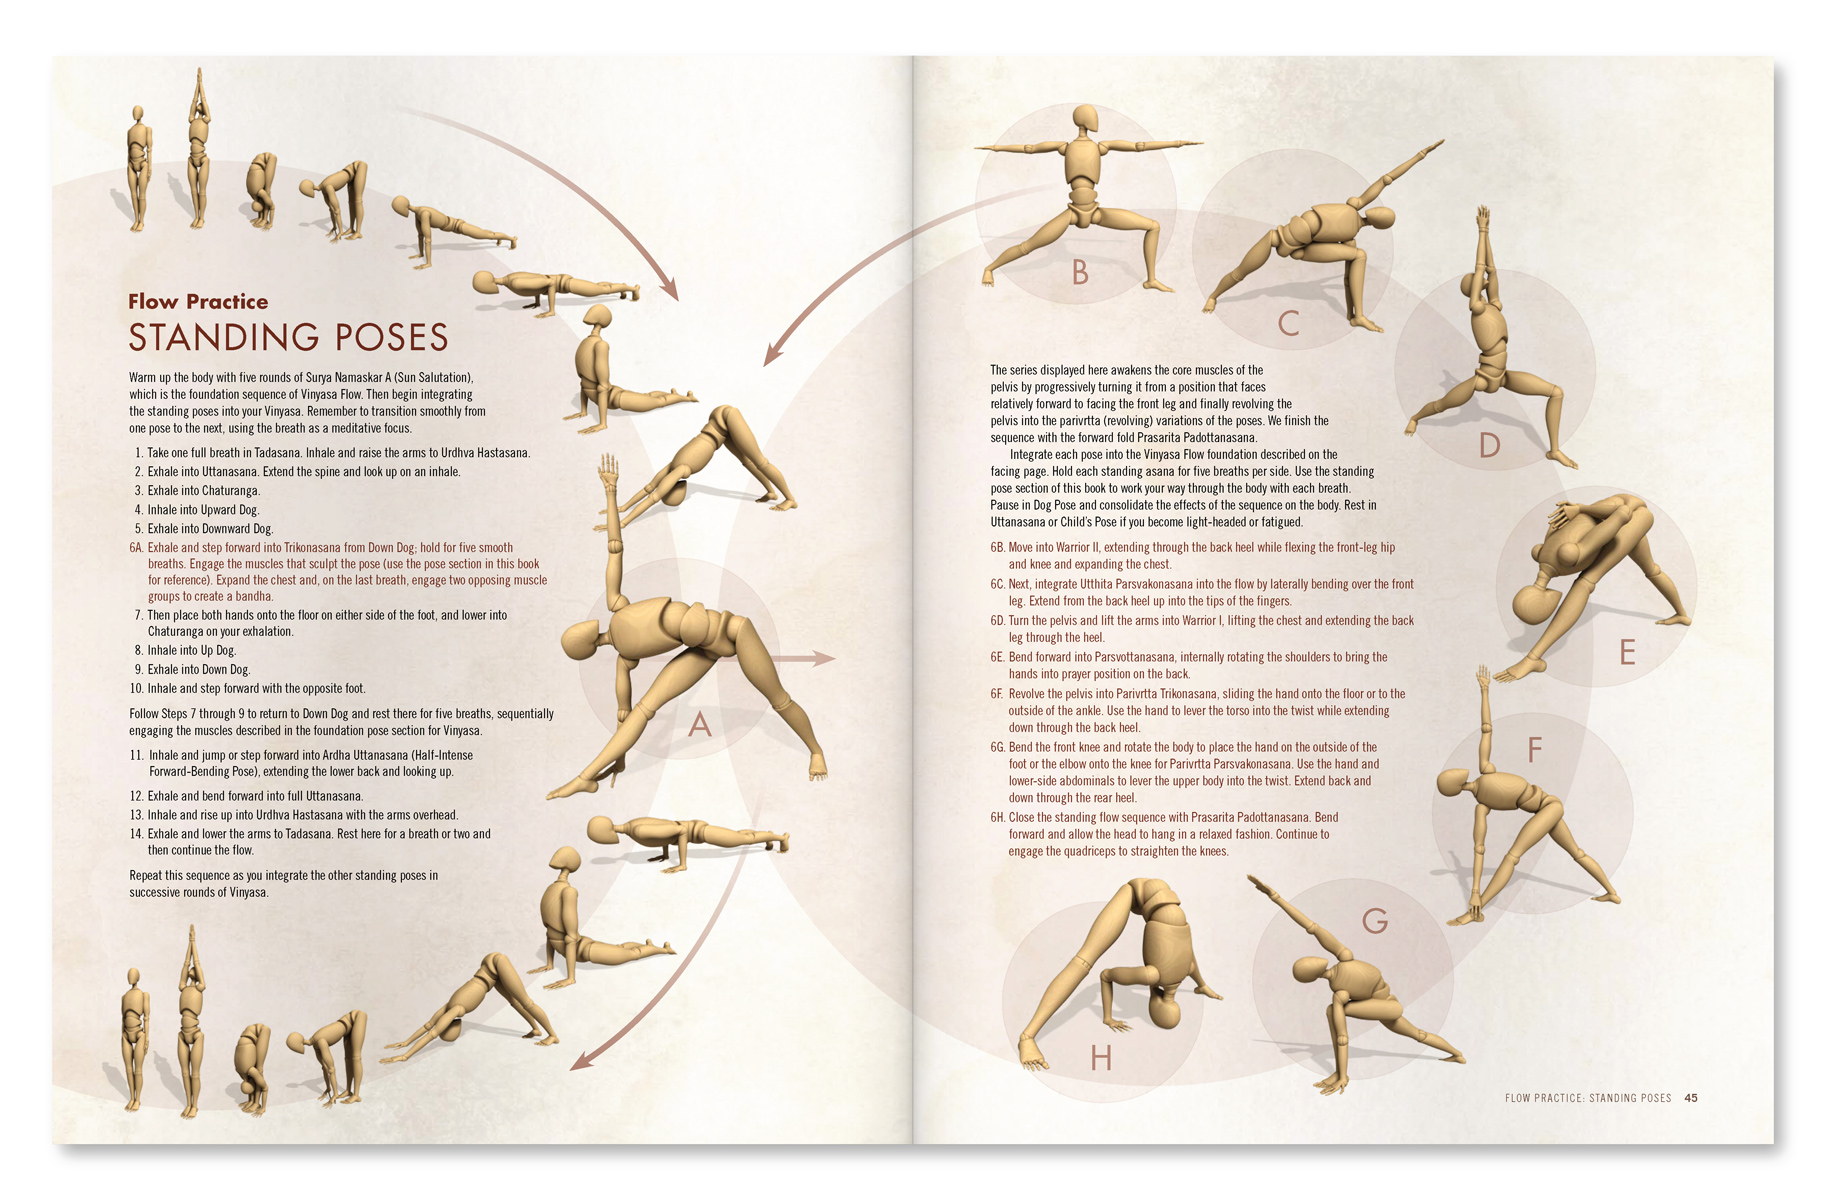 |
| An excerpt from "Yoga Mat Companion 1 - Anatomy for Vinyasa Flow and Standing Poses". |
 |
| An excerpt from "Yoga Mat Companion 1 - Anatomy for Vinyasa Flow and Standing Poses". |
Thanks for stopping by The Daily Bandha. Stay tuned for our next post when I'll present another subject on combining science and yoga. Also, we greatly appreciate when you share us on Facebook, Twitter and Google Plus.
Namaste'
Ray and Chris