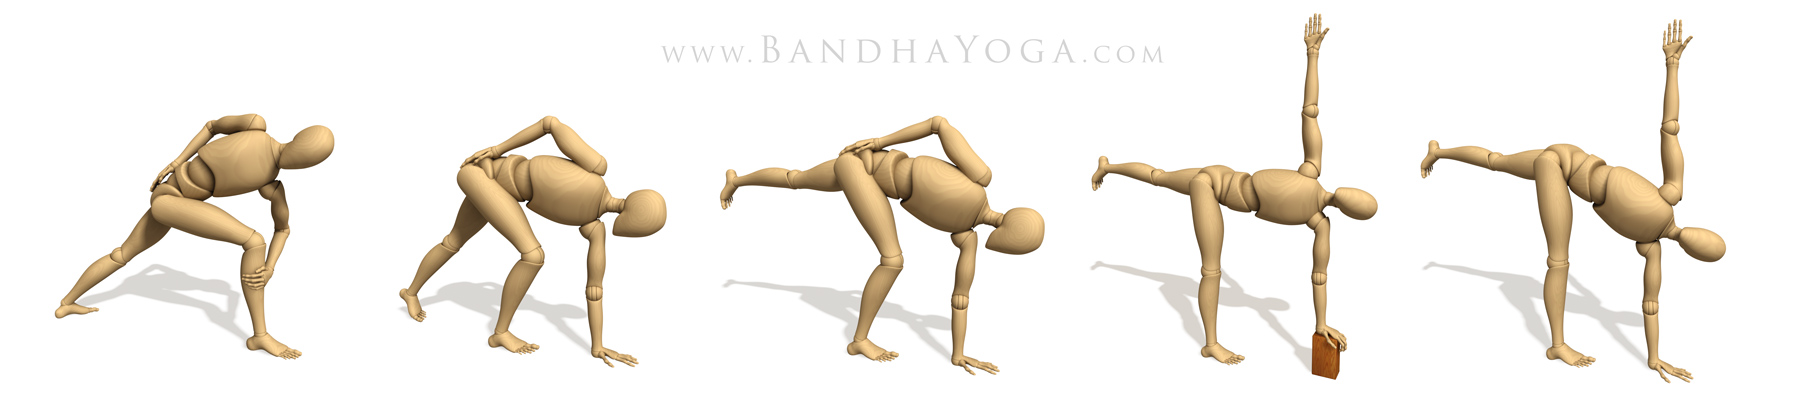
We recently covered the some key poses to strengthen your core, along with biomechanical cues to refine your work in Forearm Plank pose and Bird Dog pose. Side Forearm Plank is another awesome pose to strengthen your core while protecting your wrists. You do this one by placing your forearm on the mat and attempting to drag it towards your feet, while engaging the core muscles on your sides to stabilize the lumbar pelvic complex. Keep your supporting arm (the humerus bone) straight up and down (at a right angle to the floor). This way the passive strength of the bone aids to support your body weight. Click here for more on this concept in Vasisthasana.
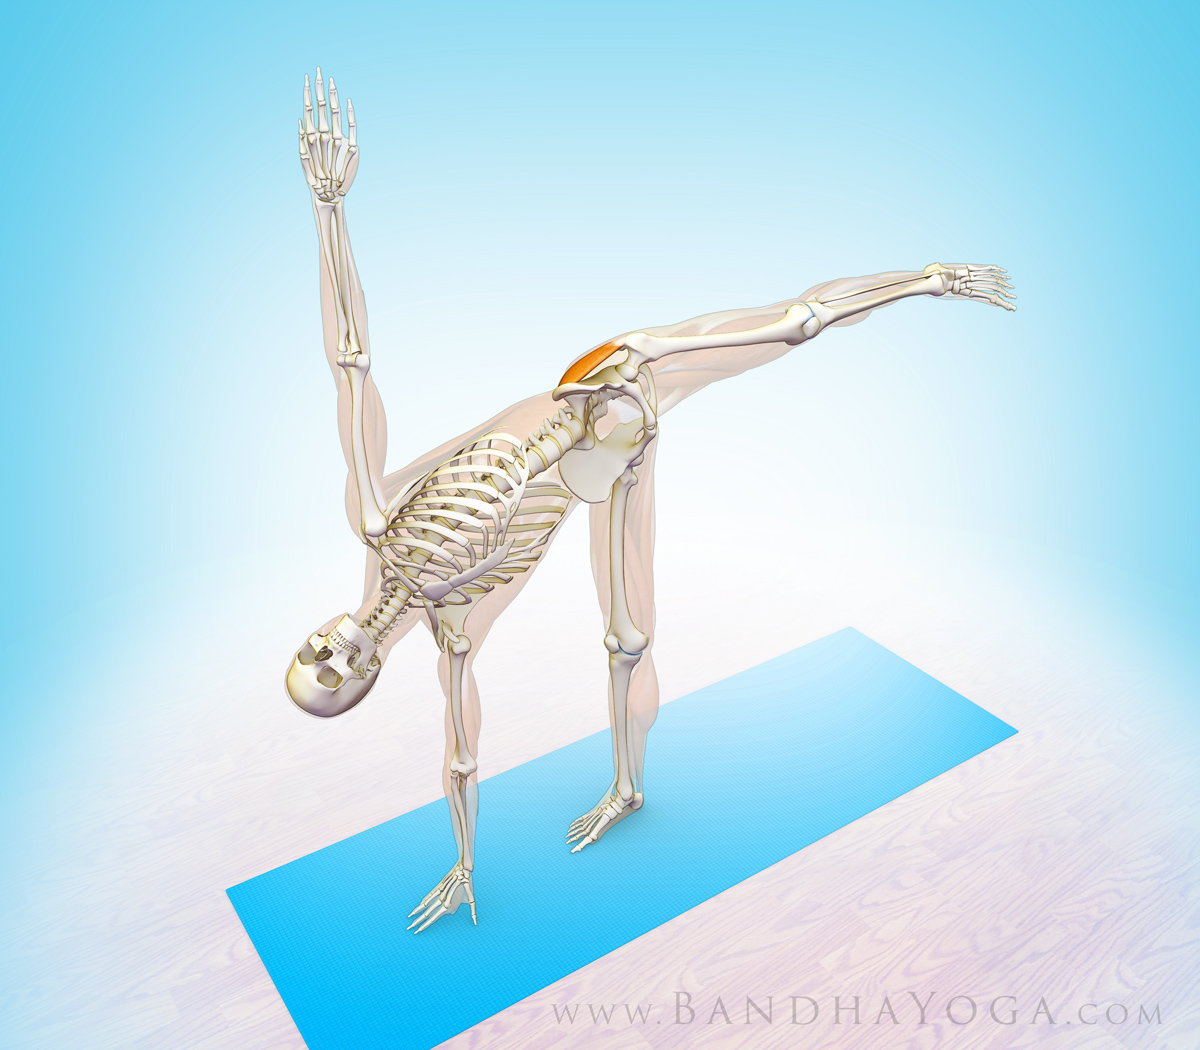
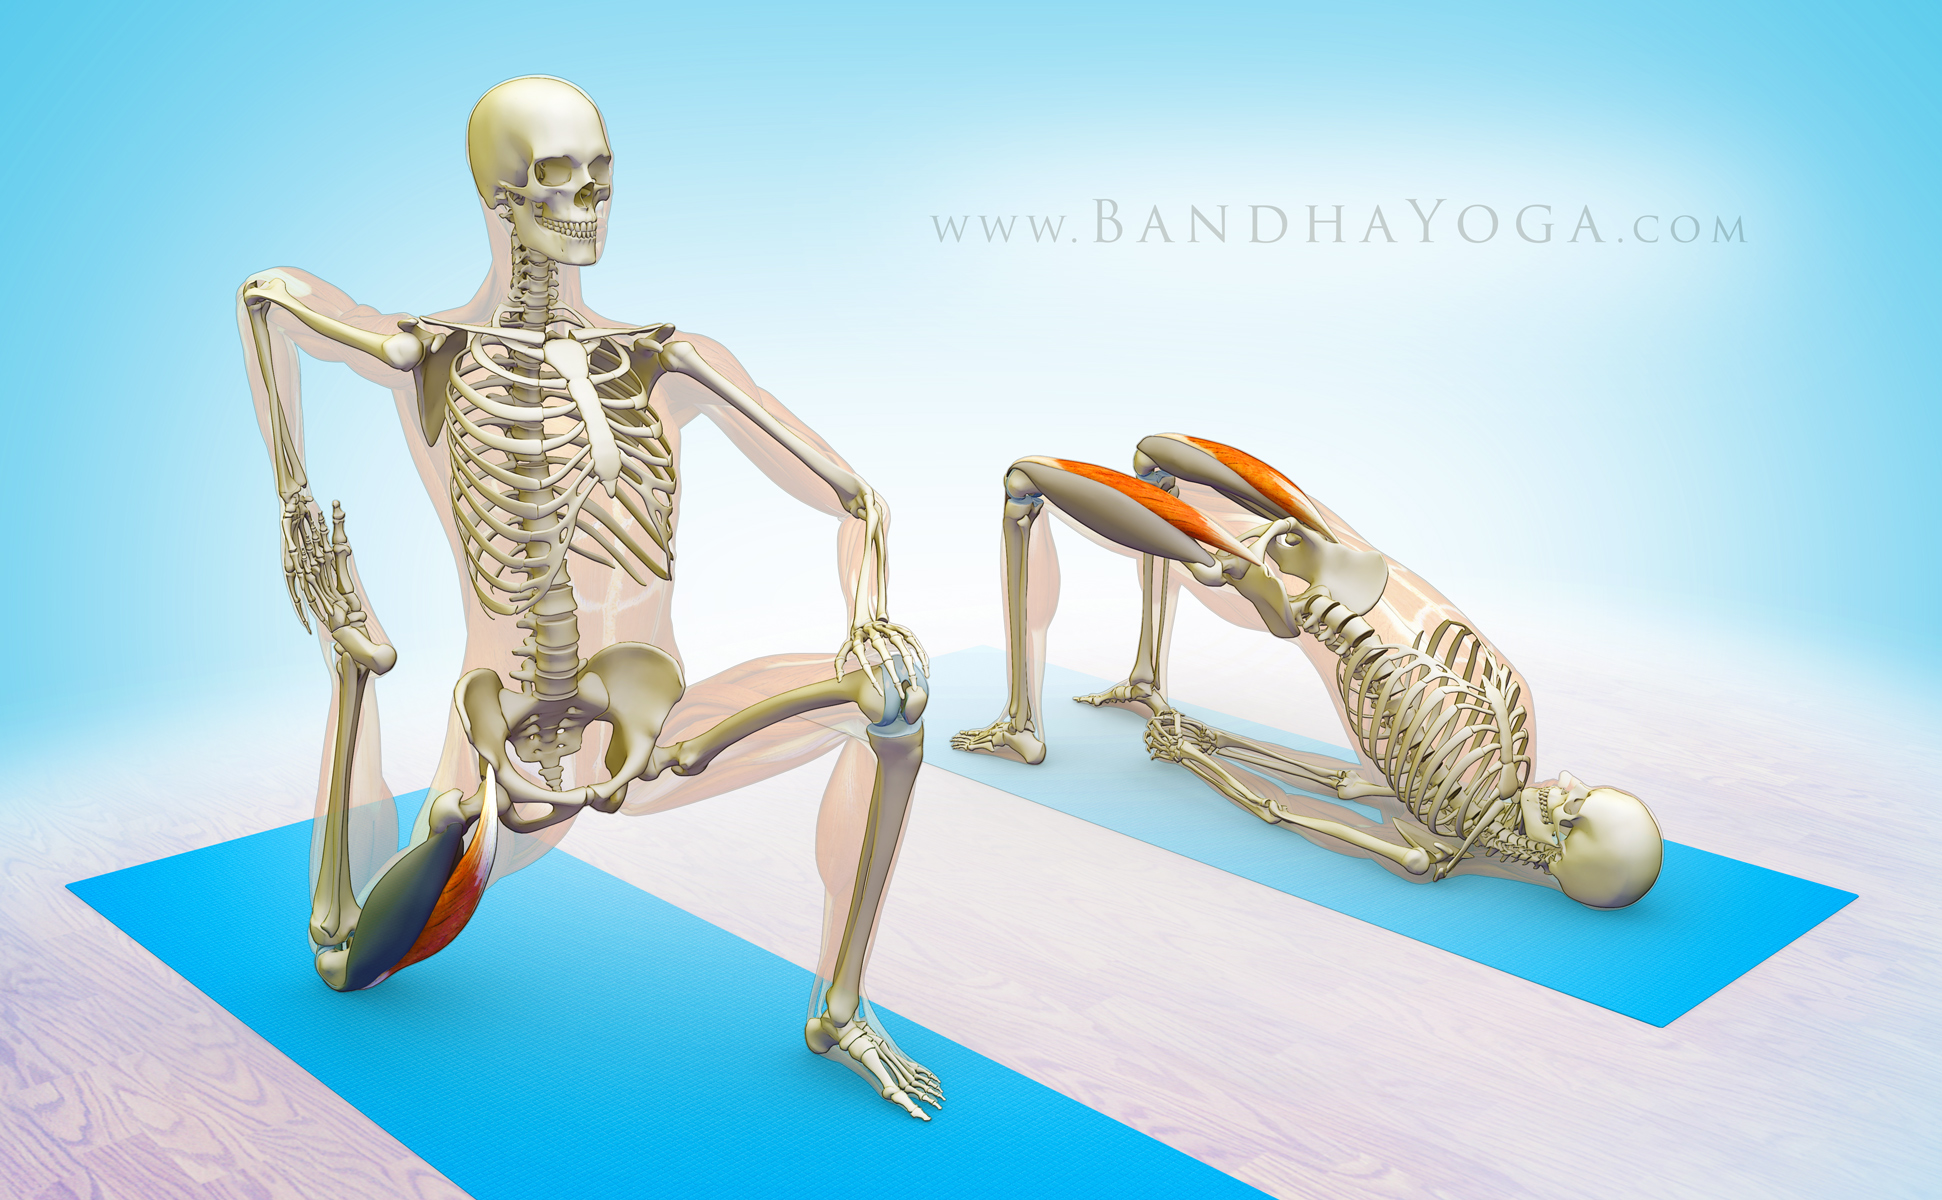
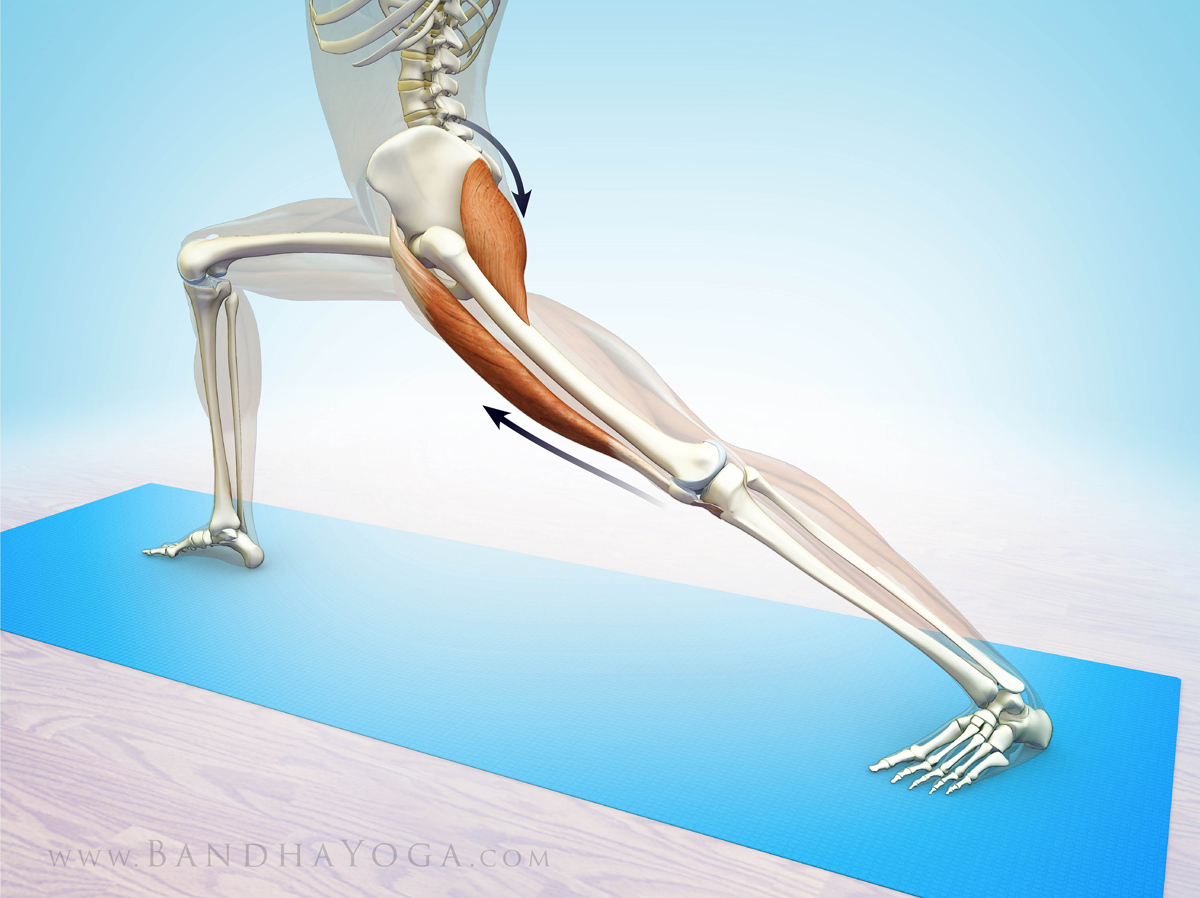
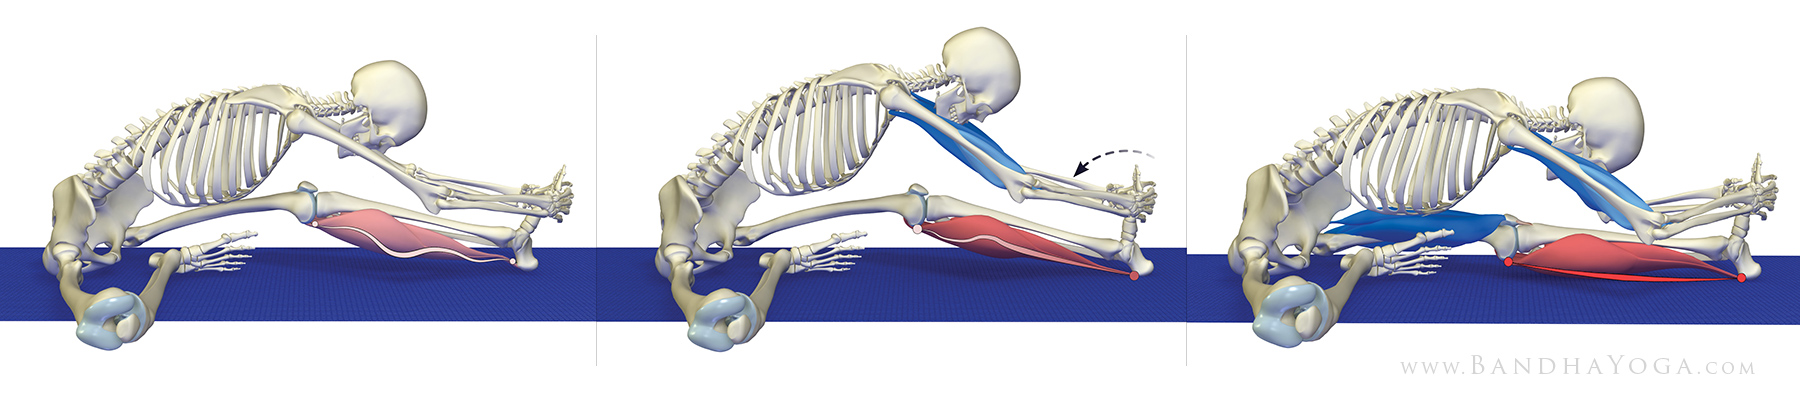
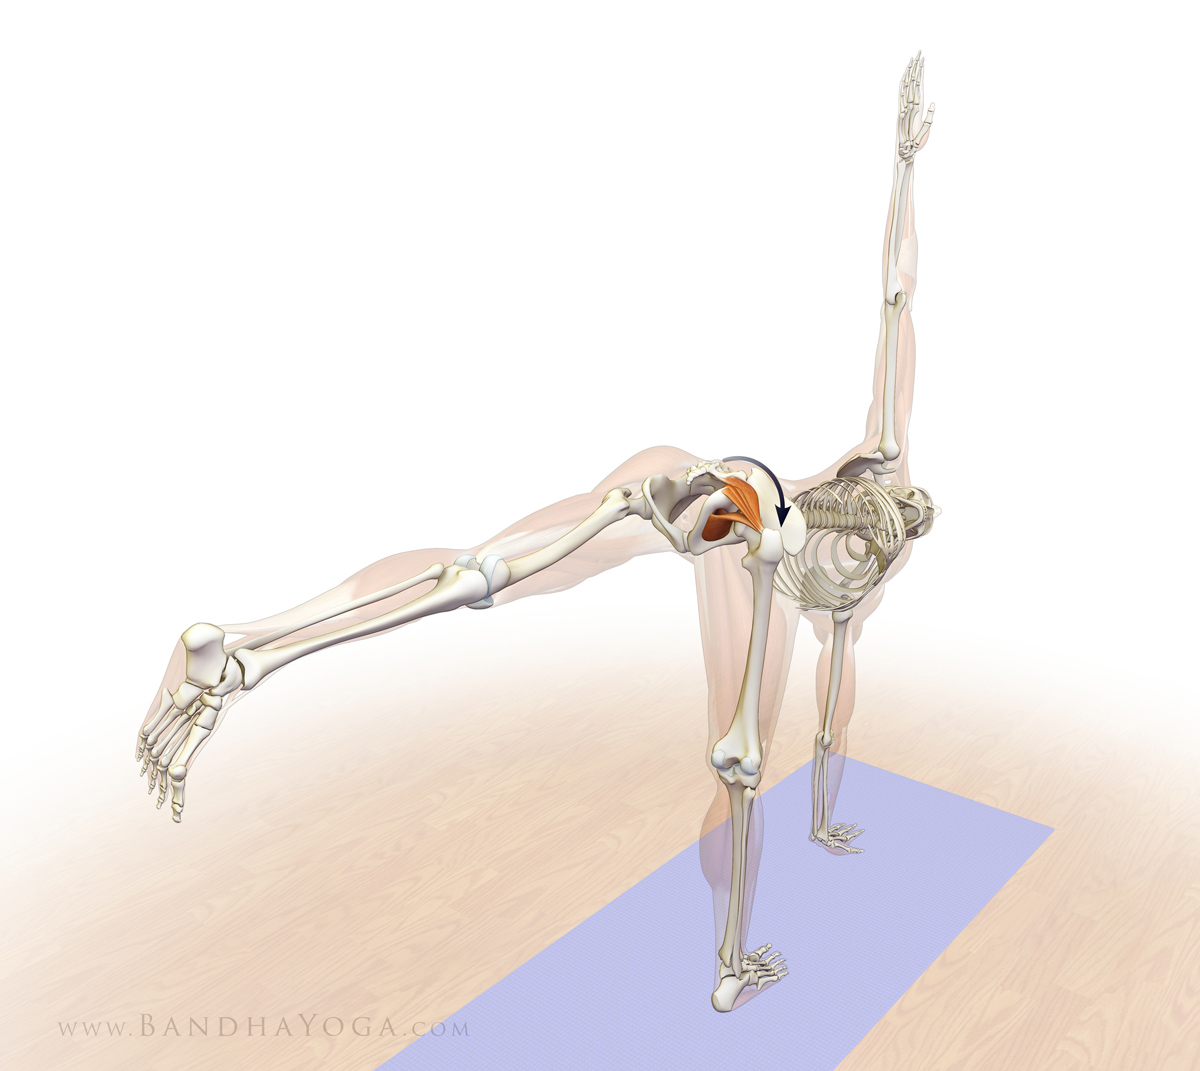
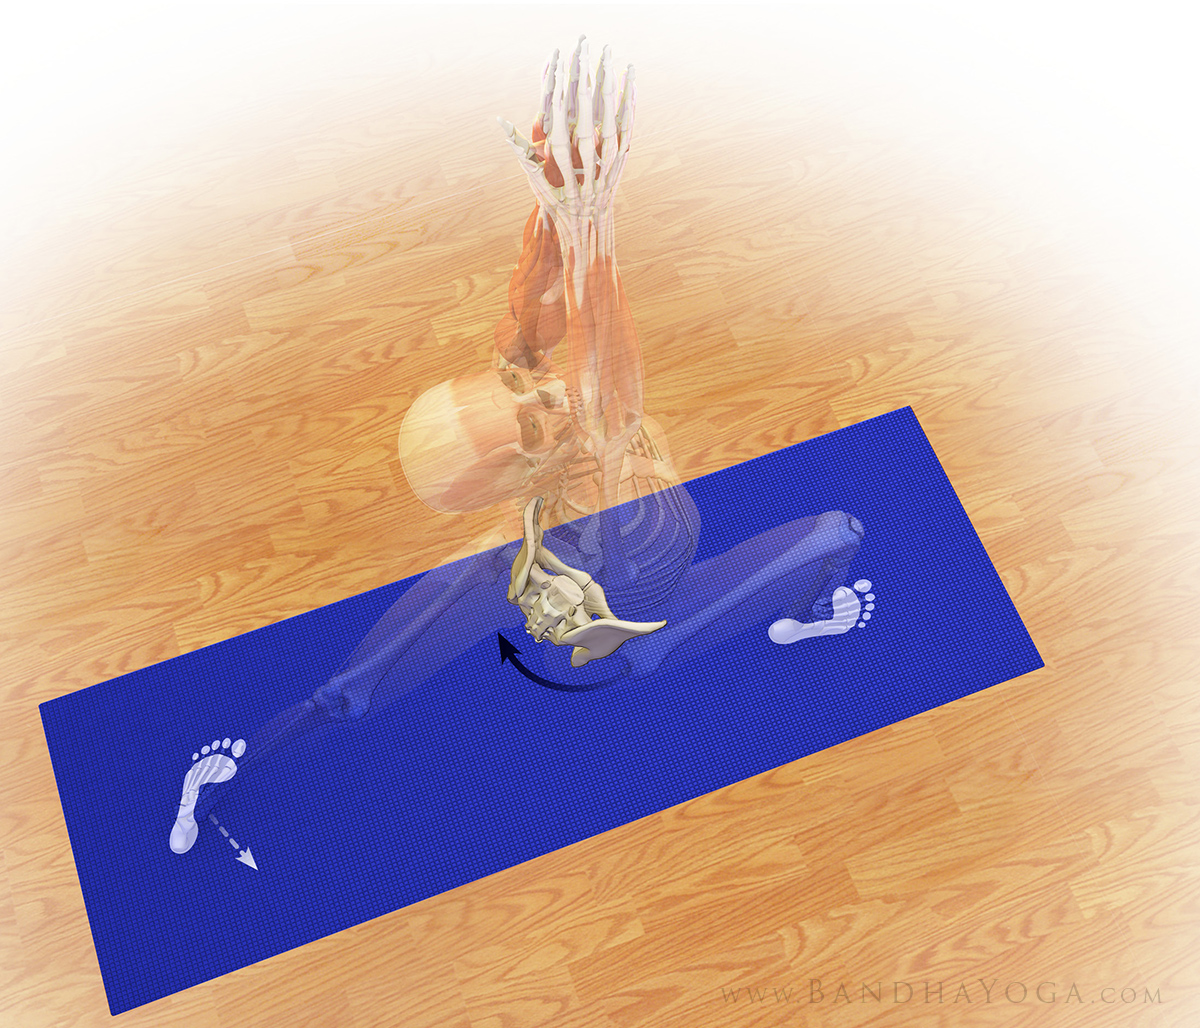
Begin by stabilizing the shoulders. Do this by attempting to externally rotate your forearm on the mat. At the same time, attempt to internally rotate your forearm on the mat as well. It’s a bit like a windshield wiper that’s fixed in place. This cue “co-activates” the infraspinatus and teres minor (external rotation) and the subscapularis (internal rotation) muscles of your rotator cuff. Feel how this stabilizes your shoulder. Folks that are new to this pose can use the preparatory version to work with this cue. Figure 1 shows the prep pose and Figure 2 illustrates the action of the forearms.
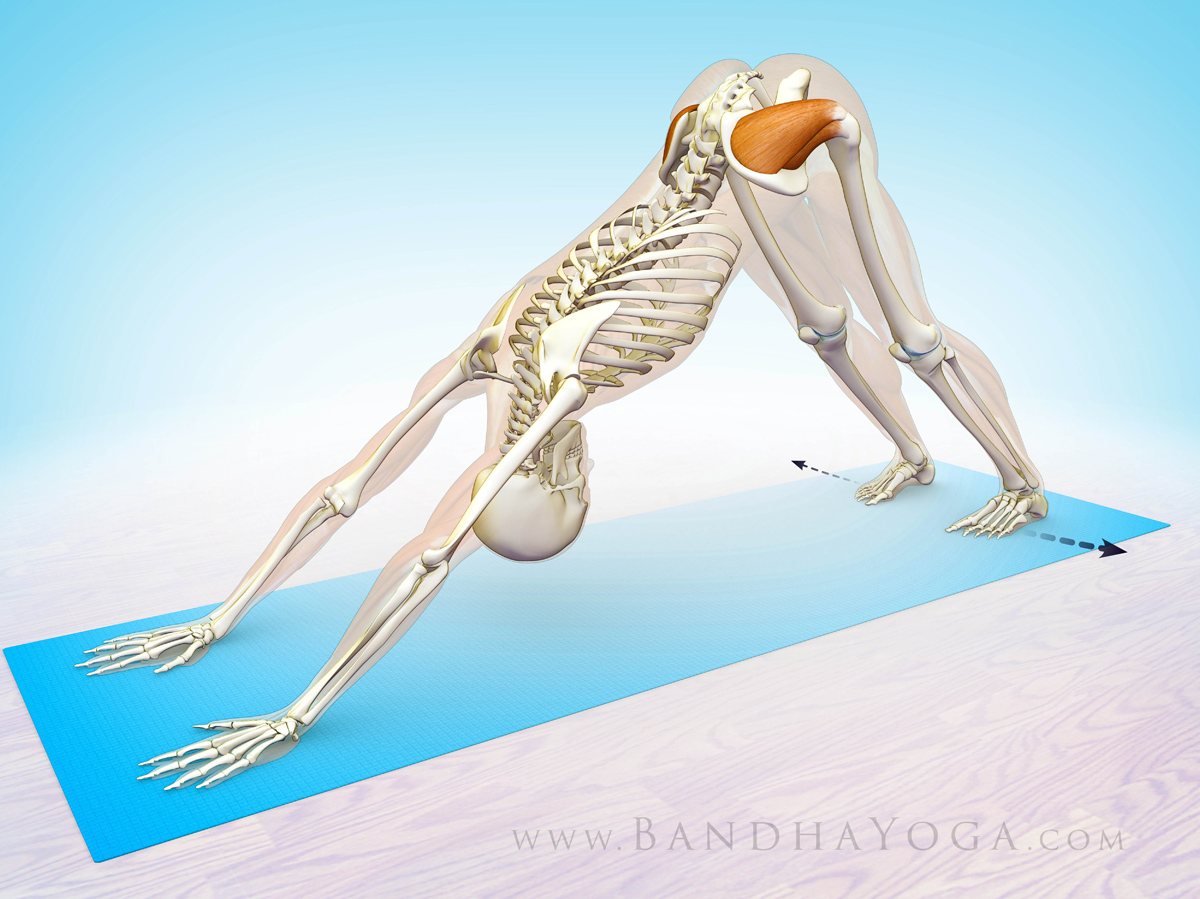
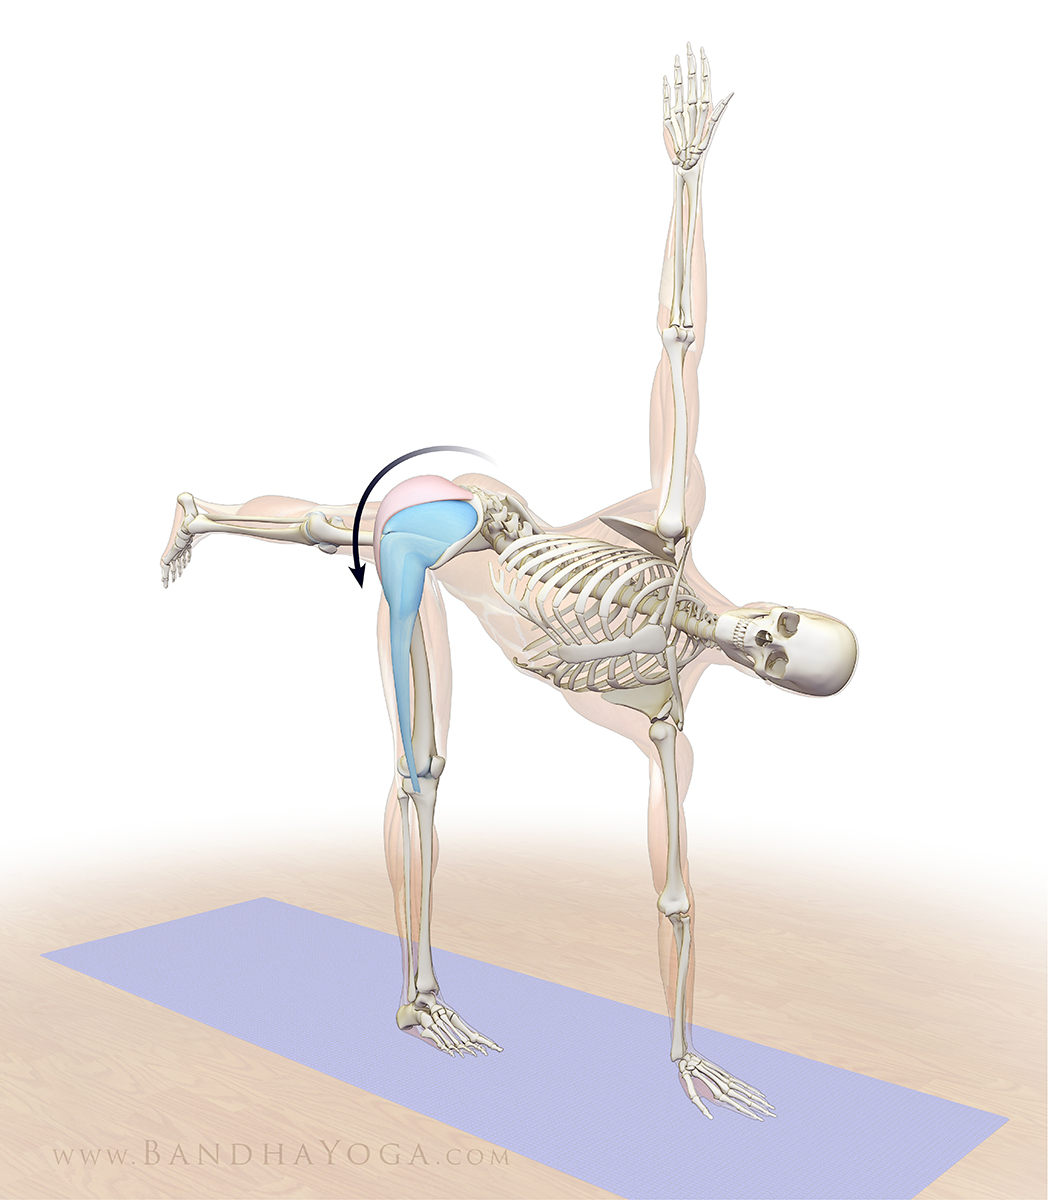
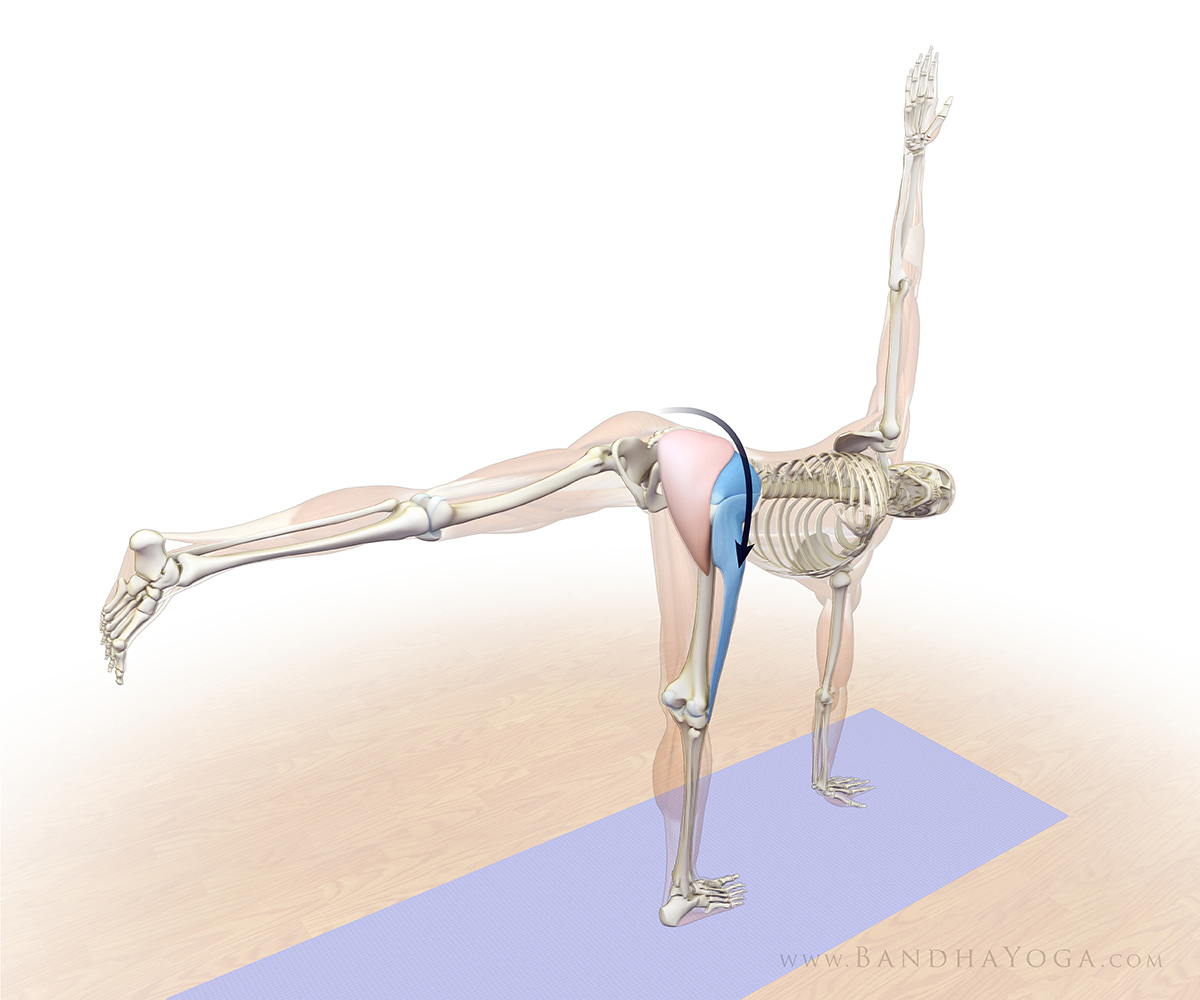
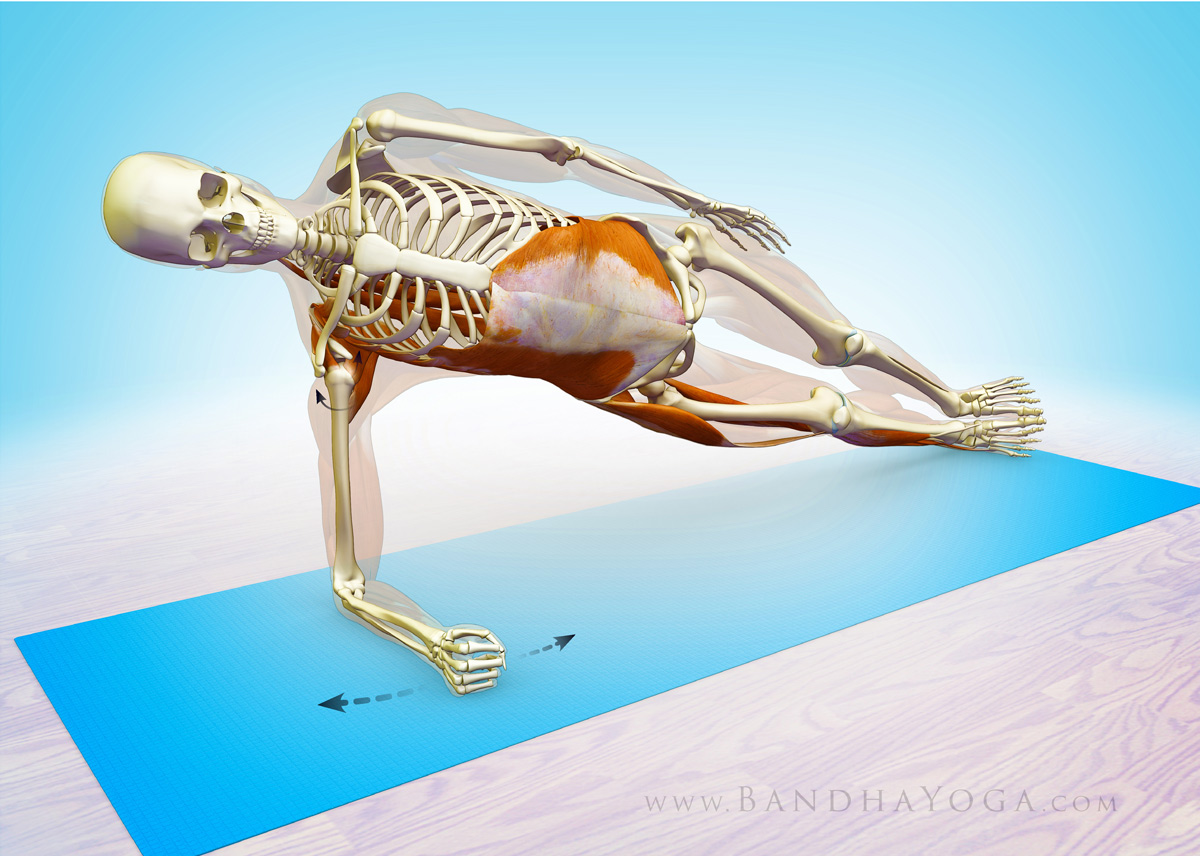
Next, press the edge of your lower side foot into the mat and gently draw it upwards toward the shin to “evert” your foot. These cues activate a series of muscles—including the “lateral subsystem”--to connect your shoulders and legs to your core. Figure 3 shows the cue for attempting to drag the forearm and the feet towards each other (while engaging the side abs).
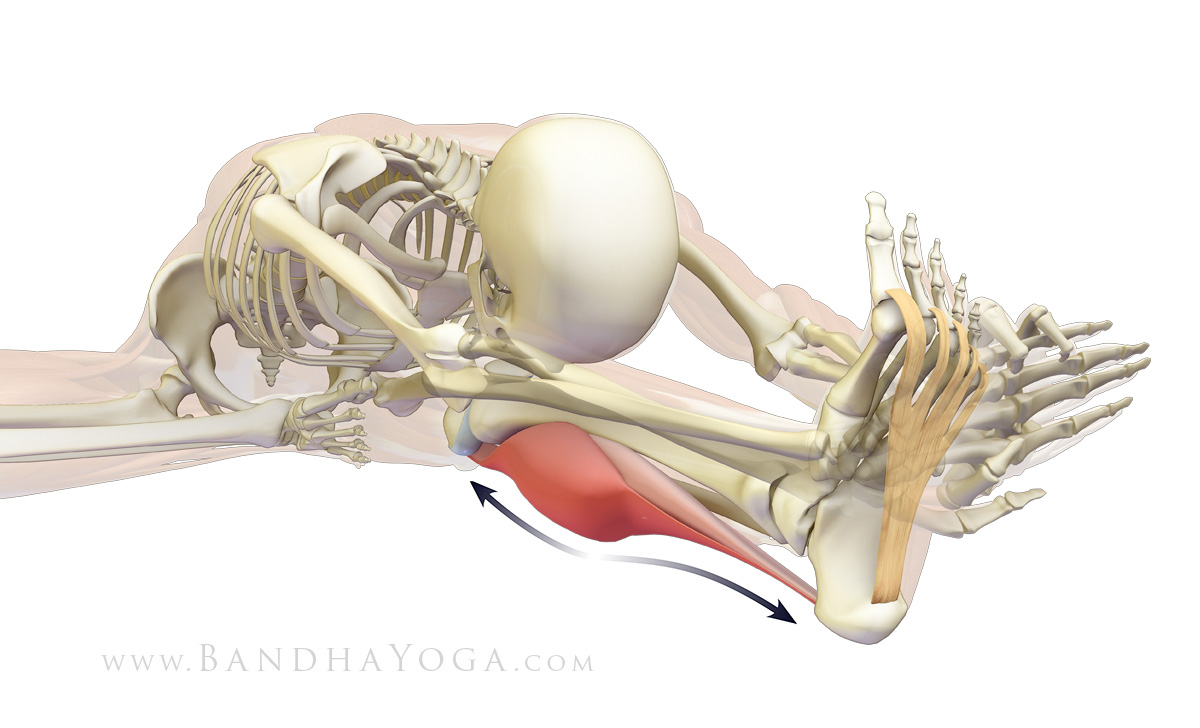
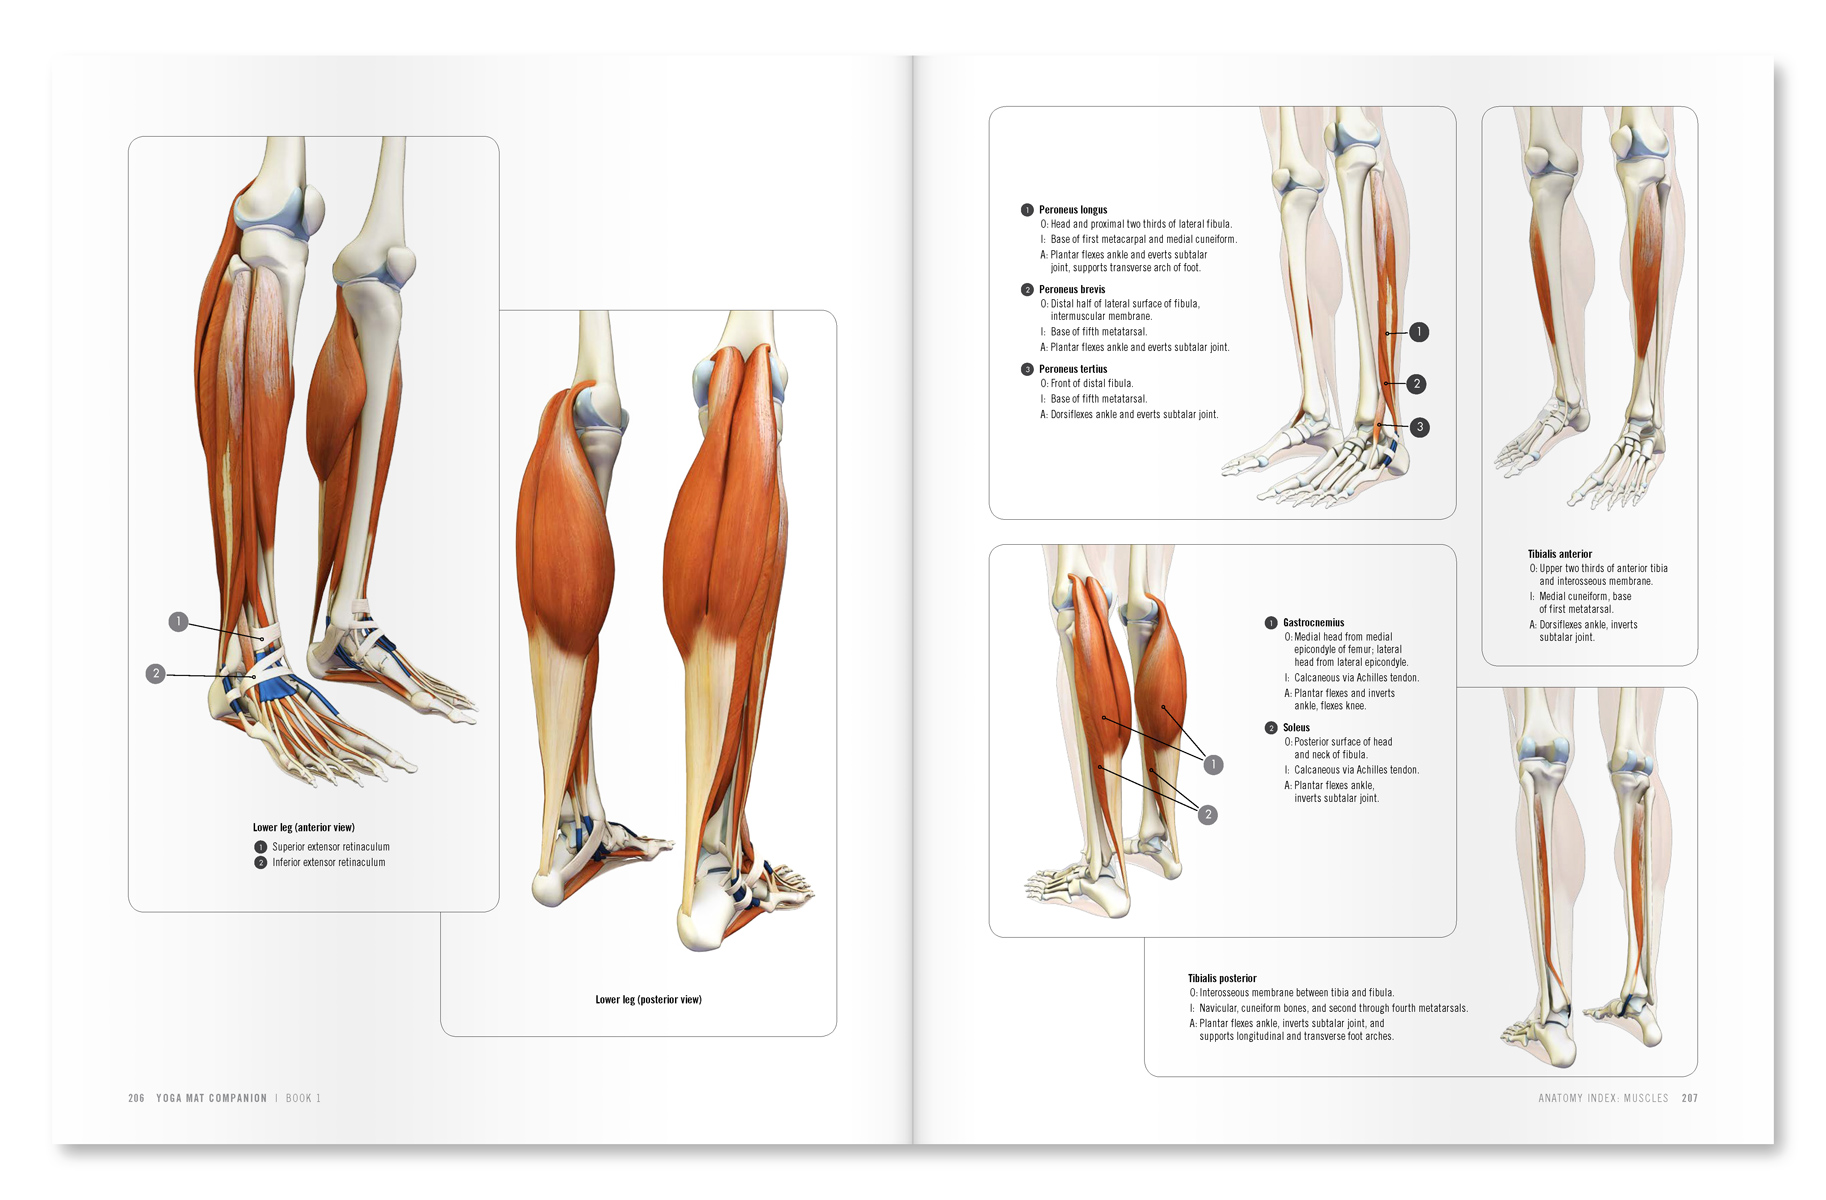
Now let’s check out the myofascial connections in side forearm plank. When you press the side of your foot into the mat, you activate the peroneus muscles as well as the abductor muscles up at your hip (the TFL and gluteus medius). These muscles have a fascial connection to your abs, specifically the external oblique (which attaches to the rim of the pelvis). The external oblique connects to your shoulders via the serratus anterior muscle. The serratus anterior is a scapular stabilizer that works in concert with the rotator cuff. So the whole operation helps to integrate your feet, legs, pelvis and lumbar--all the way up to the shoulders.
So let’s talk about the deep longitudinal subsystem…
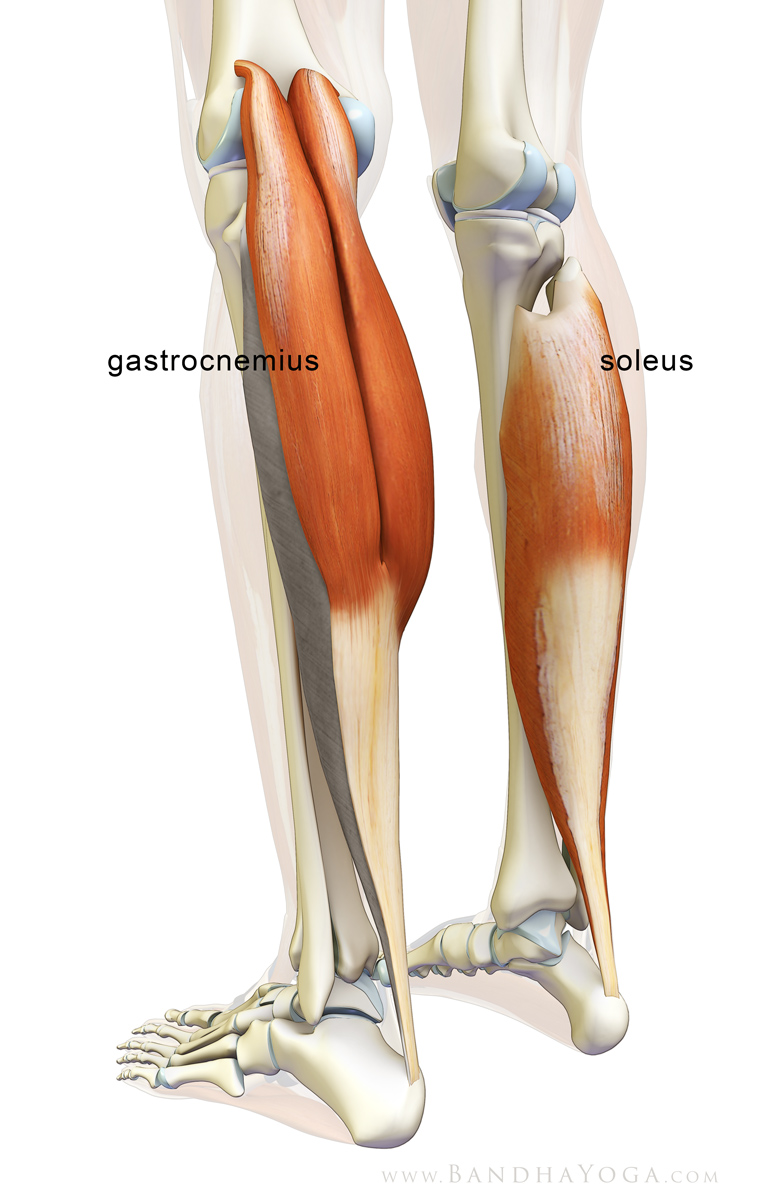
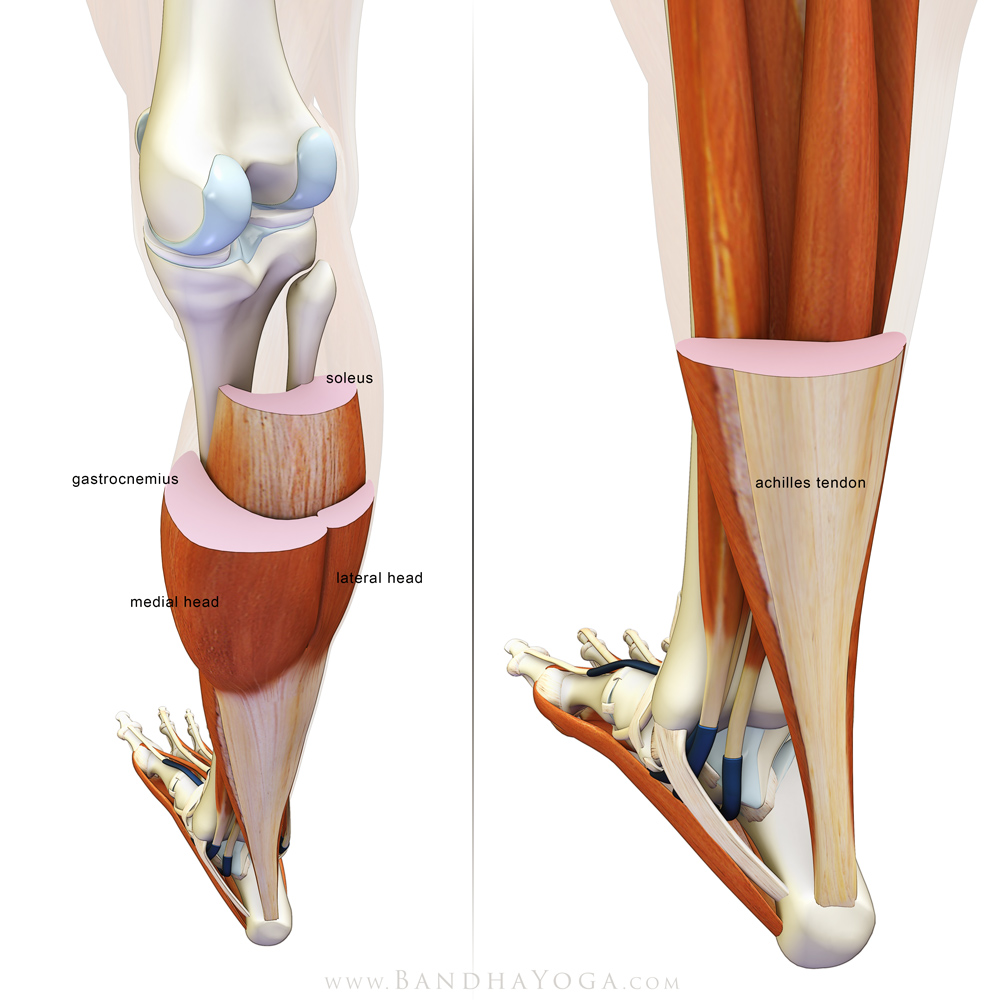
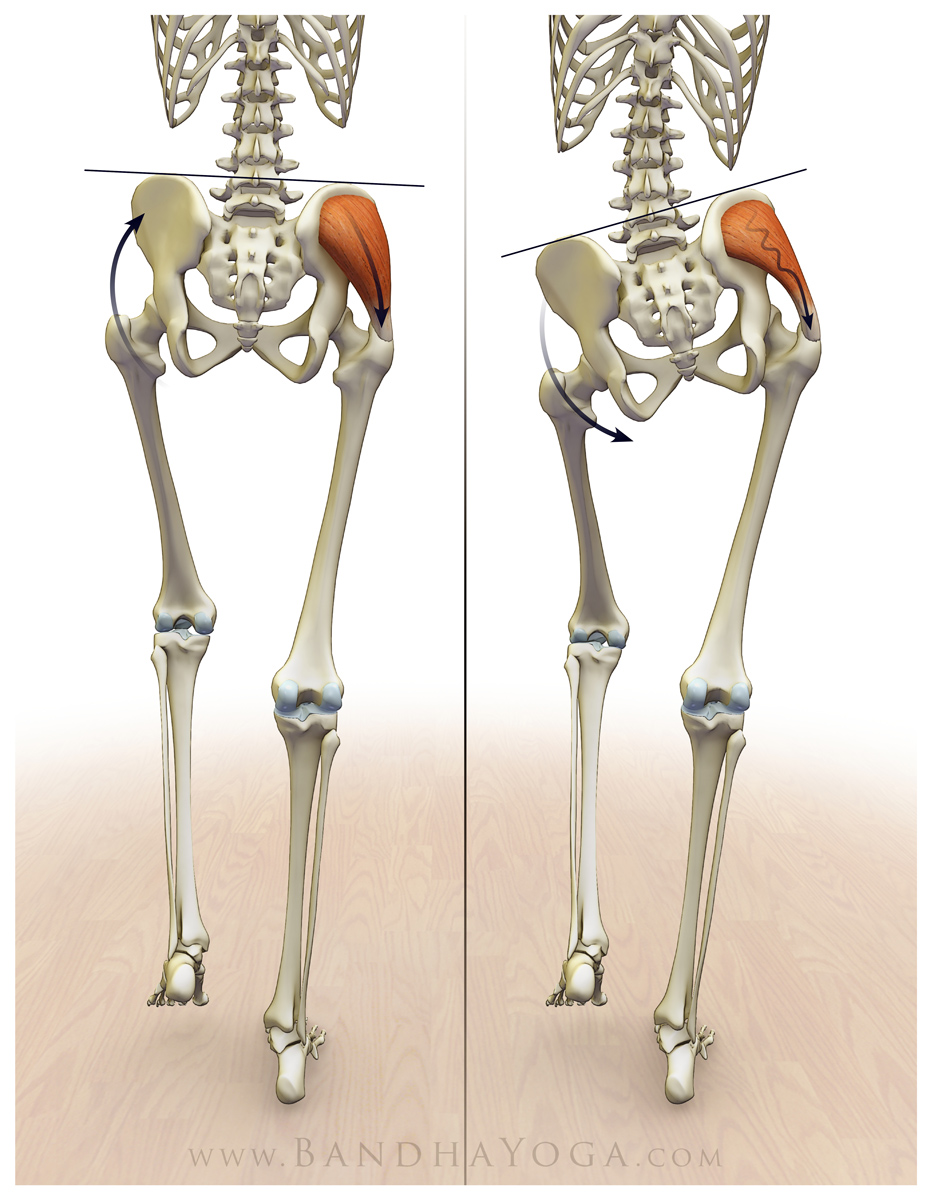
Your deep longitudinal subsystem is made up of the peroneus longus muscle (on the outside of your lower leg), the biceps femoris of your hamstrings and your sacrotuberous ligament (up in the pelvis), the thoracolumbar fascia and the erector spinae muscles (in your back). The biceps femoris creates a link between the lower extremities and the trunk via the sacrotuberous ligament. This ligament helps to transmit force across your sacrum, and, via the thoracolumbar fascia on up the trunk to your deep back muscles. Check Figure 3 for a color coded illustration of this connection. Click here to see this connection in the lower legs in Reverse Pigeon Pose.
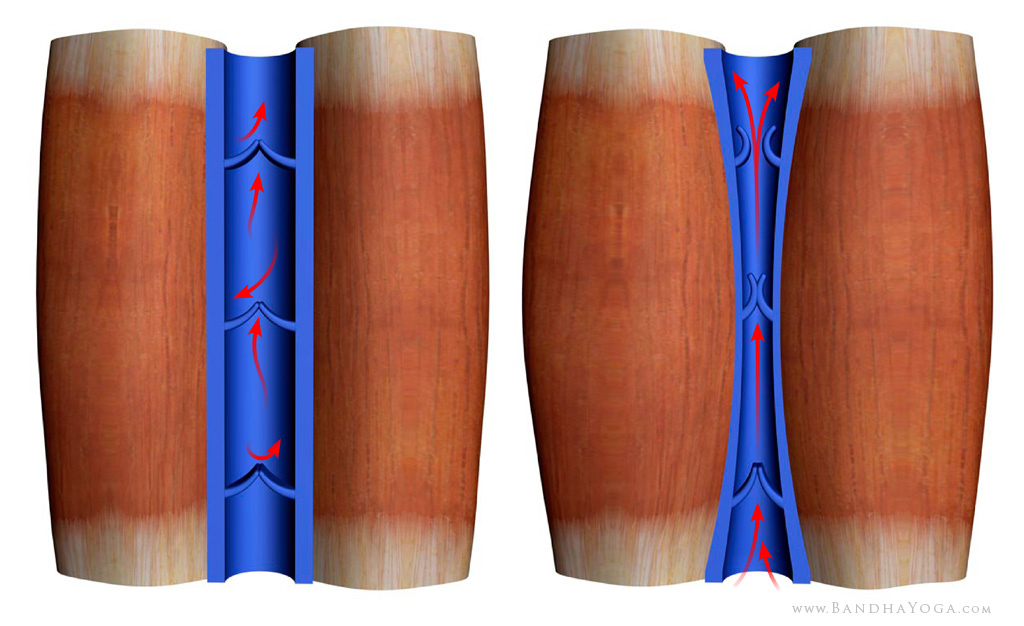
This subsystem is part of the global movement system and is thought to be important in force transmission between your trunk and the ground—as in walking. We’ll have more posts on the other subsystems and how to work with them in yoga soon. Click here to see how the abductor muscles of the hip work in your poses. Click here to learn more about the thoracolumbar fascia and its importance in yoga.
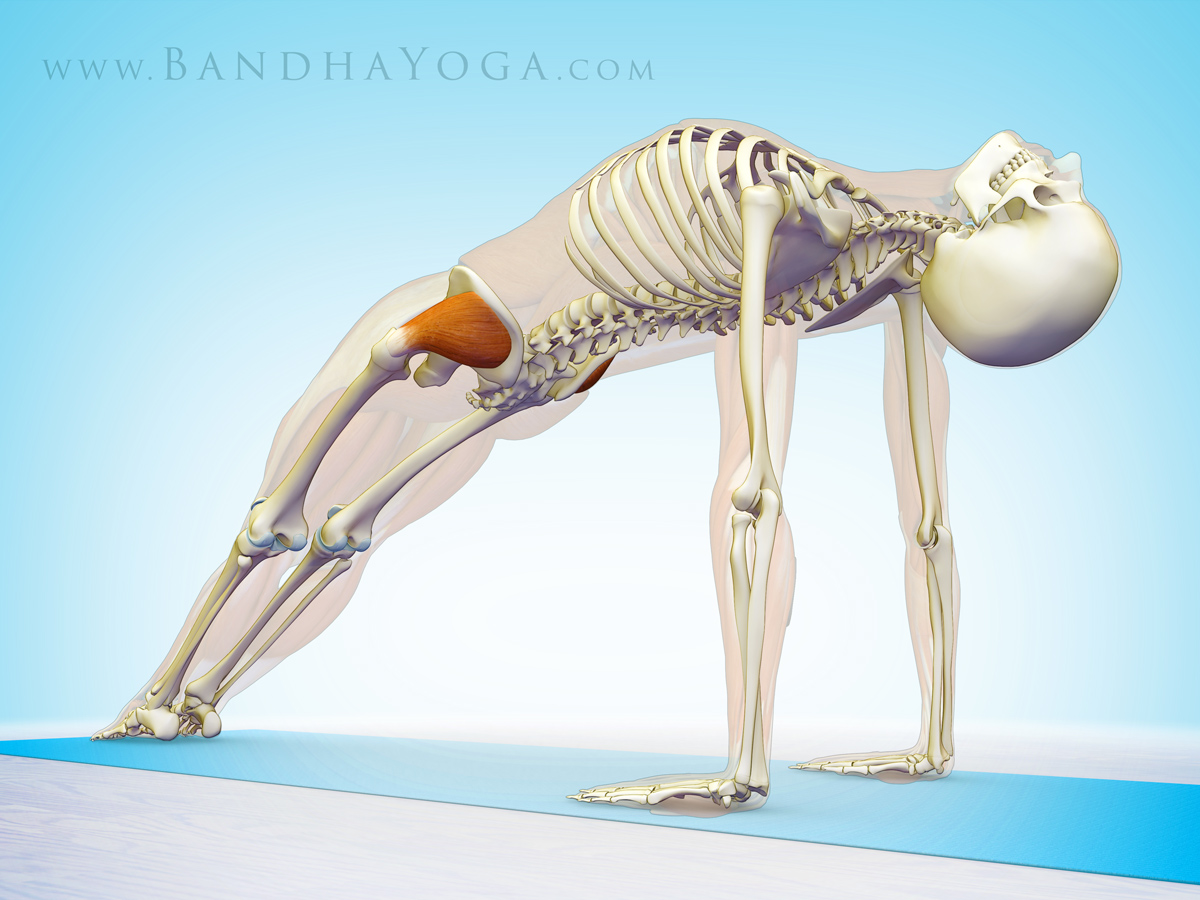
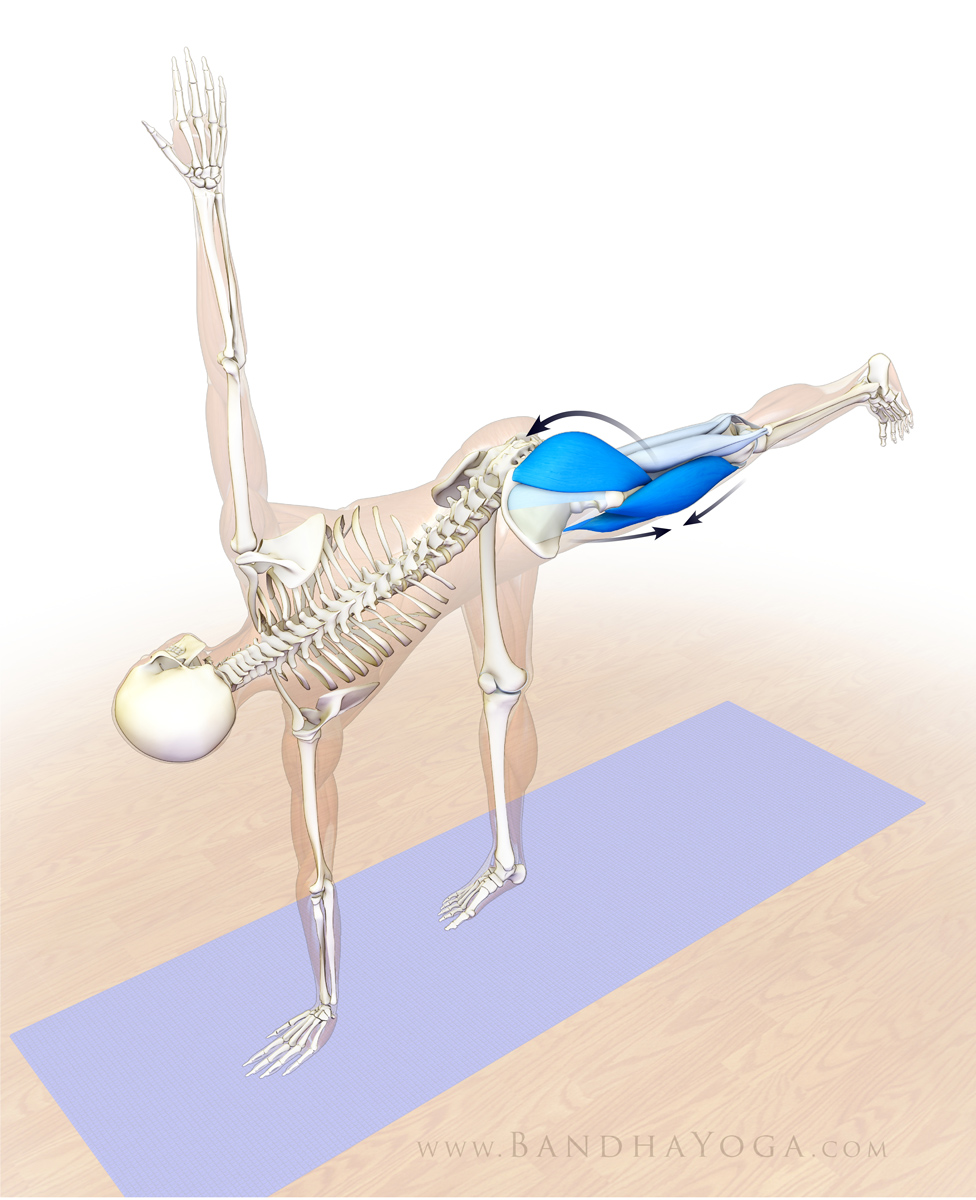
Figure 4 shows the myofascial connection between the external oblique muscle (of the abs) and the serratus anterior of the shoulder girdle.
Thanks for checking in! Click here to browse through our books. Or by clicking the links on the right. These books have lots of practical cues with key info on anatomic sequencing to integrate into your practice!
Namaste’
Ray Long, MD
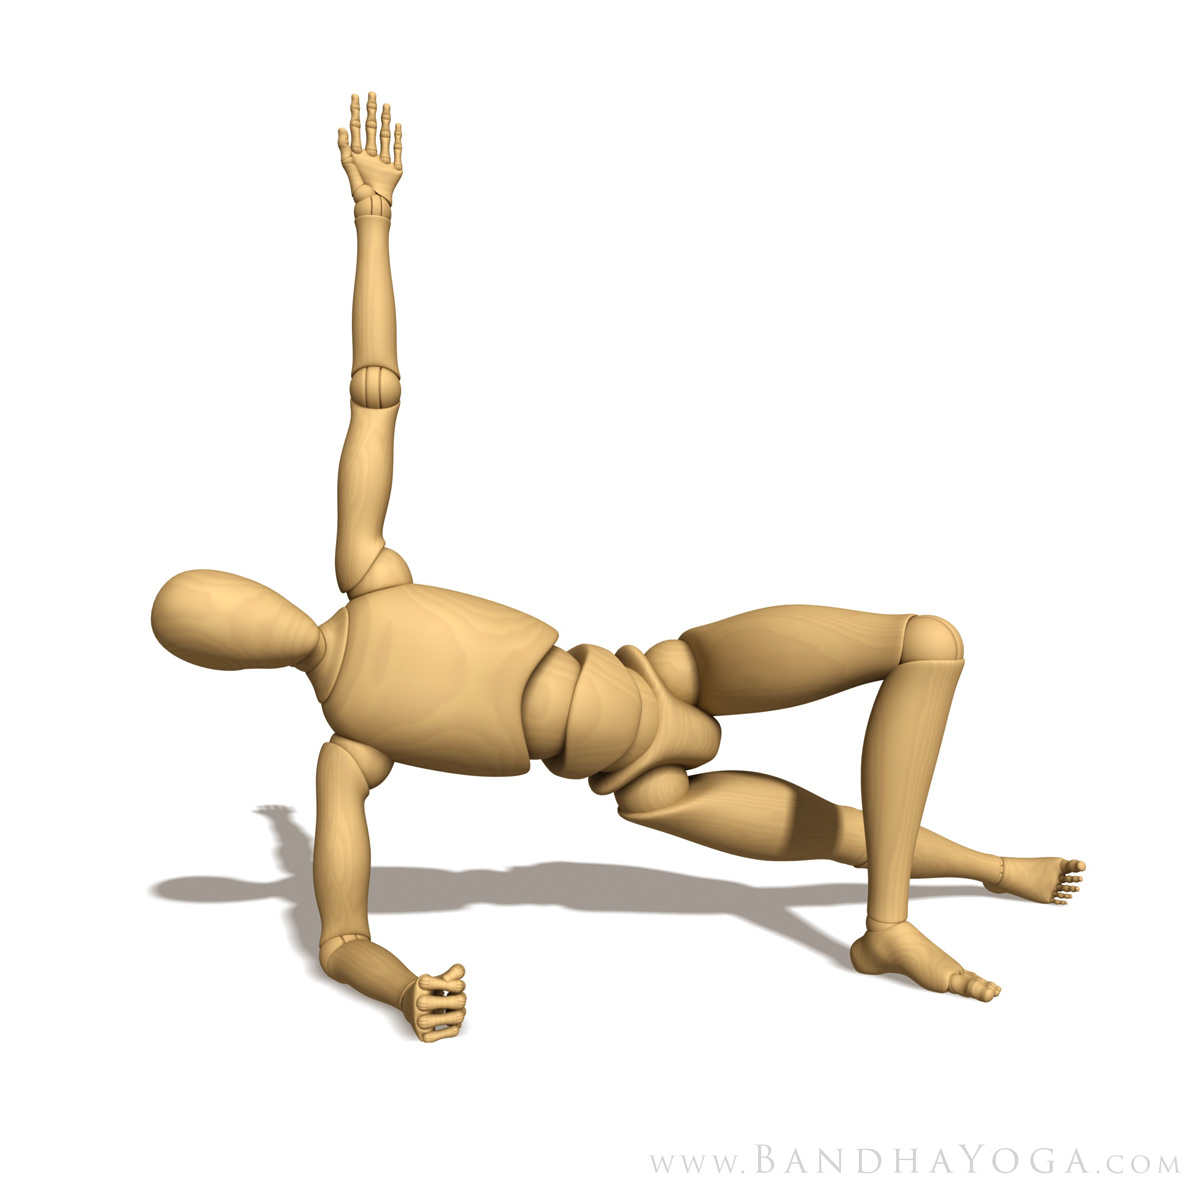 |
| Figure 1: Side Forearm Plank Preparatory Pose |
Begin by stabilizing the shoulders. Do this by attempting to externally rotate your forearm on the mat. At the same time, attempt to internally rotate your forearm on the mat as well. It’s a bit like a windshield wiper that’s fixed in place. This cue “co-activates” the infraspinatus and teres minor (external rotation) and the subscapularis (internal rotation) muscles of your rotator cuff. Feel how this stabilizes your shoulder. Folks that are new to this pose can use the preparatory version to work with this cue. Figure 1 shows the prep pose and Figure 2 illustrates the action of the forearms.
 |
| Figure 2: This illustrates the cue for co-activating the external and internal shoulder rotators (the infraspinatus, teres minor and subscapularis of the rotator cuff). |
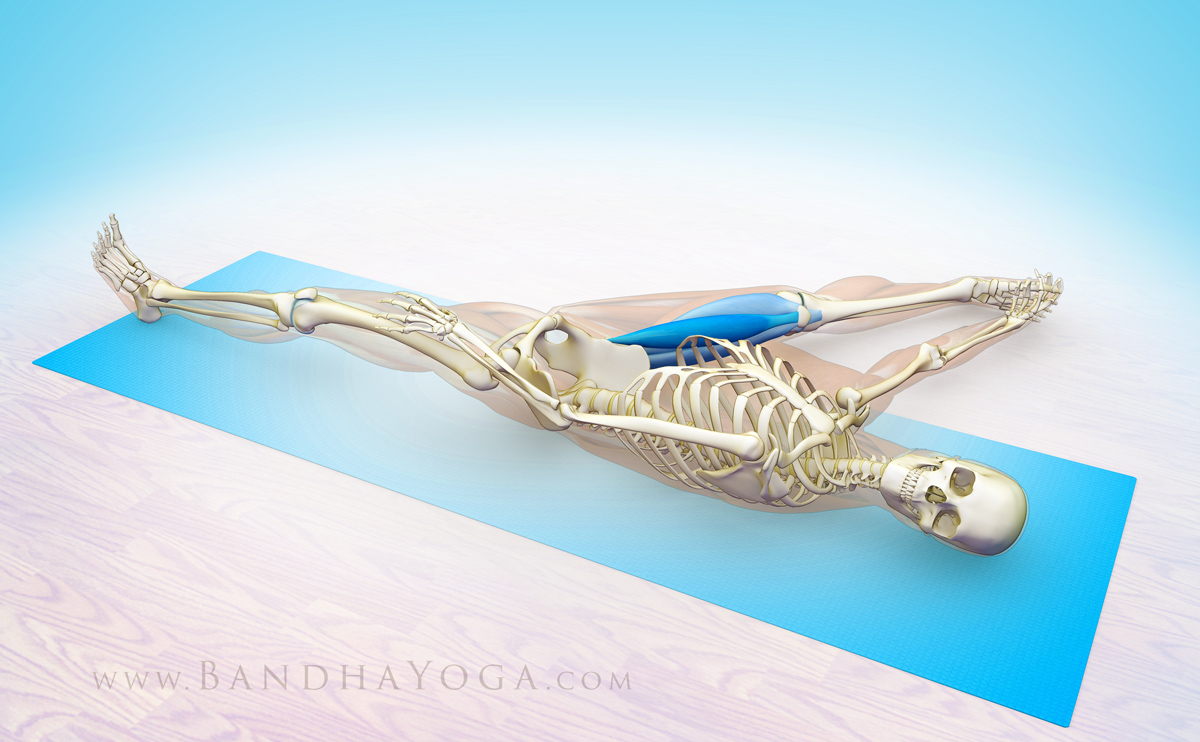
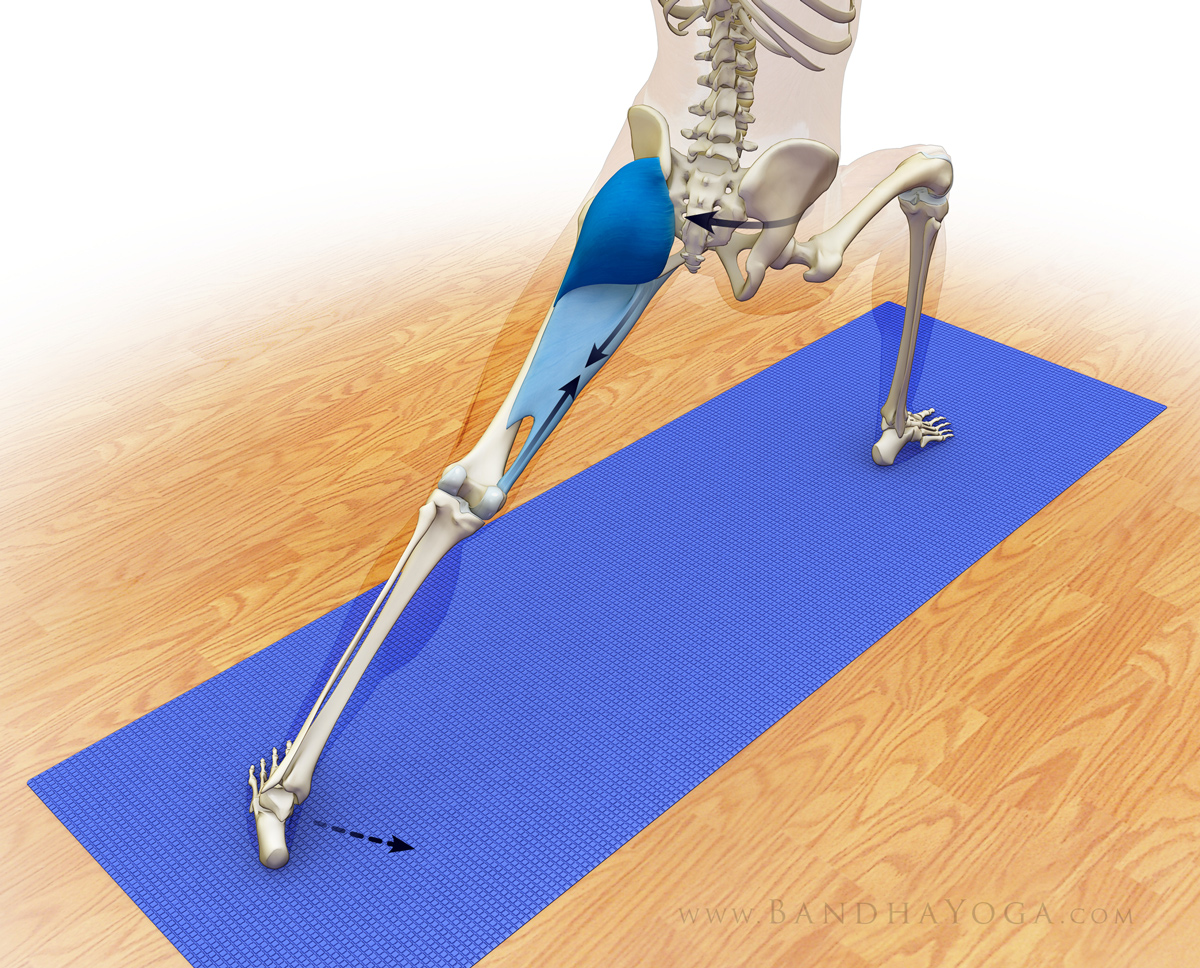
Next, press the edge of your lower side foot into the mat and gently draw it upwards toward the shin to “evert” your foot. These cues activate a series of muscles—including the “lateral subsystem”--to connect your shoulders and legs to your core. Figure 3 shows the cue for attempting to drag the forearm and the feet towards each other (while engaging the side abs).
Now let’s check out the myofascial connections in side forearm plank. When you press the side of your foot into the mat, you activate the peroneus muscles as well as the abductor muscles up at your hip (the TFL and gluteus medius). These muscles have a fascial connection to your abs, specifically the external oblique (which attaches to the rim of the pelvis). The external oblique connects to your shoulders via the serratus anterior muscle. The serratus anterior is a scapular stabilizer that works in concert with the rotator cuff. So the whole operation helps to integrate your feet, legs, pelvis and lumbar--all the way up to the shoulders.
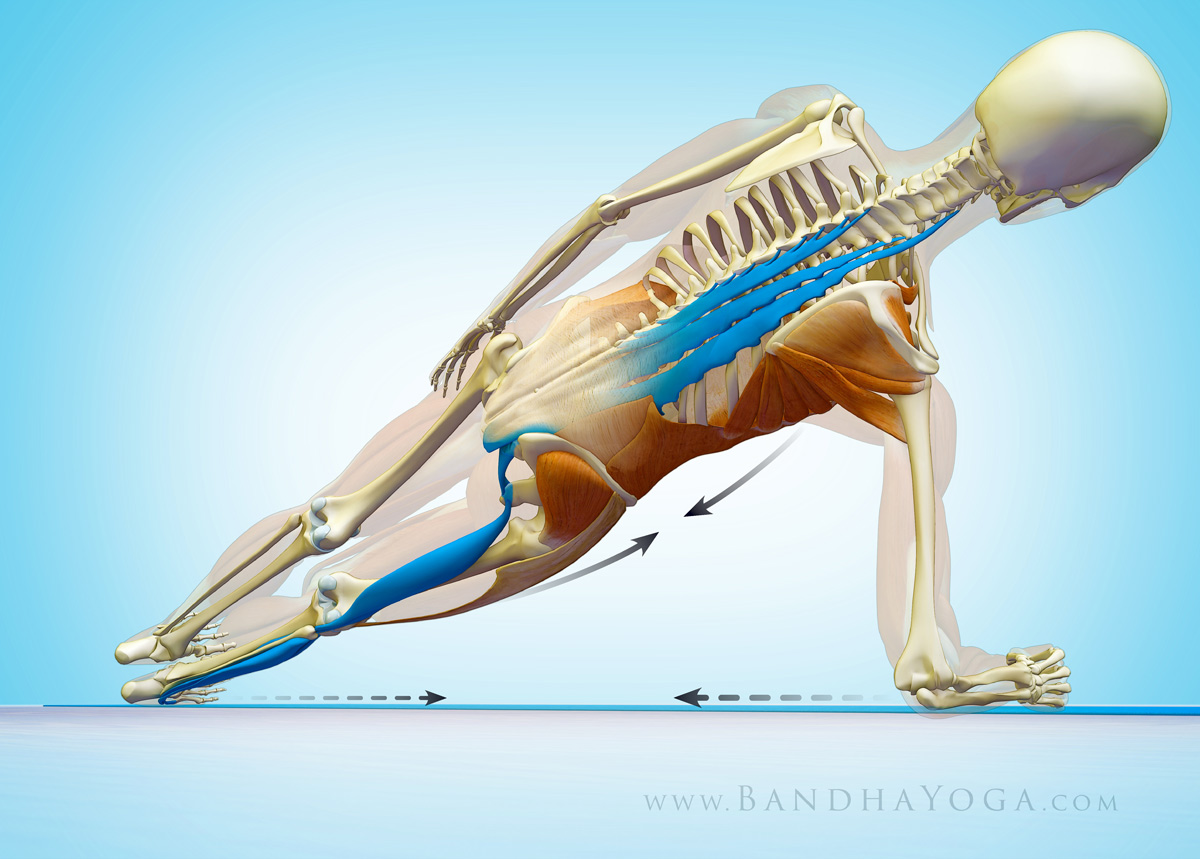 |
| Figure 3: This illustrates the cue of everting the lower foot and dragging the elbow towards it. It also shows the deep longitudinal subsystem. |
So let’s talk about the deep longitudinal subsystem…
Your deep longitudinal subsystem is made up of the peroneus longus muscle (on the outside of your lower leg), the biceps femoris of your hamstrings and your sacrotuberous ligament (up in the pelvis), the thoracolumbar fascia and the erector spinae muscles (in your back). The biceps femoris creates a link between the lower extremities and the trunk via the sacrotuberous ligament. This ligament helps to transmit force across your sacrum, and, via the thoracolumbar fascia on up the trunk to your deep back muscles. Check Figure 3 for a color coded illustration of this connection. Click here to see this connection in the lower legs in Reverse Pigeon Pose.
This subsystem is part of the global movement system and is thought to be important in force transmission between your trunk and the ground—as in walking. We’ll have more posts on the other subsystems and how to work with them in yoga soon. Click here to see how the abductor muscles of the hip work in your poses. Click here to learn more about the thoracolumbar fascia and its importance in yoga.
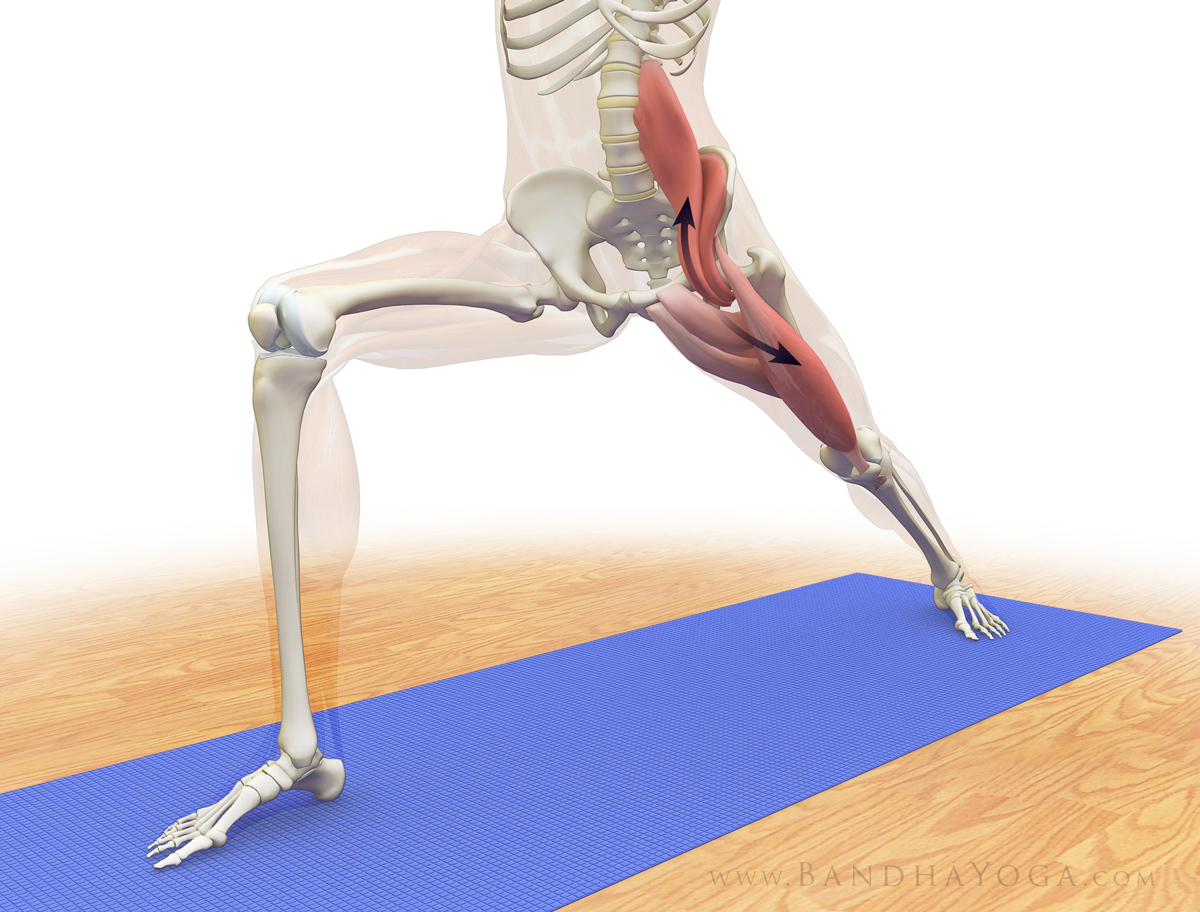
Figure 4 shows the myofascial connection between the external oblique muscle (of the abs) and the serratus anterior of the shoulder girdle.
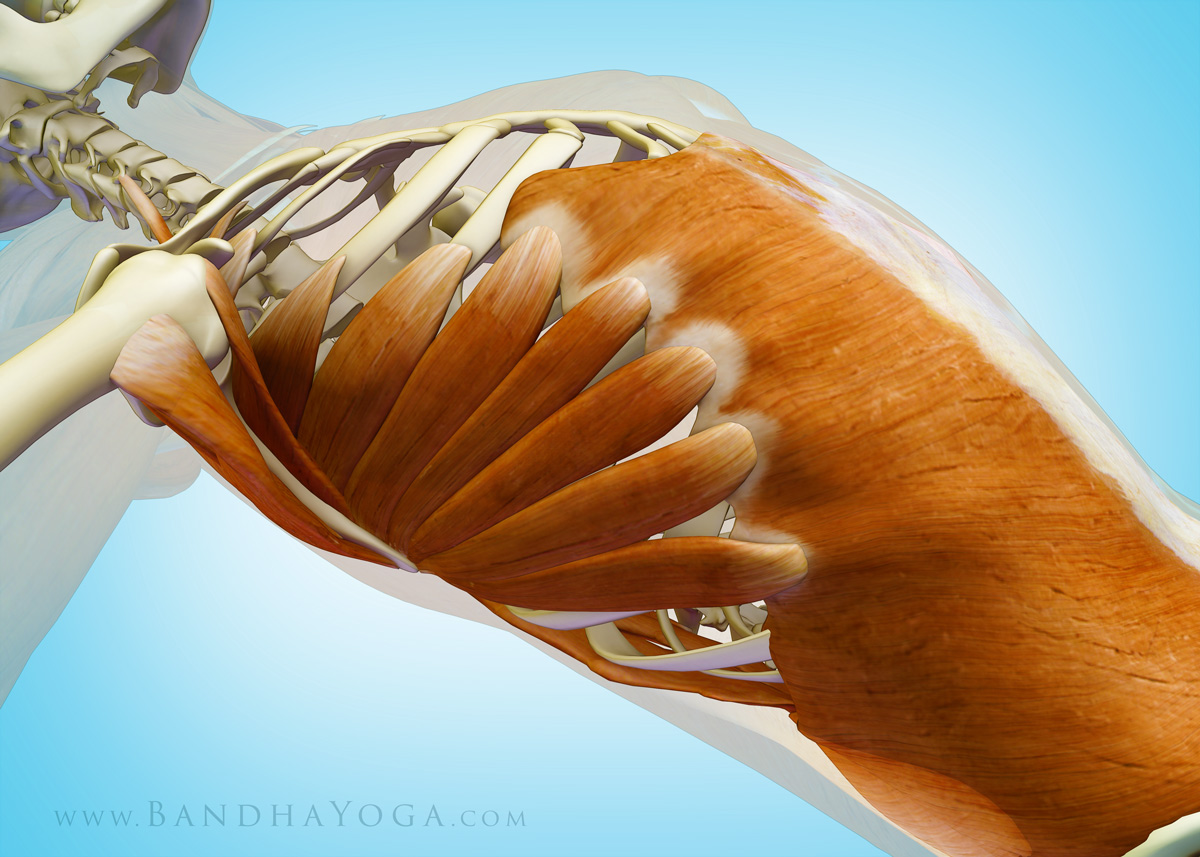 |
| Figure 4: This illustrates the myofascial connection between the external oblique muscle of the abdomen and the serratus anterior of the shoulder girdle. |
 |
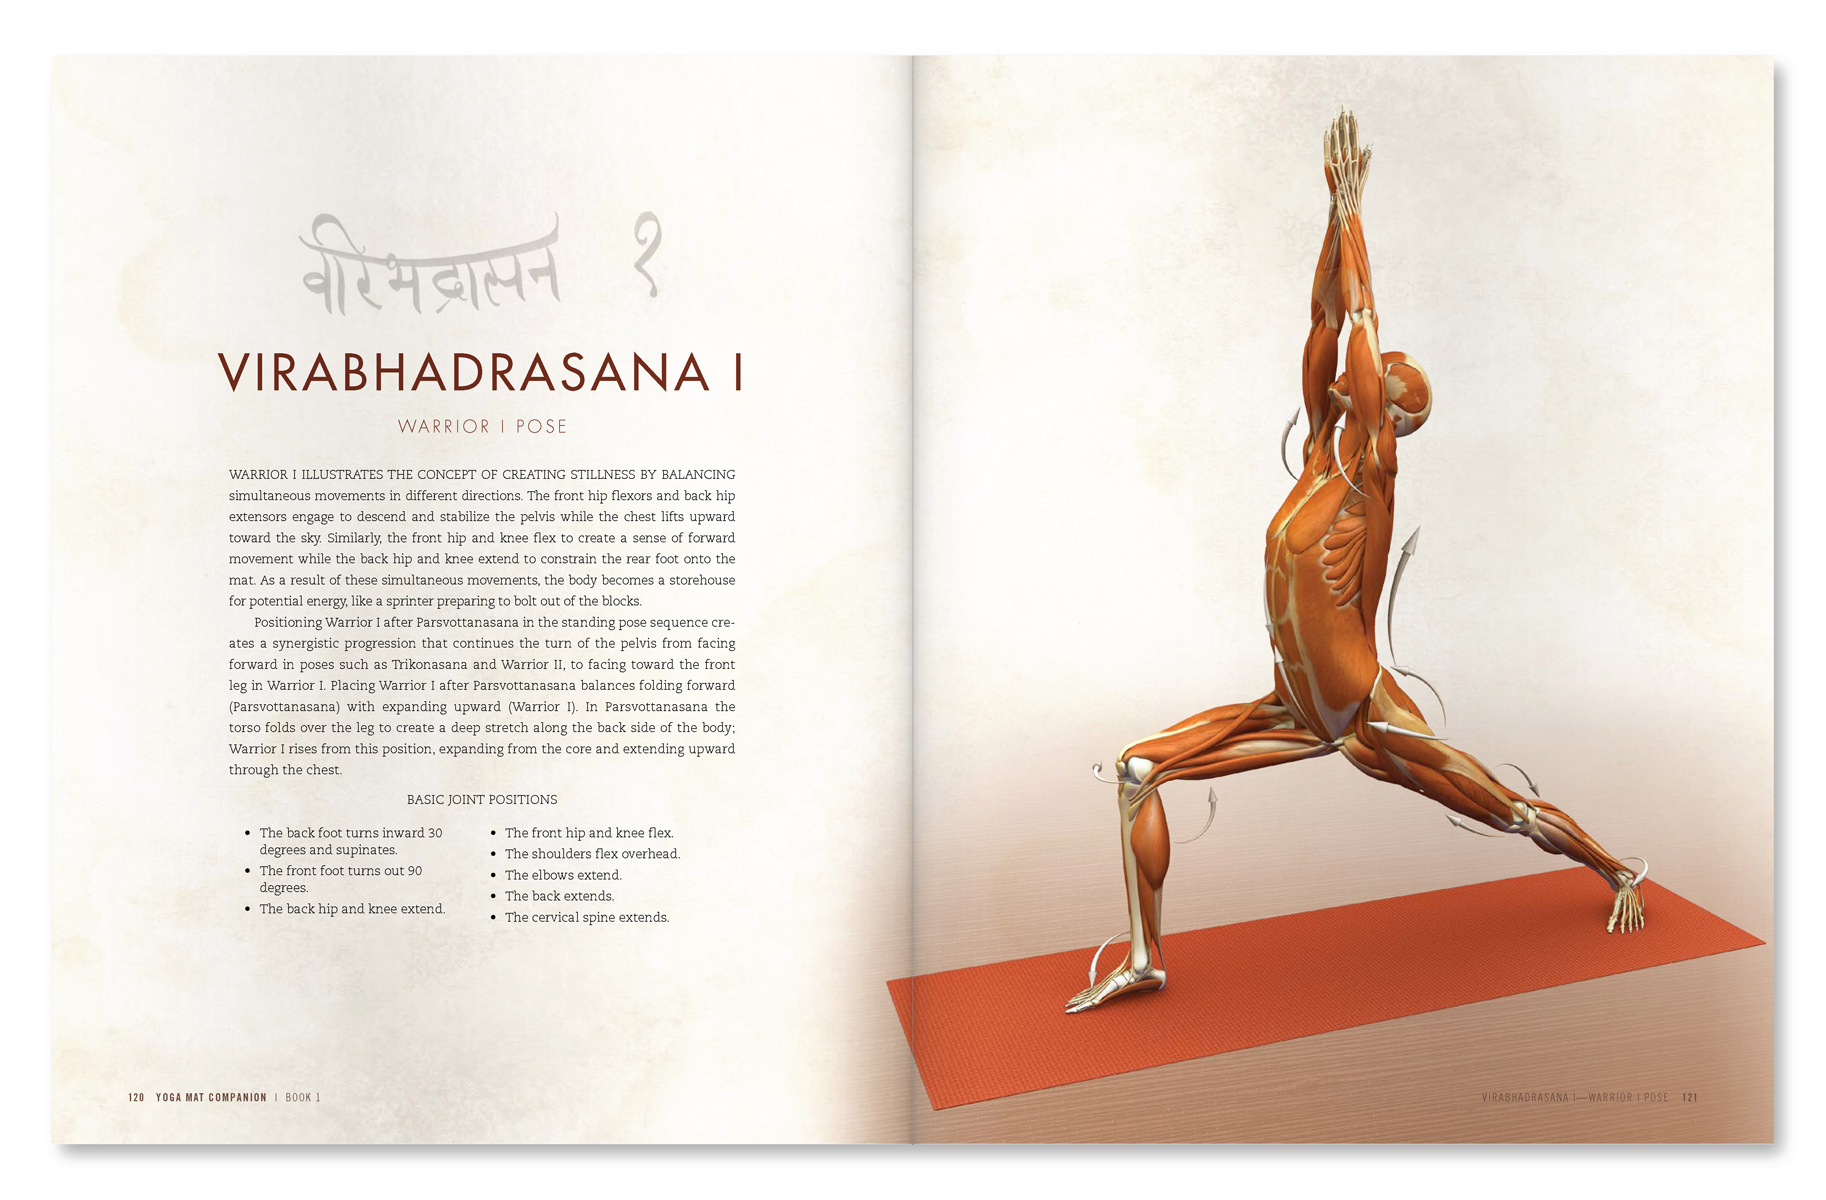
| An excerpt from "Yoga Mat Companion 4 - Anatomy for Arm Balances and Inversions". |
 |
| An excerpt from "Yoga Mat Companion 4 - Anatomy for Arm Balances and Inversions". |
Thanks for checking in! Click here to browse through our books. Or by clicking the links on the right. These books have lots of practical cues with key info on anatomic sequencing to integrate into your practice!
Namaste’
Ray Long, MD