Here's the anatomy…
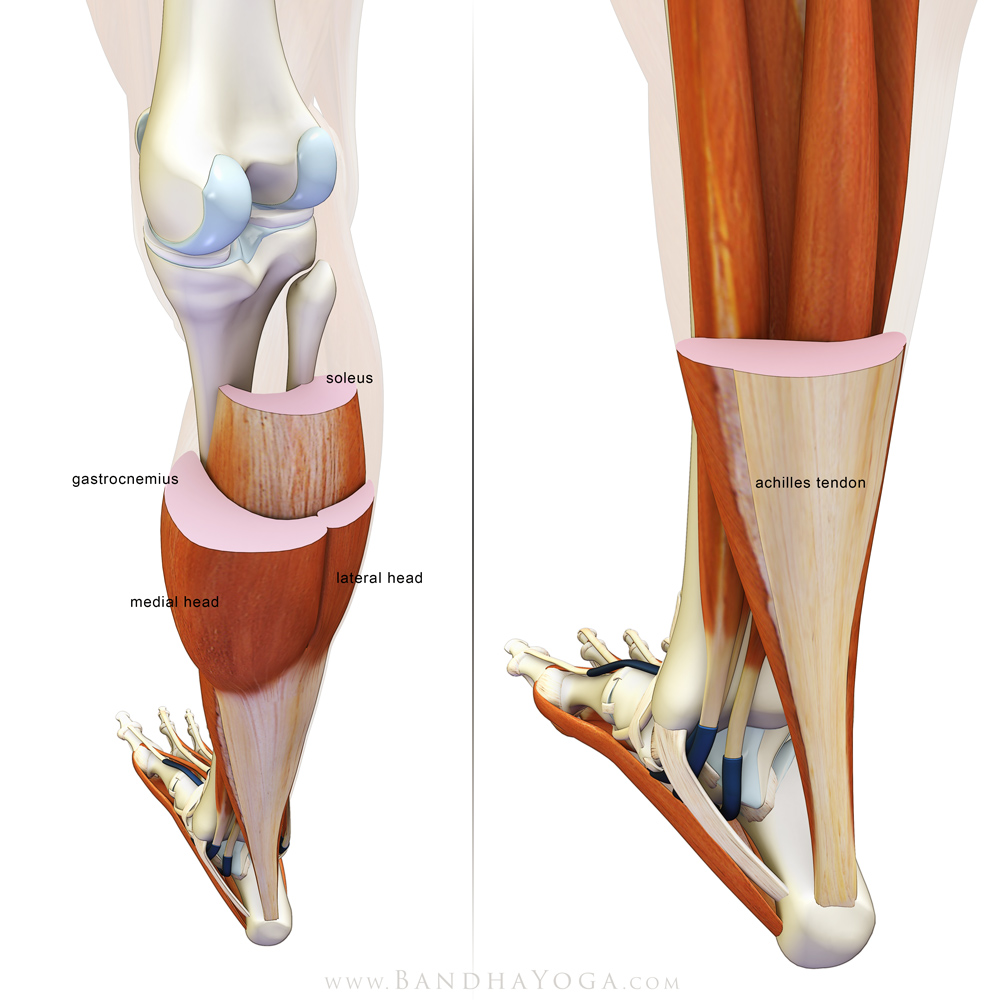
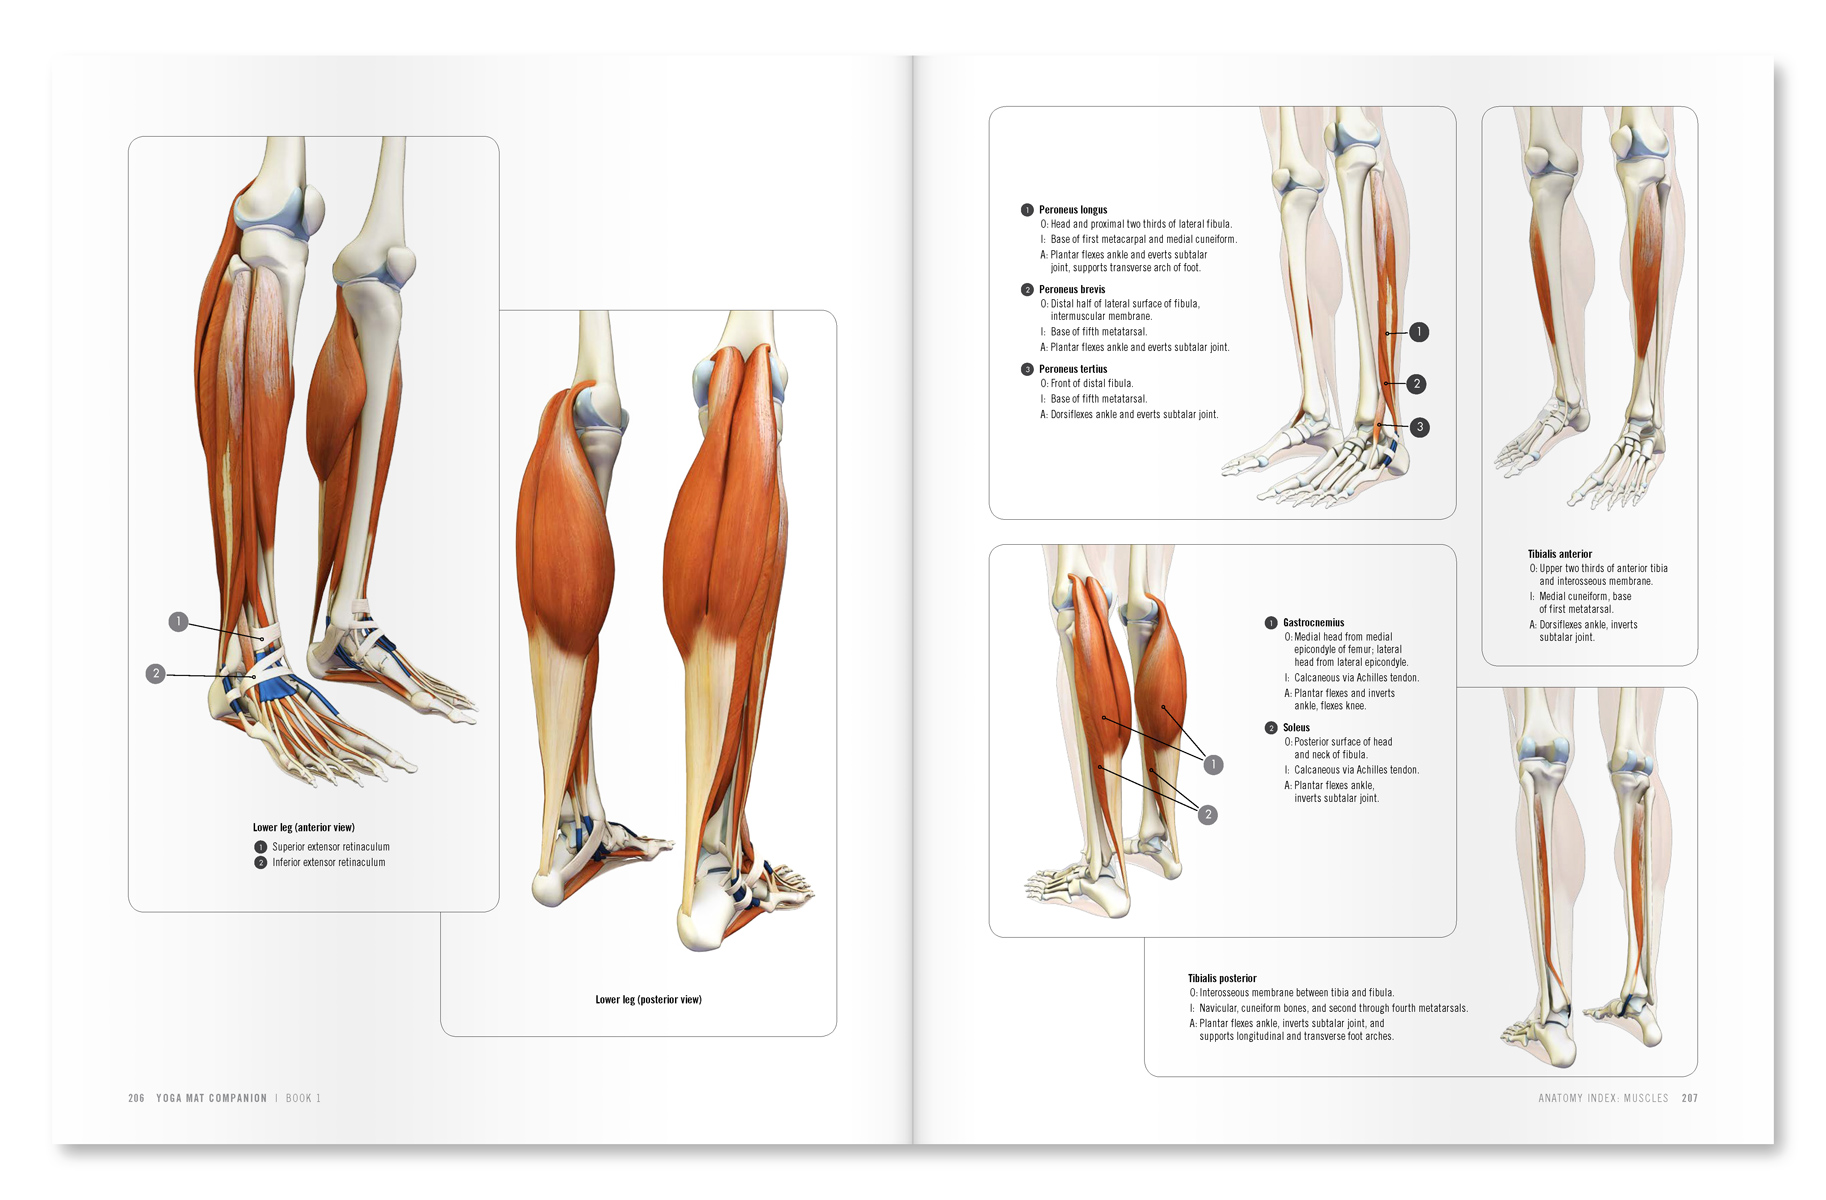
The gastrocnemius and soleus muscles form the triceps surae or gastrocnemius/soleus complex. The soleus muscle originates from the head and neck of the fibula bone and, via a tendinous arch, the soleal line at the back of the tibia bone. The gastrocnemius has two heads; one originates from the medial epicondyle of the femur and the other from the lateral epicondyle. The soleus and gastrocnemius attach to the calcaneus (heel bone) via the Achilles tendon (figure 1).
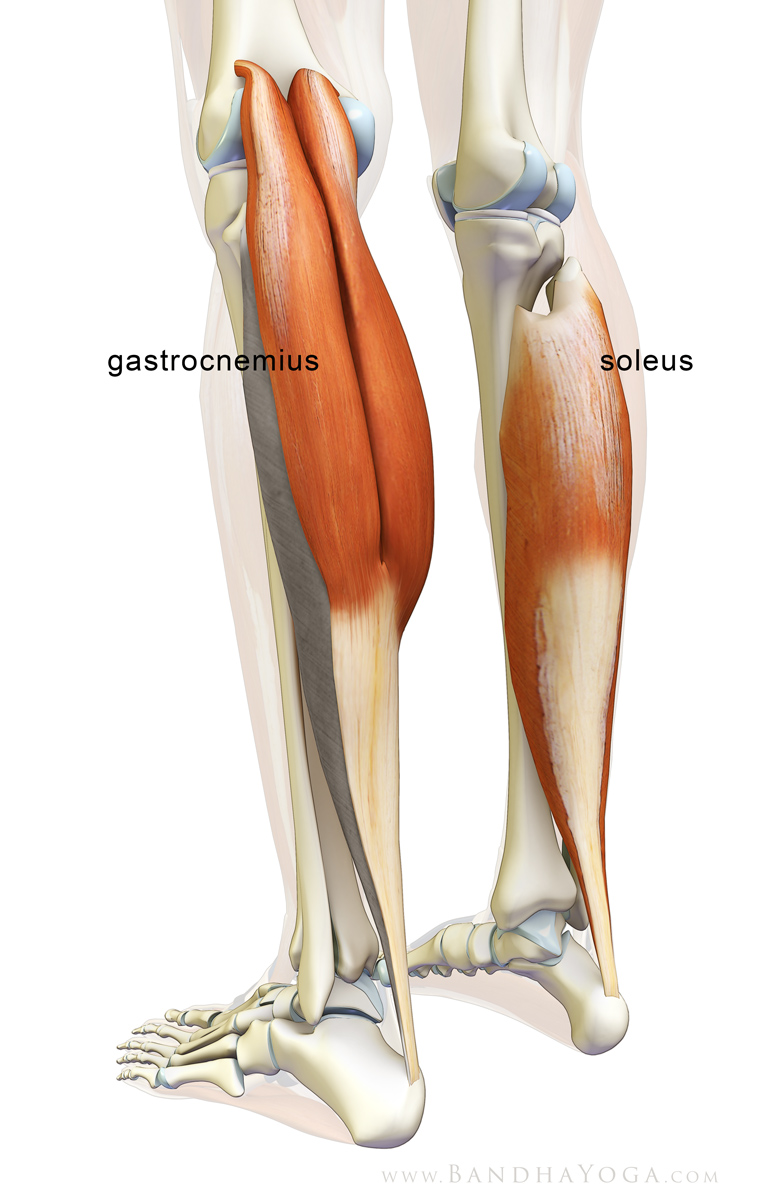 |
| Figure 1: The gastrocnemius and soleus muscles. |
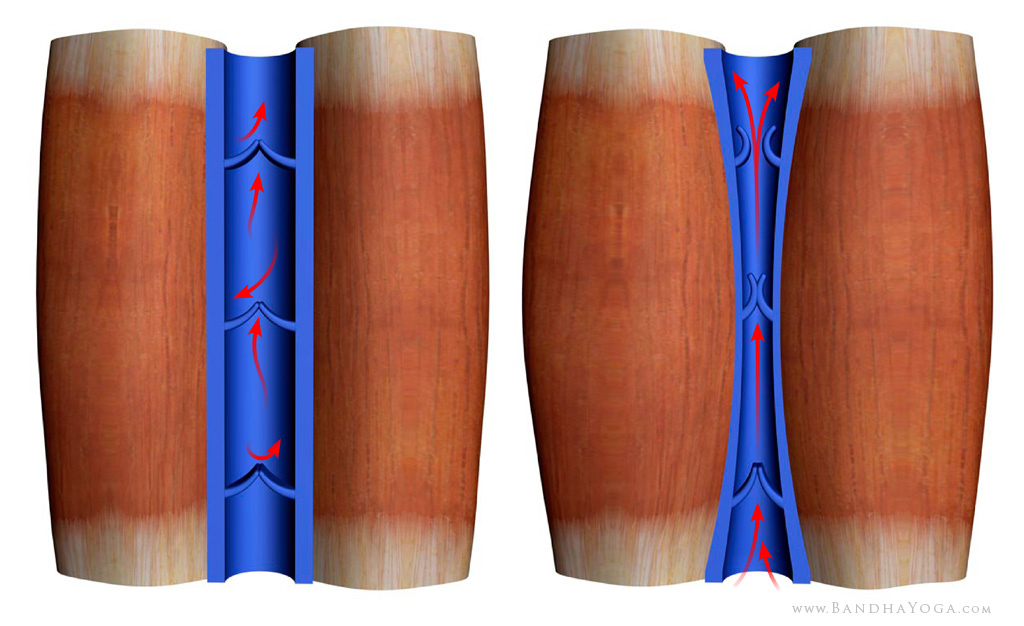
Both muscles act to flex the ankle and invert the subtalar joint. The gastrocnemius, because it crosses the knee, also acts as a knee flexor. Since the two muscles act to plantarflex the ankle, dorsiflexing the ankle joint acts to stretch them. Figure 2 illustrates the relationship between these muscles in cross section.
 |
| Figure 2: The gastrocnemius and soleus muscles in cross-section. |
As B. W-B. pointed out in her Facebook comment on the soleus, “these muscles help to propel blood and fluids back up out of the legs for proper circulation of your legs.” This is because muscle contraction augments the flow of blood and lymphatic fluid towards the heart via a system of one-way valves within the vessels (figure 3). I discuss this concept in greater detail in a previous blog post (click here to learn more).
 |
| Figure 3: One way valves in veins. |
In her Facebook comment, A. K. A. recommends placing a slight bend in the knee during dog pose to release the gastrocnemius and focus the stretch more deeply on the soleus muscle. I found this to be helpful as well.
You can also release the gastrocnemius with a series of stretches in Downward Dog pose. Our blog post on Hanumanasana illustrates the effect of several short duration (<30 seconds) stretches on muscle length, with some links to the biomechanical literature. Finally, engaging antagonist muscles aids to lengthen muscles in a stretch through reciprocal inhibition. Figure 4 illustrates sequentially releasing the gastroc by bending the knee, using the hands to dorsiflex the ankle and then engaging the quads to straighten the knee. A similar sequence can be applied to Downward Dog. Click here for a tip on using reciprocal inhibition to aid in lowering the heels in Down Dog.
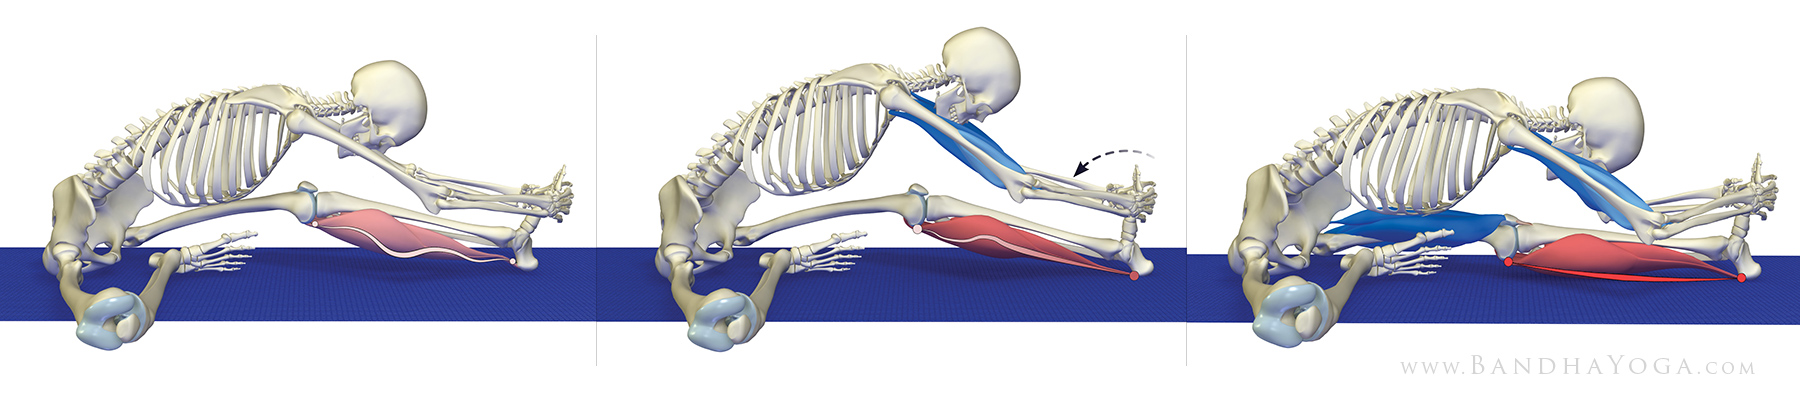 |
| Figure 4: 1) bend the knee to release the gastroc; 2) dorsiflex the ankle to stretch the soleus; 3) contract the quadriceps to extend the knee and stretch the gastroc. |
The Silfverskiöld test also illustrates the rationale for increased ankle dorsiflexion with the knee bent. We use this test in orthopedics to differentiate a tight gastrocnemius from an Achilles tendon contracture by dorsiflexing the ankle with the knee straight and then with the knee flexed. Increased ankle dorsiflexion with the knee bent indicates that the limitation of motion at the ankle is coming from the gastrocnemius.
Finally, figure 5 illustrates the connection between the gastrocnemius/soleus complex and the plantar fascia. Click here to learn more in our blog post, “Plantar Fasciitis, Myofascial Connections and Yoga.”
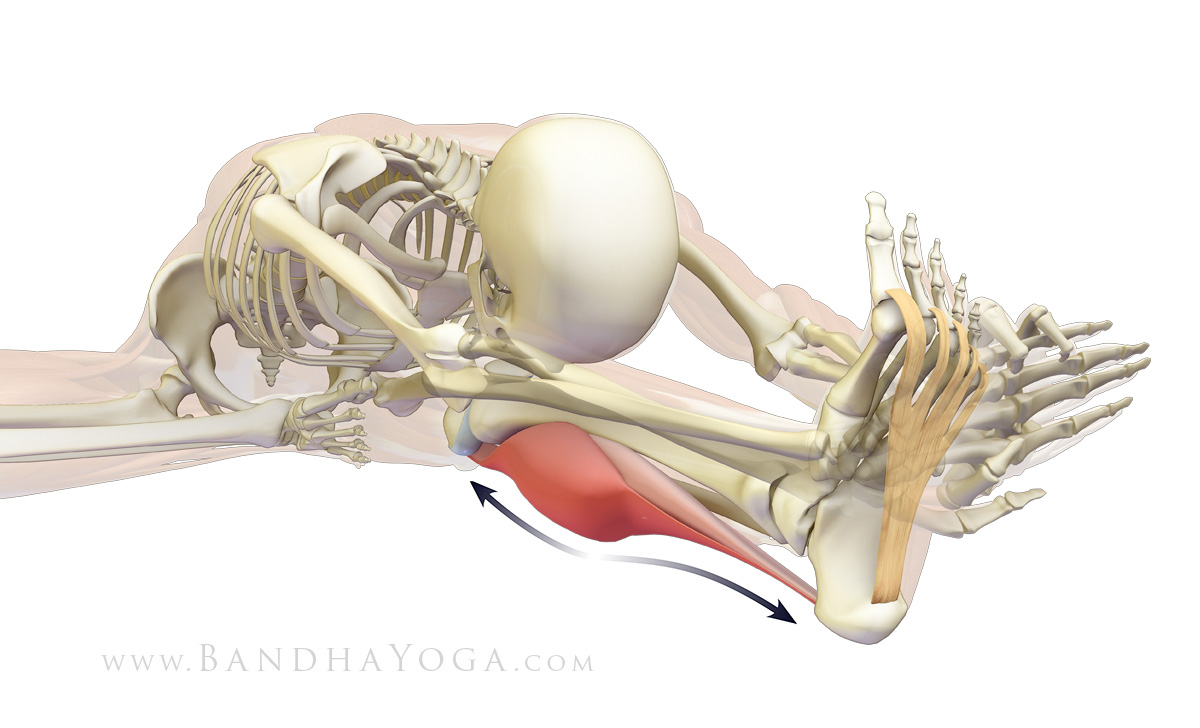 |
| Figure 5: The plantar fascia and gastroc/soleus complex. |
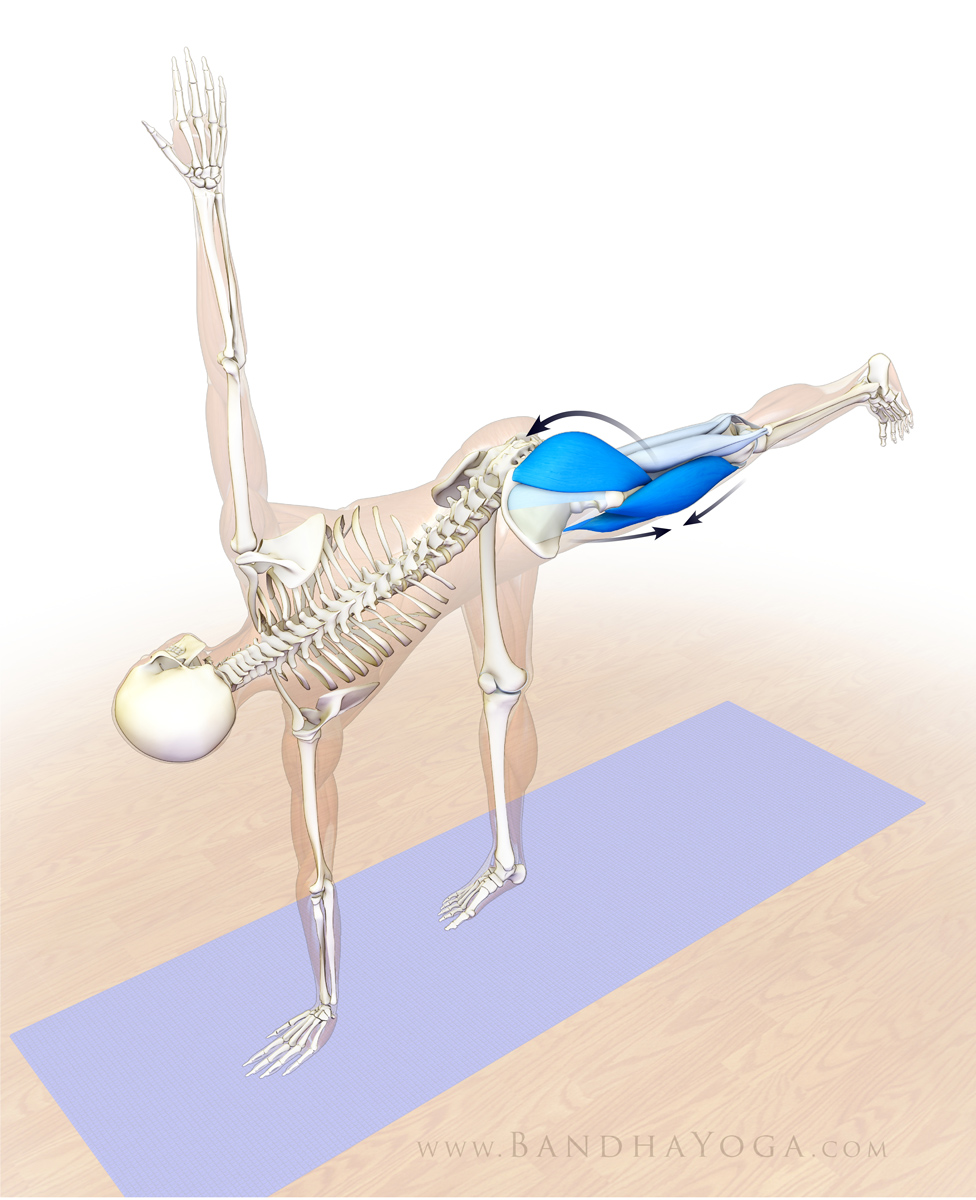
 |
| An excerpt from "Yoga Mat Companion 1 - Anatomy for Vinyasa Flow and Standing Poses". |
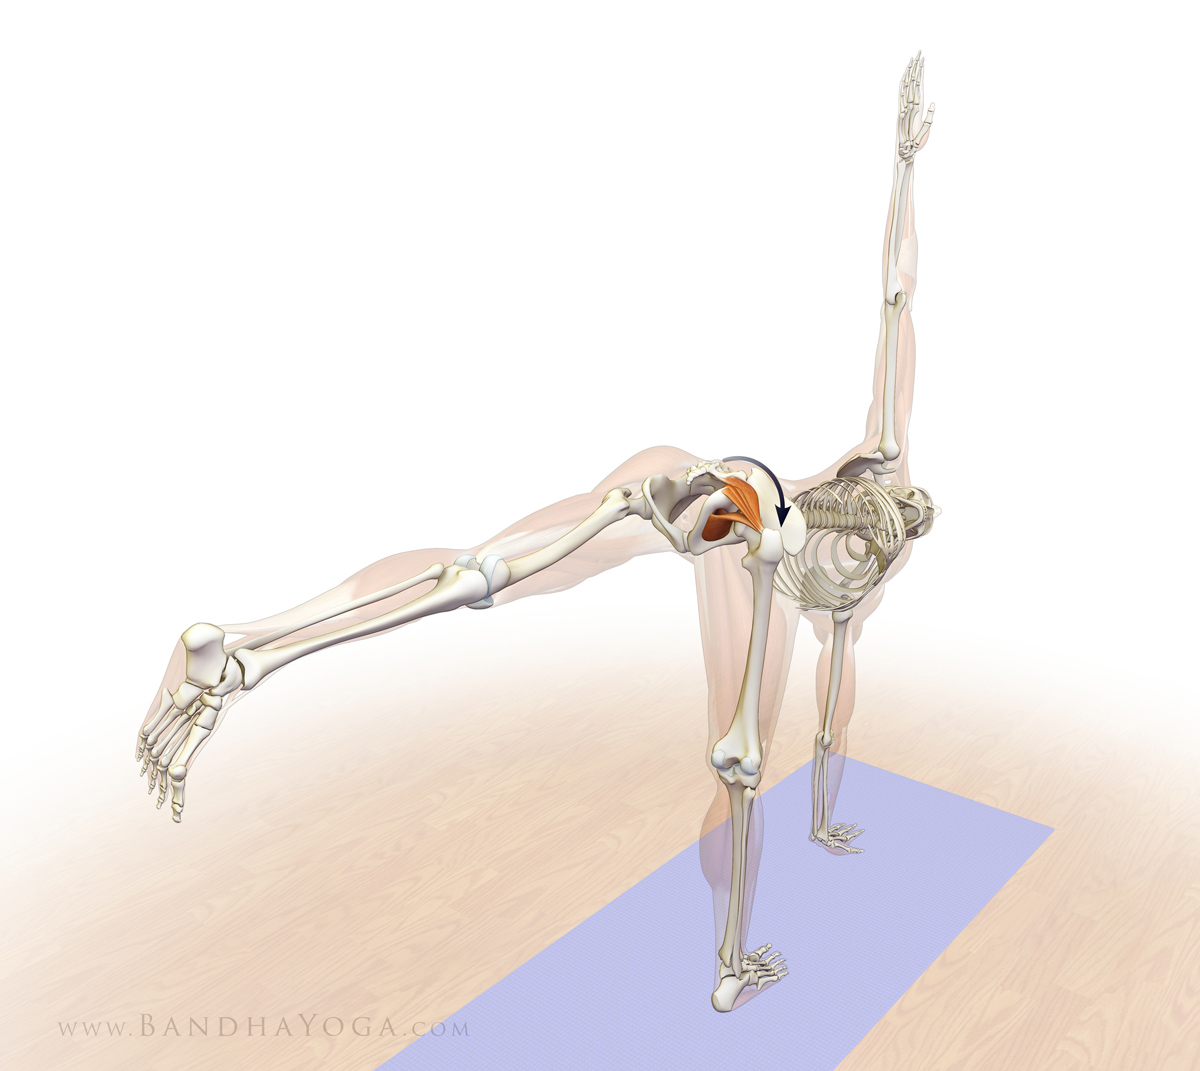
 |
| An excerpt from "Yoga Mat Companion 2 - Anatomy for Hip Openers and Forward Bends". |
Feel free to browse through our books, The Key Muscles of Yoga and Key Poses of Yoga by clicking here.The Yoga Mat Companion Series gives you step-by-step anatomic sequencing for all of the major asanas, with a variety preparatory poses as well. Use these books to design your classes and optimize your practice. We’re also pleased to announce that all of our books are now available in digital format for Kindle and other devices. Click here to learn more… Feel free to browse through all of our books by clicking here.
Thanks for stopping by The Daily Bandha. Stay tuned for our next post when I'll present another subject on combining science and yoga. Also, we greatly appreciate when you share us on Facebook, Twitter and Google Plus.
Namaste'
Ray and Chris